Post-processing or simply photo enhancement happens to be a significant aspect of today’s digital photography era. It’s very possible that you already carry out one form of processing or another on your images. Hundred images are enhanced daily so there can be a handful of image post-processing mistakes that could happen. You should know what to do if it does.
Are you using image post-processing effectively? Are you doing it to better your images or make them look worse? As someone who is into photography, you might view hundred images every day.
Types of mistakes that affect the beauty of images and make them less interesting.
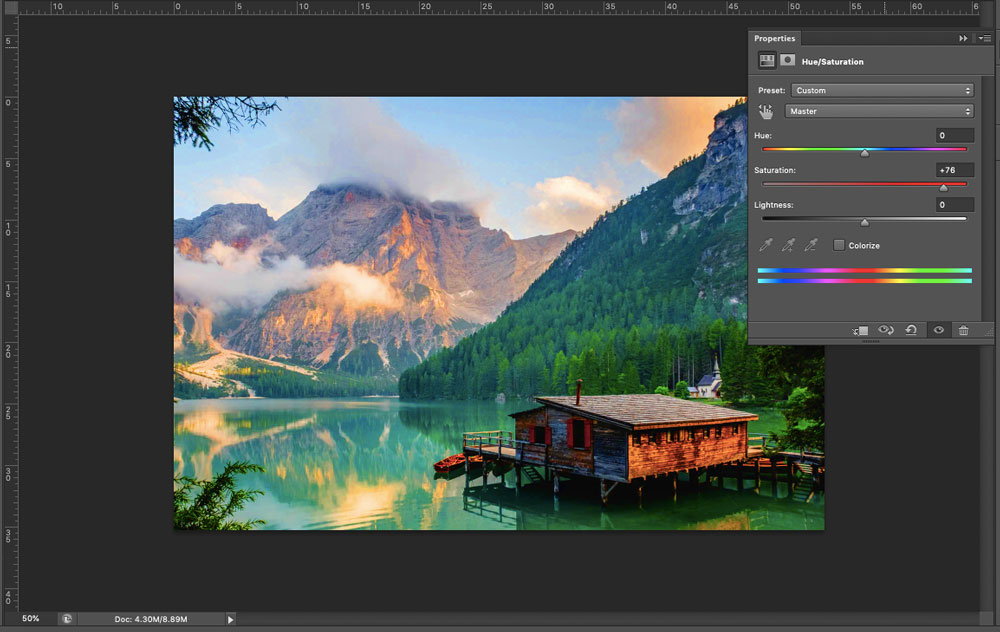
1. Too Much Saturation
This may not be surprising to you but this is a very common mistake.
Everybody loves photos that are full of colour. But there is a stage in colouring that it becomes unwanted. It’s high time you pull back that saturation slider. Especially, when the colours appear odd or whenever less assertive colours turn out to be extremely saturated.

There’re more efficient ways to increase the saturation of an image instead of applying the image editor’s saturation slider. As a matter of fact, adding this is just one of the several ways that will make a lot of difference in your photography.
Photoshop’ Luminosity Mask is a reliable option regarding applying selective colours. Although you can add some more saturation if you want, using the selective approach will not deprive the image of its natural look.
Related Post: 7 Key Techniques for High-end Beauty Photography Retouching
2. Cropping Tightly
Cropping, most likely, is the first thing everybody likes to learn in their journey of software editing. It is applied all the time by photographers worldwide, but you can mess up your photo badly if you don’t use this tool correctly. The biggest mistake is having to crop extremely tight and without leaving the subject with enough space to breathe in the frame.

Doing your cropping extremely tight is one trap you are likely to get caught up in if your aim is to have the frame filled with your subject. Ensure your subject has some room around its edges!
You should equally understand that you can over-crop as well. If your subject is seated too far, executing huge crops just to correct the mistake will provide you with a small image. It equally worsens any mistakes within your shots like soft focus or digital noise.
3. Over Sharpening
Similar to saturation, sharpening is better added in a selective manner or by way of restriction. This can be a photo killer. We all crave for the sharpest photos. But you can be tempted by the sharpening sliders to go the extreme, and the imperfection could be noticeable.
Over-sharpening brings about unwanted noise. And that is why certain areas should not be sharpened like smooth surfaces and sky. This is one of those image post-processing mistakes that any of us will have to work on.
4. Too Much Noise Reduction
While we’re interested in image sharpening and making image details appear sharper we equally want to tune down grain and noise. This is somehow contradictory since sharpening increases noise.
Many photo editors have alternatives for getting rid of noise. But, ridding it of too much noise will give birth to unnatural smoothness and low contrast images. Observe the below comparison:
Obviously, adding excess noise reductions takes away every micro-detail. This leave an image that is not naturally smooth. The effects appear more in background and grassy areas within an image.
5. Too Much Clarity
Clarity can make or break an image. You can do clarity adjustment with Camera Raw clarity slider and Photoshop CC Lightroom. You have to apply this slider with great care; when it is pulled too much it can affect the image negatively.
Similar to several adjustments, clarity ought to be included selectively in most image post-processing. Instead of editing the whole image, there are specific areas around the image that don’t need sharpening.
6. Making Only Global Adjustments
If you have come thus far, you may have knowledge of the last mistake of someone who is just starting out with post-processing. Using only global adjustments.
Many beginner photographers do this mistake without knowing how much it will cost them. So to maximize any of your images you should start using selective adjustments.
The bulk of Photoshop adjustment layers will influence the whole image, including areas that you didn’t want it to affect. Like we discussed for mistake #1, as opposed to using saturation slider, you can include saturation by selectively using HSL slider. Also, you can apply Photoshop Layer Masks for removing adjustments from specific areas.
Related Post: 7 Common Mistakes & Habits You Need to Break to Master Photoshop Photo Retouching
There could be a lot image post-processing mistakes that could arise especially when you’re new to photo editing.
Sometimes, it takes a lot of time to be an expert. Got to have those meticulous eyes to achieve those awesome processed photos.


