Photoshop has a wide range of tools that can be used to create a multitude of effects in a single picture. It is great to be aware of the different techniques that are used by photo editing companies to enhance an image. Having a background about how the effects are achieved will not only enhance your knowledge about photo editing. It will also allow you to have an idea on what to do if a photo editing service is not available.
A favorite among image editing effects is having images inside a text. In this tutorial, you will learn how to use the clipping mask technique in making an image appear inside a text.
But first, you need to understand what clipping mask is.
Clipping Mask in Photoshop
One of the most basic editing skills in Photoshop is using clipping mask to hide unnecessary areas of a layer so that they will not show up in the final design or documents. This technique is very familiar in a Photoshop masking service. Basically, you need two layers to create a clipping mask. Unlike using clipping path to snip out the excess parts of the photo, clipping mask uses the bottom layer’s transparent areas and content to see which parts of the layer above it remains visible. It is similar to the concept used in using a stencil with ink to create a shape.
Now that you already have an idea about it, let us get ready to start masking!
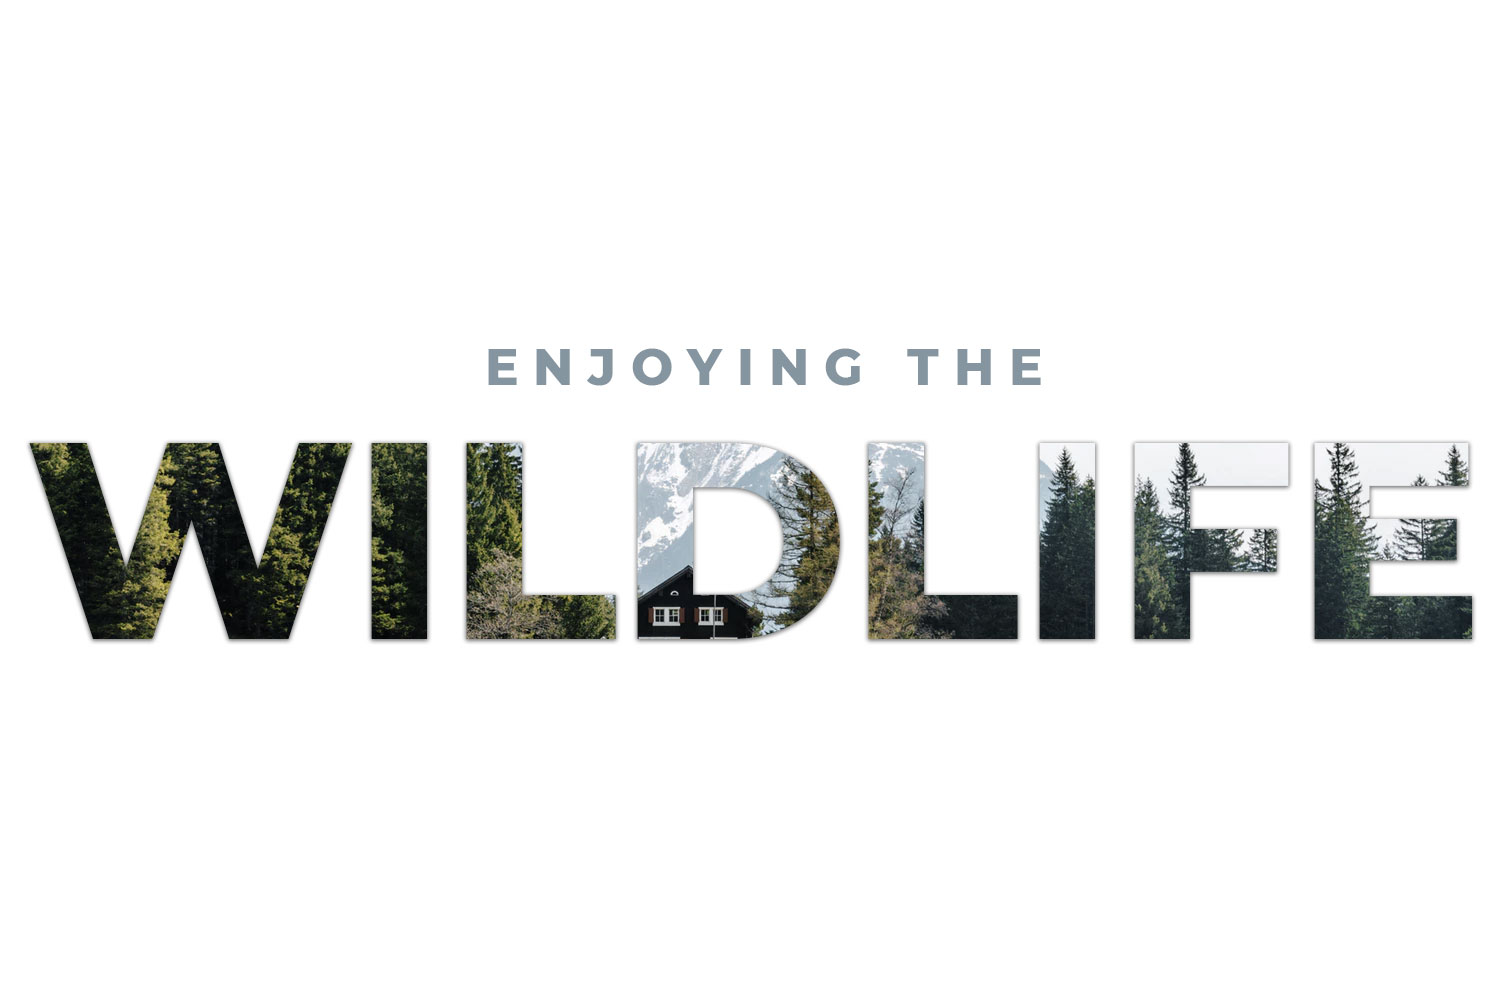
1. Open the first image in Photoshop. It can be any photo that you want but let use this beautiful picture for this example.

2. Find the Horizontal Type Tool or use T for a short cut. Select a font that you like from the tool options located at the top of the screen. It will not matter what color you will use for the font as long as you set the anti-aliasing to strong.

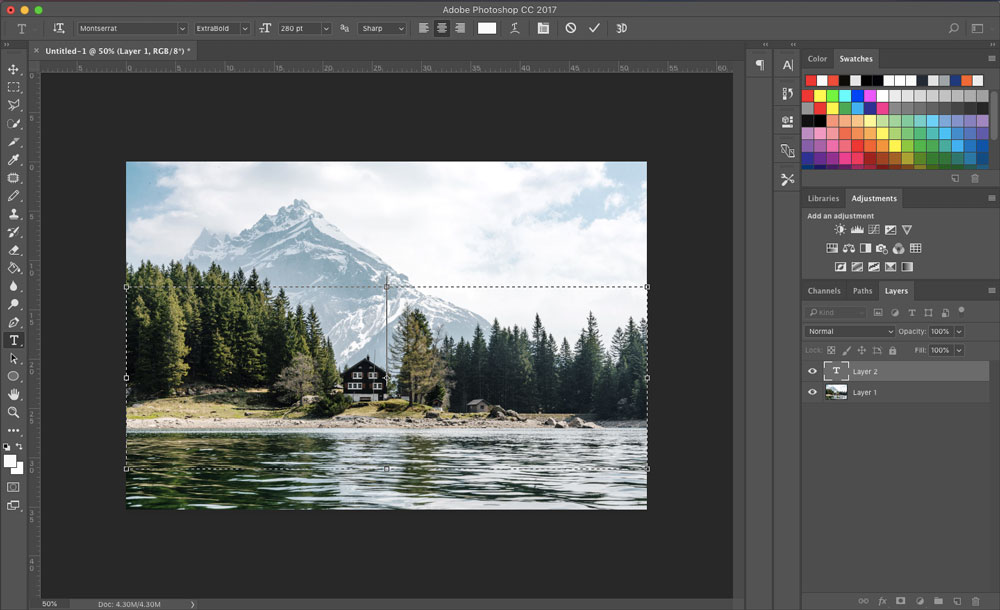
3. Click on the image and start typing in some text. A new Text layer will be added in the Layer Panel as soon as you start to type in the text. Here, I will be using the word WILDLIFE.
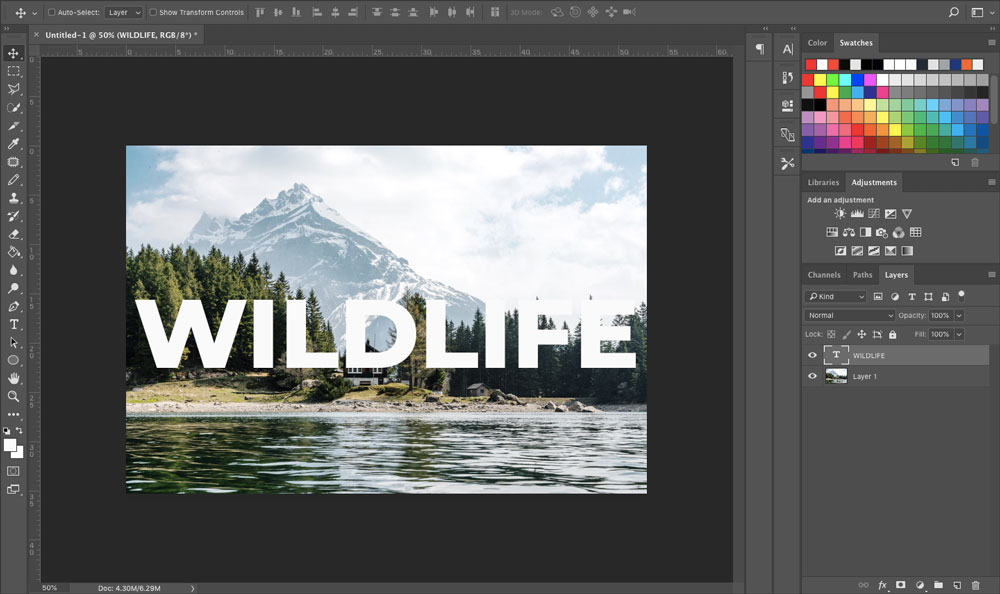
4. Using the Move Tool (shortcut V), place the text in the middle of the photo or to an area of interest.
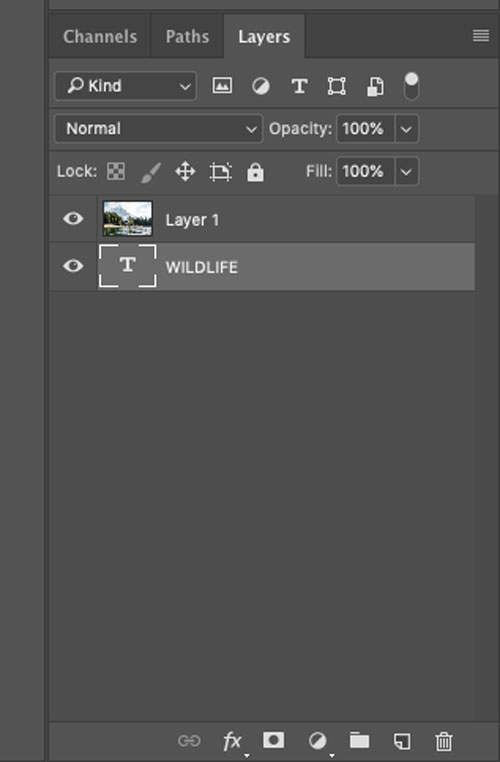
5. On the Layer Panel, drag the new text layer below the image layer. Take note that you need to have the image to be clipped under the first image if you want to clip the image following the shape of the text.
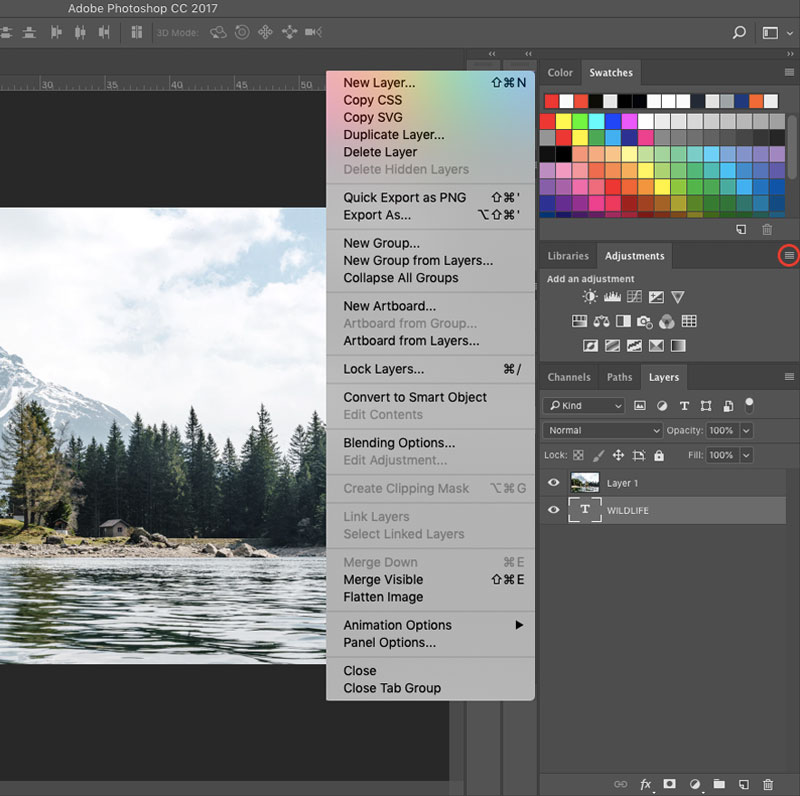
6. Select the Image Layer then click on the Hamburger menu icon located at the top right corner of the Layers Panel. A menu will show up showing different actions. Select Create Clipping Mask. You may also use the shortcut by pressing Alt+Ctrl+G in Windows or Option+Cmd+G in Mac.
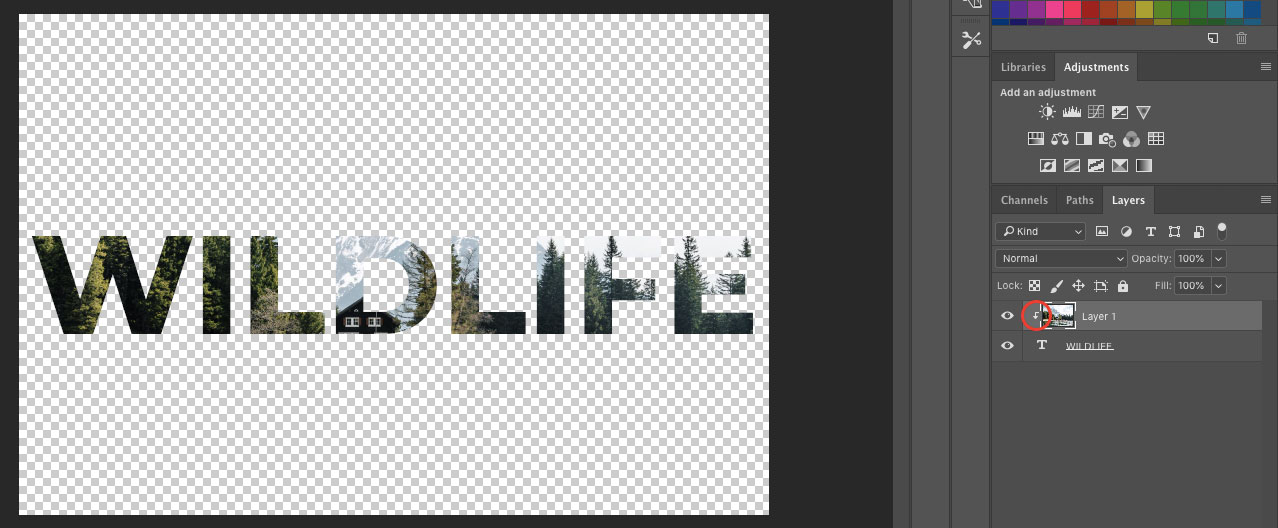
The clipping mask will show up at once and you will see the text filled with some parts of the first image. The rest of the picture is hidden by the mask and only the filled text remains.
On the Layers Panel, you will notice that a small arrow will appear beside the image layer with an indented thumbnail. This only means that the image layer is successfully clipped to the text layer below it. You may use the Move Tool (V) to move either of the two layers to align the parts of the image that you want to show on the text.
Touch Ups
A photo masking service is good if the editor does the necessary touch ups to make the photo more remarkable. If you want to replicate what most image editing services do, you have to first create a white layer below the masked image. This will serve as a cover for the transparent areas. Here are the steps to do it:
1. Select the current layer, which is the Text layer, and then hold down Ctrl for Windows or Cmd for Mac. Select the New Layer icon that is located at the bottom of the Layers Panel. This will create an empty layer that is positioned under the Text layer.

2. Find the Foreground color swatch on the Toolbar and set it to white. Use the Paint Bucket tool (G) to fill the new layer with a solid white color by clicking on the image once.

Adding Drop Shadow
Another method of making the image more interesting is by adding a drop shadow to the Text layer. You can do this by:
1. Click on the Text layer and select the Add a Layer Style button located at the bottom of the Layers Panel. Among the choices in the pop-up menu is Drop Shadow, click it.
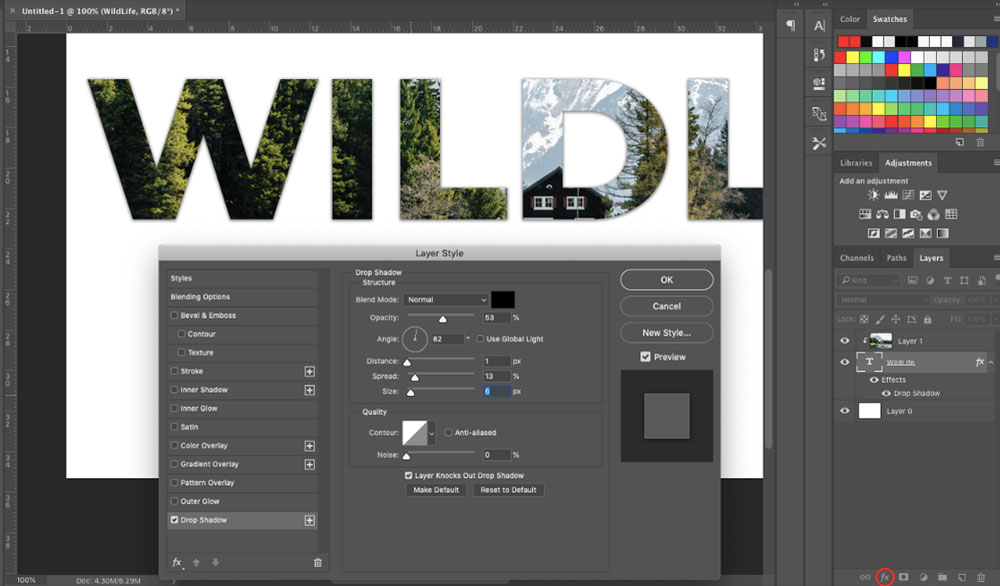
2. You can play around with the Drop Shadow settings in the Layer Style dialog box. Creating a subtle drop shadow effect can be achieved by choosing Black for the color, set your desired opacity (mine is 53%), angle at 82, distance at 1, spread at 13, and size at 6 px. You can input any values which you think works best for your drop shadow.

Adding More Text
You can add more pieces of text to the clipped text if you need to. Here is how you do it:
1. Find the Type tool (T) at the options bar on top of the Photoshop window.
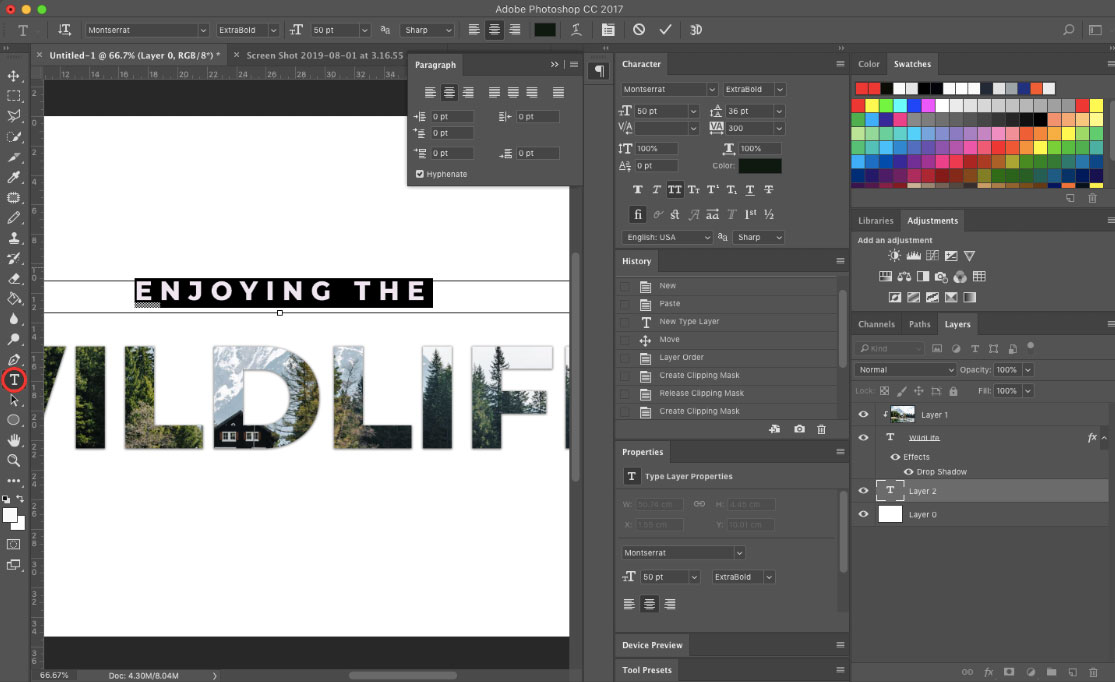
2. Select from the settings the font, size, and color.
![]()
3. Click on the image window once then type in the words that you want to add. Drag the new text around using the Move Tool (V). Move the text around until it lines up the position that you want it to be.
And that’s it! You have successfully learned how to use the clipping mask technique in putting an image inside the text using Photoshop.
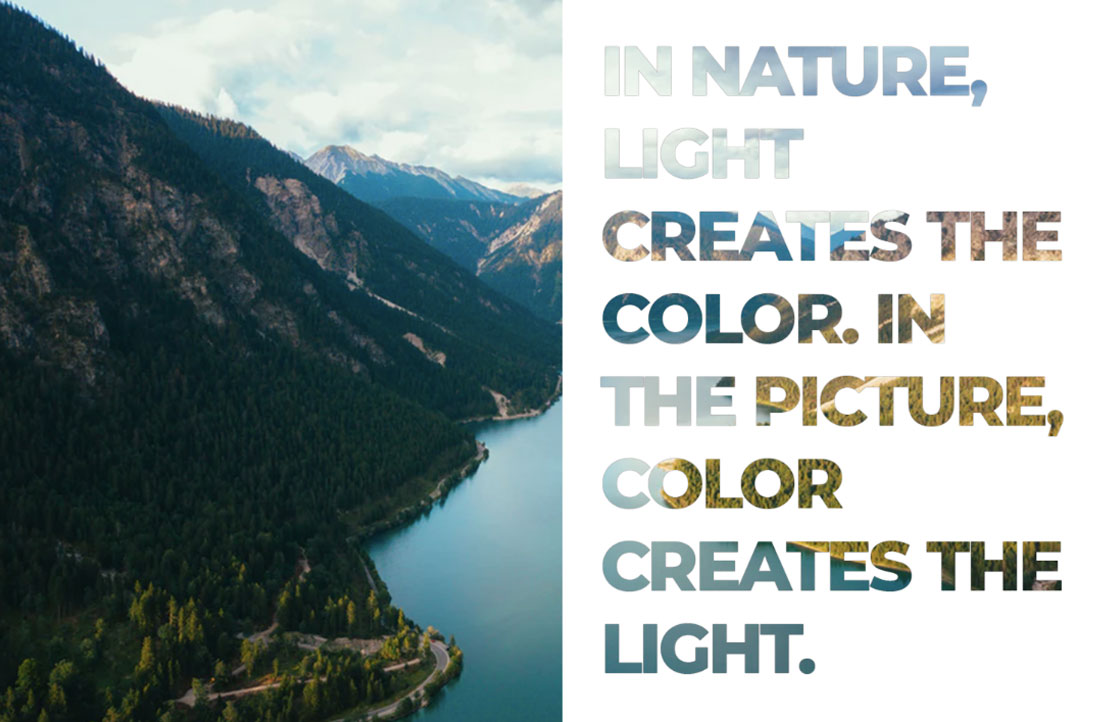
Here’s more samples of artwork you can create using text clipping mask:

A photo masking service may seem complicated but it is actually so easy to do. Image editing services are experts on these things but you can practice on different photos and apply different text effects if you want to master the clipping path and clipping mask techniques. This way, you will be able to create different styles for every project.
Need help from the experts? Our photo editing services here at Ephotovn are done by our expert graphic design team. We utilize the latest technology for all our services, including image masking service.