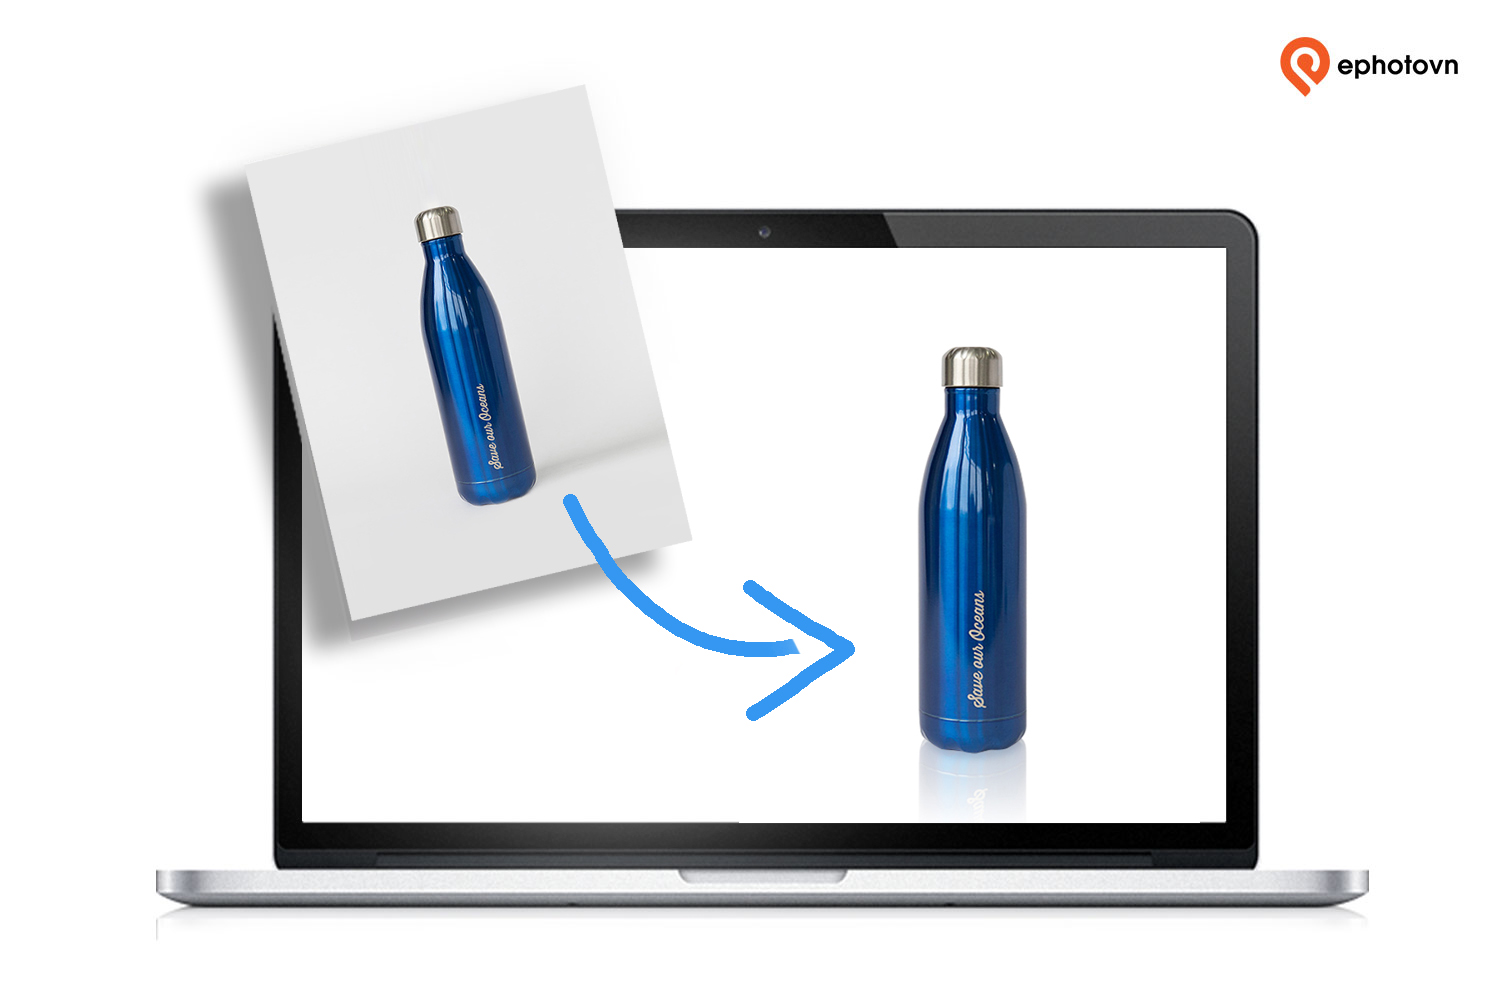
Stunning product photos are essential in making your online shop more appealing to customers. After all, the product photos are the only thing that they can examine while shopping online. It is, therefore, important that you apply careful considerations in adding visual effects that will boost the aesthetic appeal of every photo. Using drop shadow in Photoshop us one of the ways to do this aside from the common photo editing services such as clipping path and background removal. Unlike most photo retouching services, however, it takes a lot of special skills to creatively add drop shadow in Photoshop.
Why Shadows Matter
It is not easy to make product photos stand out but having the option to add drop shadow in Photoshop is a great thing. Shadows are one of the easiest ways to elevate the standards of product photography as it makes the photos look more polished and professional. Just take a look at industry leaders in the e-commerce sector and you will see how stunning their product photos are.
The main purpose of having a drop shadow in Photoshop is to improve the photos, right? Ideally, having nice photos does not only guarantee sales. It is also a way to build brand recognition. This means that consistent use of drop shadow in Photoshop can improve your reputation as an online store and customers will not only be enticed with your products but at your brand as a whole. Let’s face it, there are probably hundreds or even thousands of other stores that sell the same products that you have. Impressing them with the best photos can slowly build their confidence in your shop so that, in the future, it will be easier for you to convince them to choose your shop over the competition.
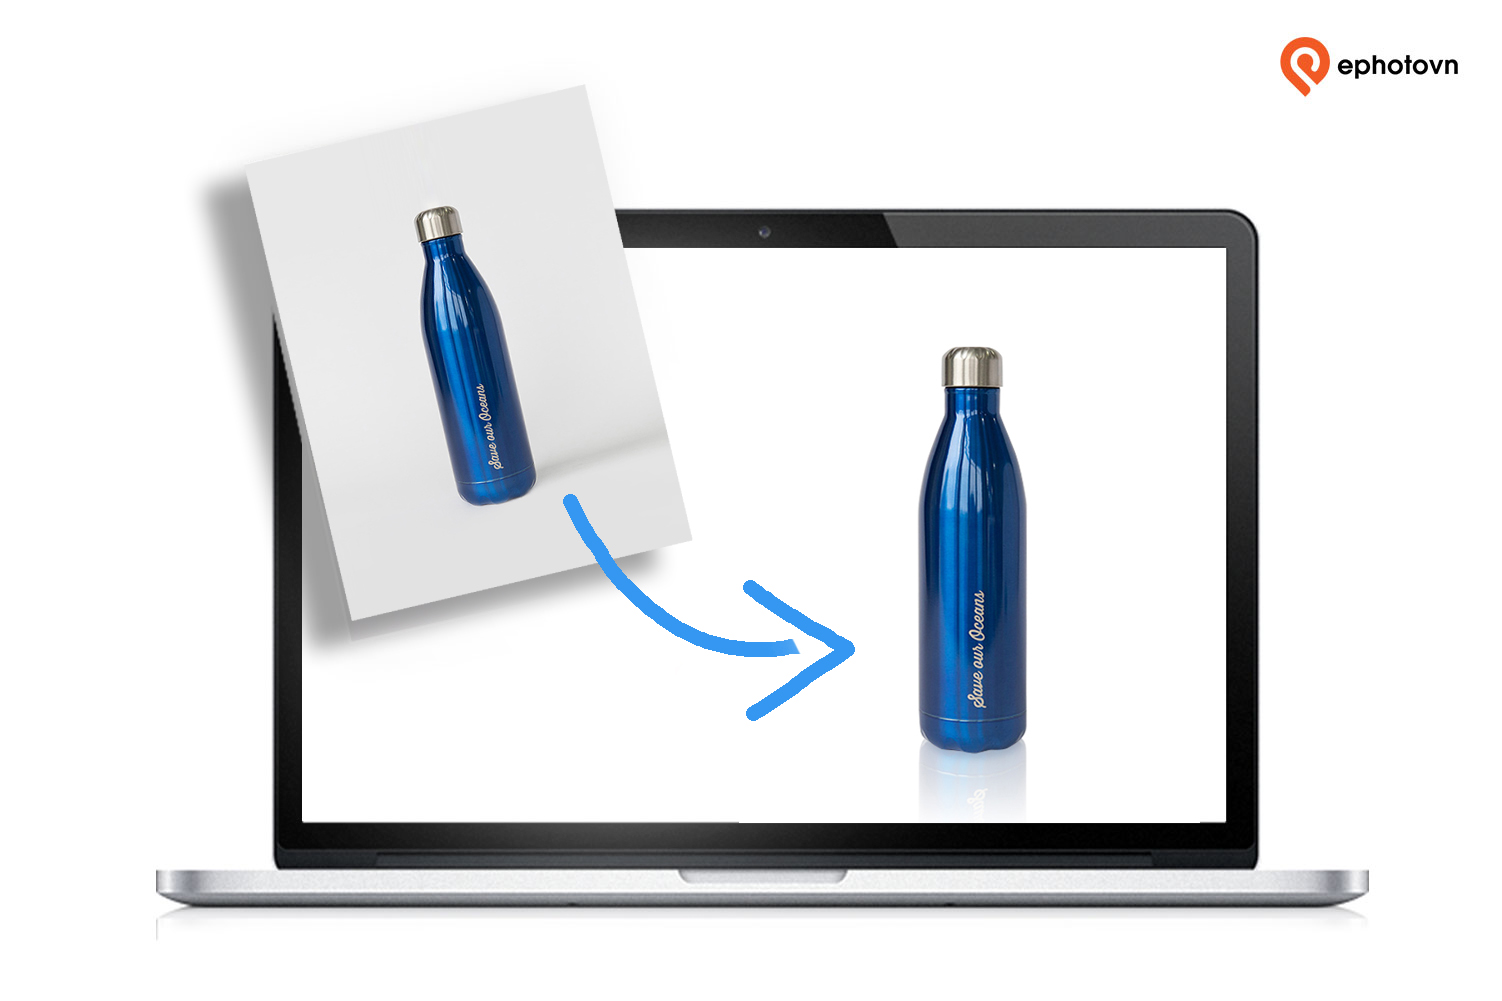
If you are considering to have drop shadow in Photoshop, it is important that you learn about the things that you need to consider, the different types of drop shadows and even video tutorials to either add or how to remove shadows in Photoshop.
To start with, let’s explore the different types of shadows:
1. Natural
A natural shadow is exactly what it is, a natural shadow that is cast when direct light is placed upon the product. It is easy to achieve since you can only use one light source in capturing the product and its shadow. There is no need to do post-processing of the photo since the shadow will naturally show up in the photos. Aside from capturing natural shadows while shooting a product image, you may also use Photoshop to add this kind of shadow later. Its advantage is that a natural shadow looks subtle and becoming especially when perfectly executed.
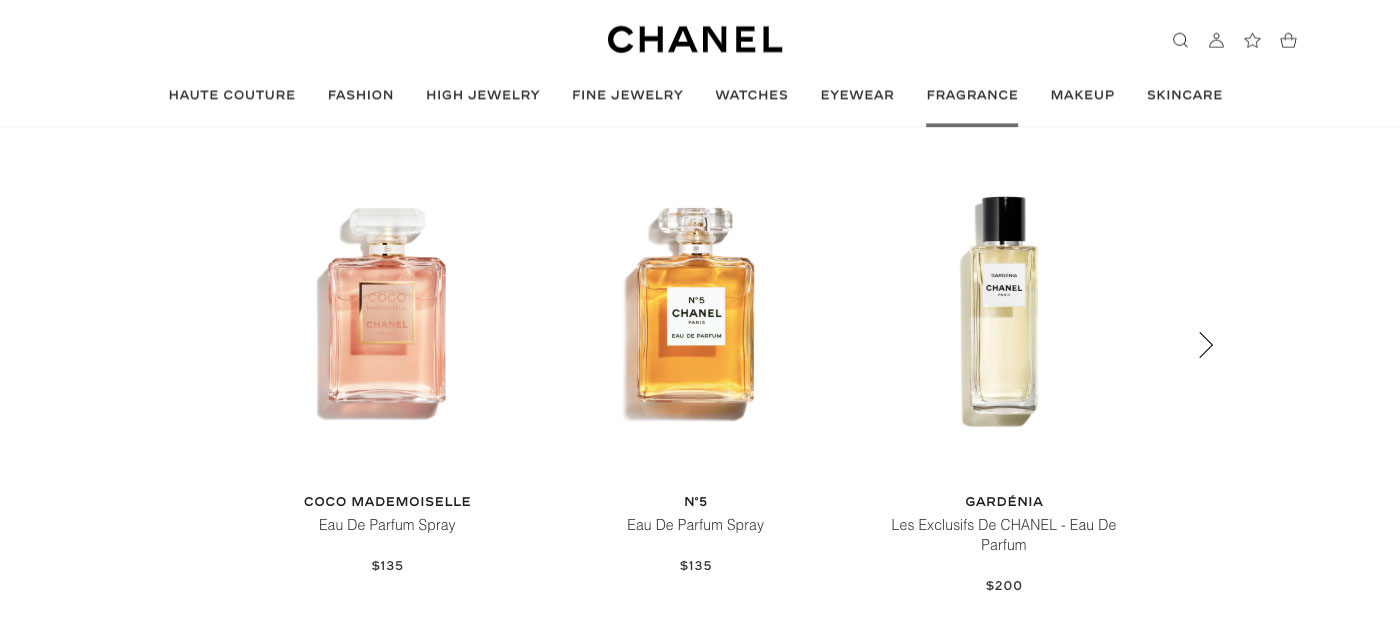
Image via chanel.com
2. Drop Shadows
If you are after the illusion of having product photos that look like they are shot from above, then a drop shadow is what you need to have for the photo. Knowing how to add a drop shadow in Photoshop has an advantage since it can eliminate that unnatural effect that the product is floating on a plain background. A drop shadow can help create a realistic visual of any product, especially with furniture and shoes. With furniture, it gives an illusion that the product is on top of a surface, just like when it is set up in a room. Shoes also go best with drop shadows because they are normally placed on a non-reflective shelf in an actual store.

Image via eu.louisvuitton.com
3. Reflection Shadows
Having reflection shadows give photos a more dramatic effect. It makes the subject look like it is on top of a reflective surface. This style also adds a sense of realism for products that are best displayed in display cases or reflective shelves. Sunglasses, jewelry, watches, and dainty decorative pieces will look exceptional with reflection shadows.

Image via loreal-paris.co.uk
Although you have the option to add shadows during post-production, it is better if you are able to control the lighting setup during the shoot. This is very important since a light source will not only add shadows but also cause light spots to appear on the product. Again, these spots may be removed using Photoshop but will take some time and even the risk of having badly edited photos in the end. Take some time to experiment with different light sources especially if you are shooting highly reflective items like glass.
Simple Ways to Add Shadows to a Product Photo Using Photoshop
By now you are aware of how important shadows can be on a product image. It is now time to learn the basic methods of adding the different shadow styles on your product photos.
Adding Natural Shadows
Natural shadows look great in any kind of product. Here is a tutorial on how you can add and keep the shadows look natural in the photos:
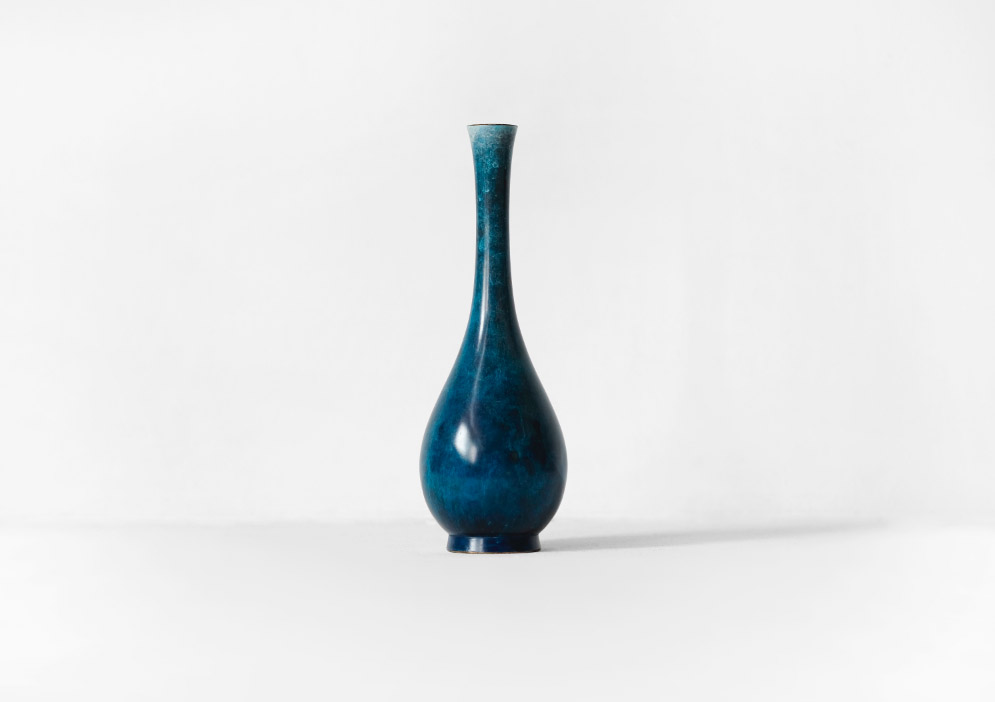
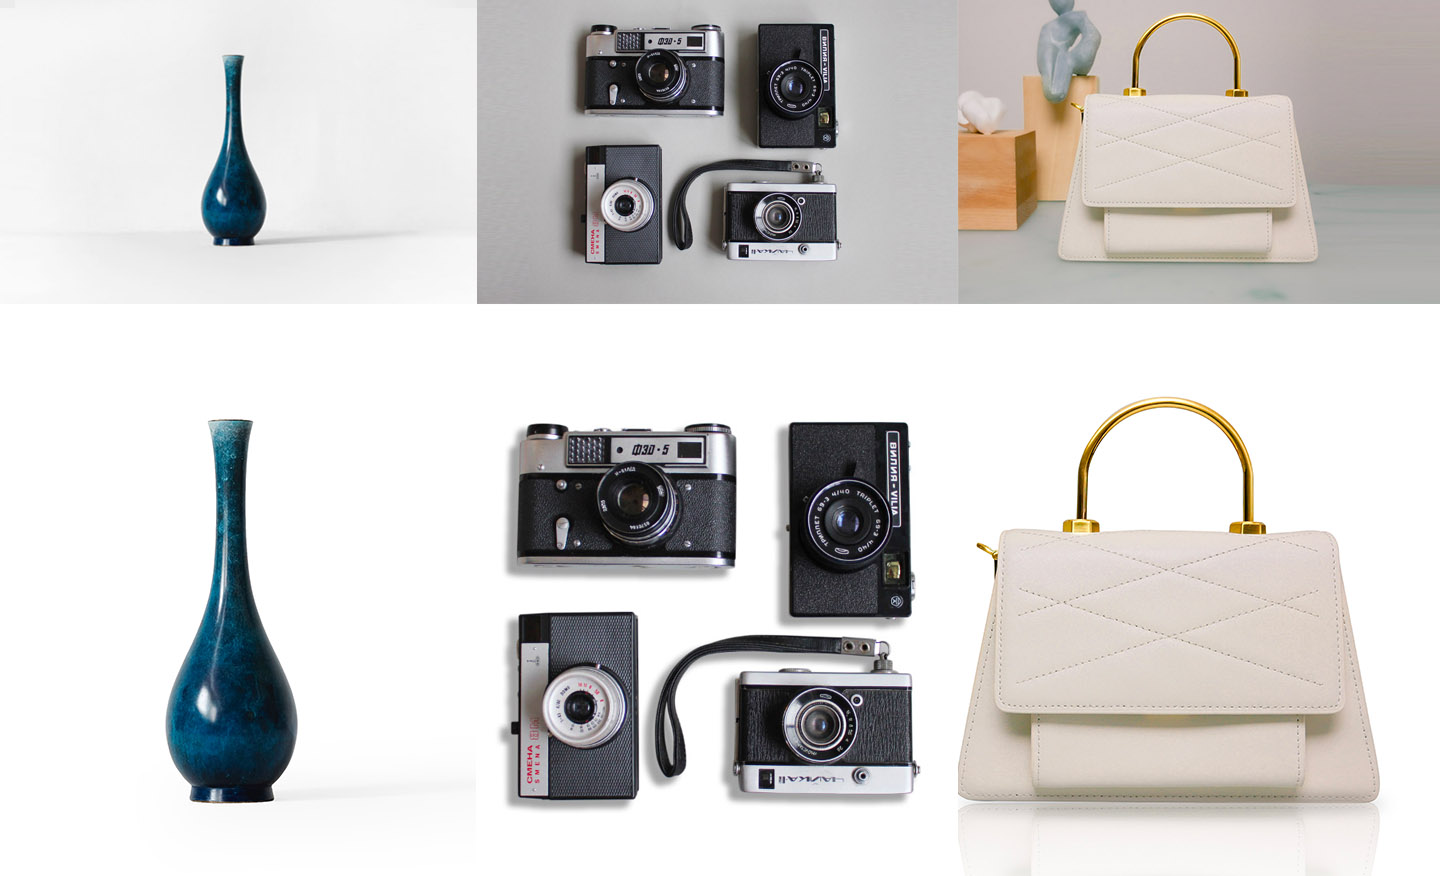
Vase
1. Open the image.
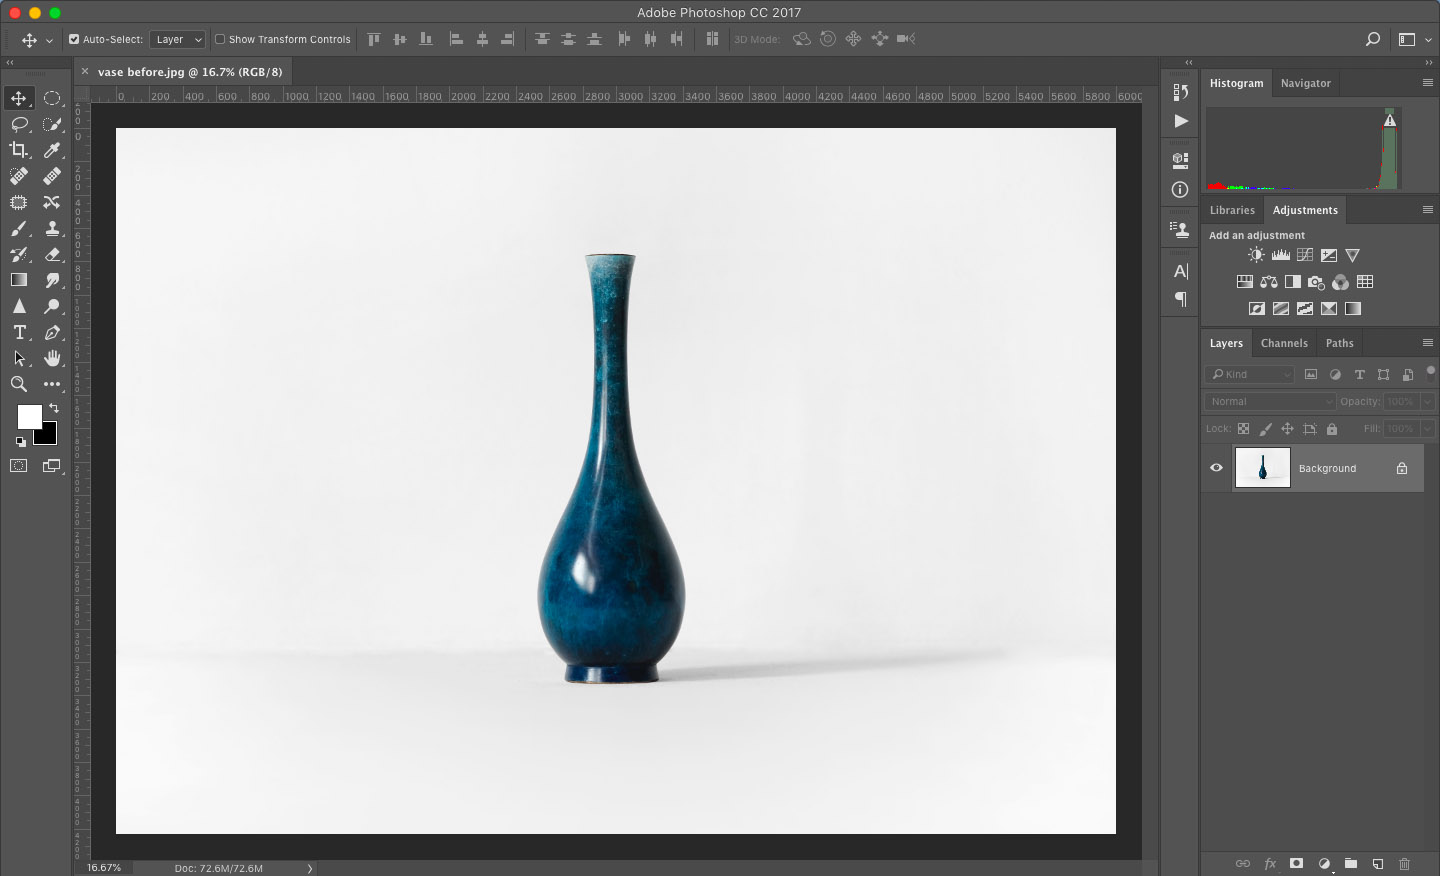
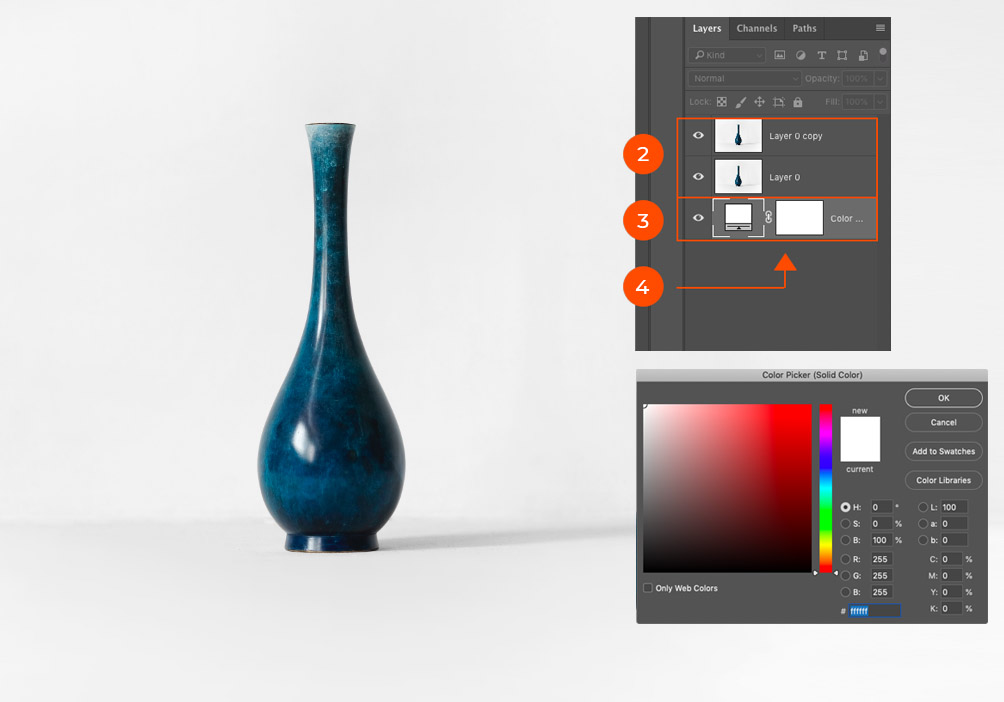
2. Duplicate the image so you’ll have two vases (two layers).
3. Create a new layer then fill with a solid white background. Now you have 3 layers in total.
4. Move up the newly-created solid white layer to the bottom of the layer stack.
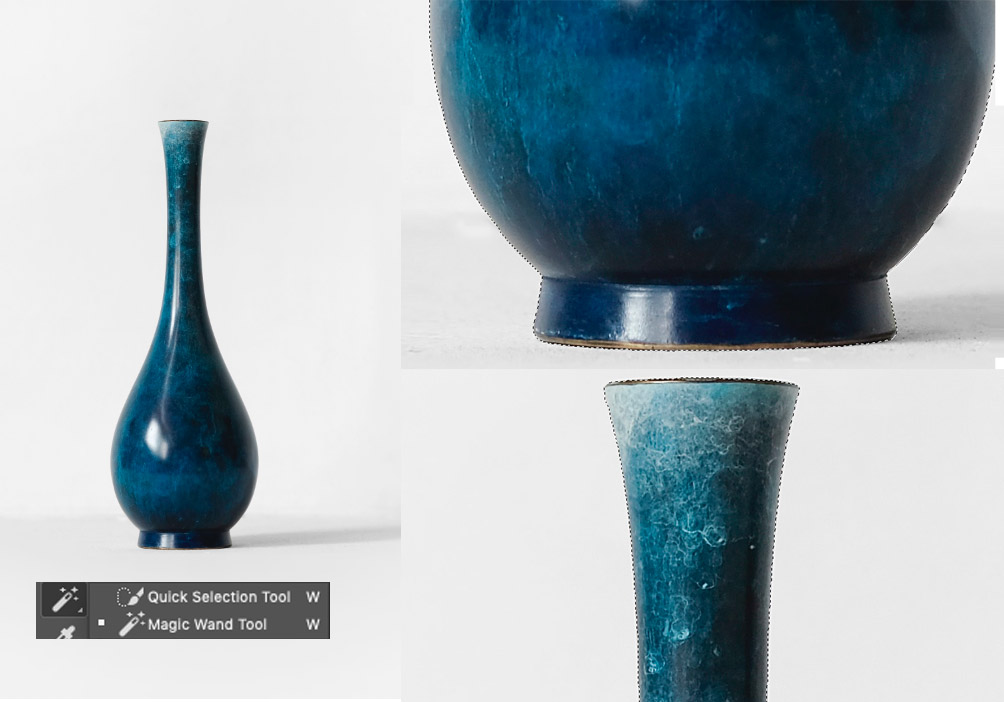
5. Make an accurate selection as you can around the vase on one of the vase layers (top layer of the stack).
6. Refine the selection’s edges smoothly by going to Select and Mask. Adjust smoothness, feather and contrast of the edges of the selection here.
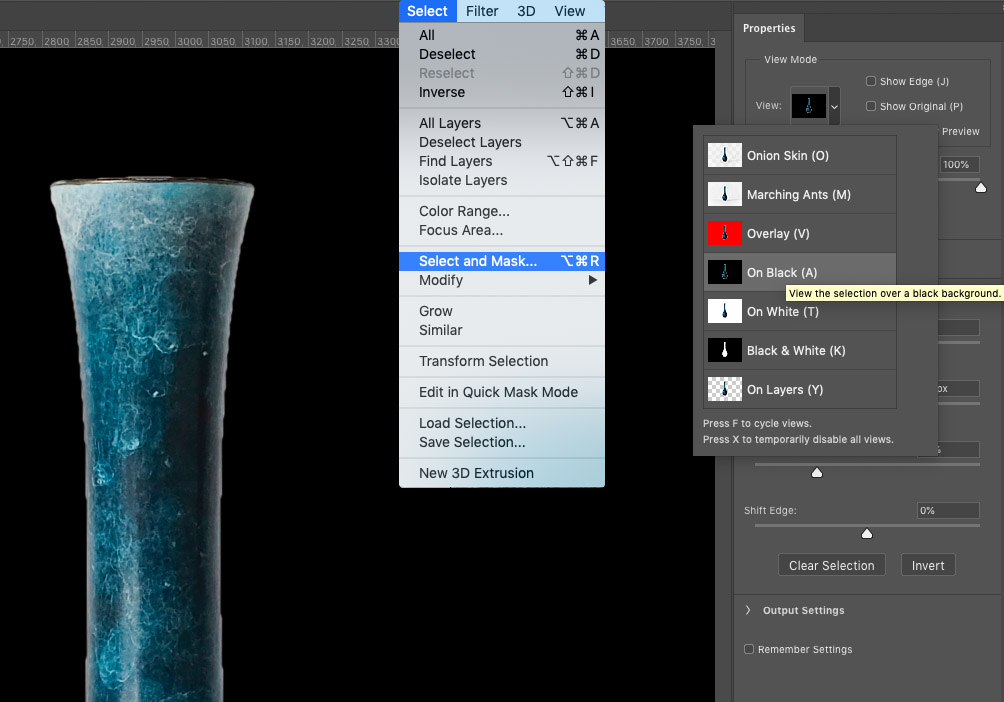
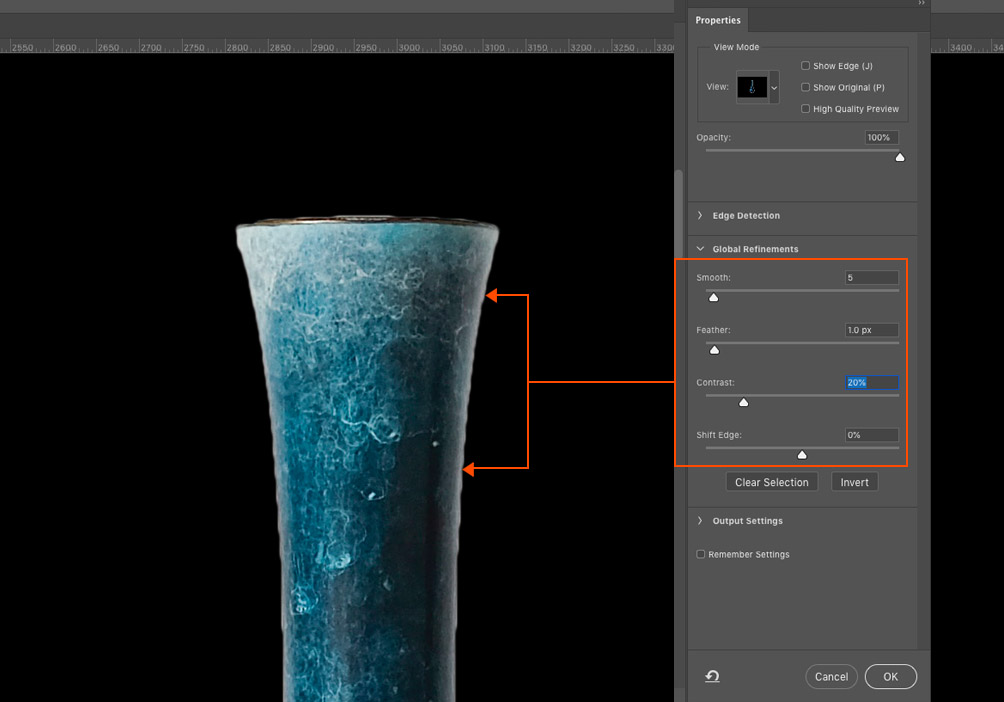
7. Create a mask from your selection. Make sure you invert the mask to make sure so that the vase is what’s showing and not the background.
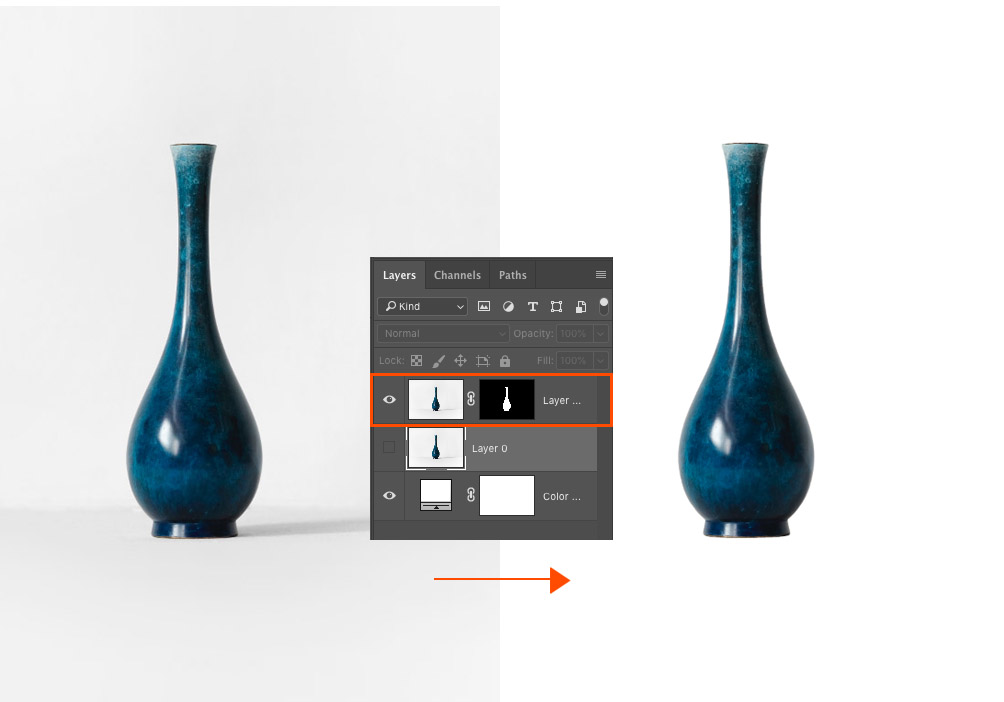
8. Select the vase layer (middle of stack). Change the duplicate vase layer to “multiply” in the top left tab of the layer dialog box.
9. Create a mask of the vase layer. Click on the mask. Use a soft-feathered brush. Try to maintain the smoothness until the grey parts around is erased.
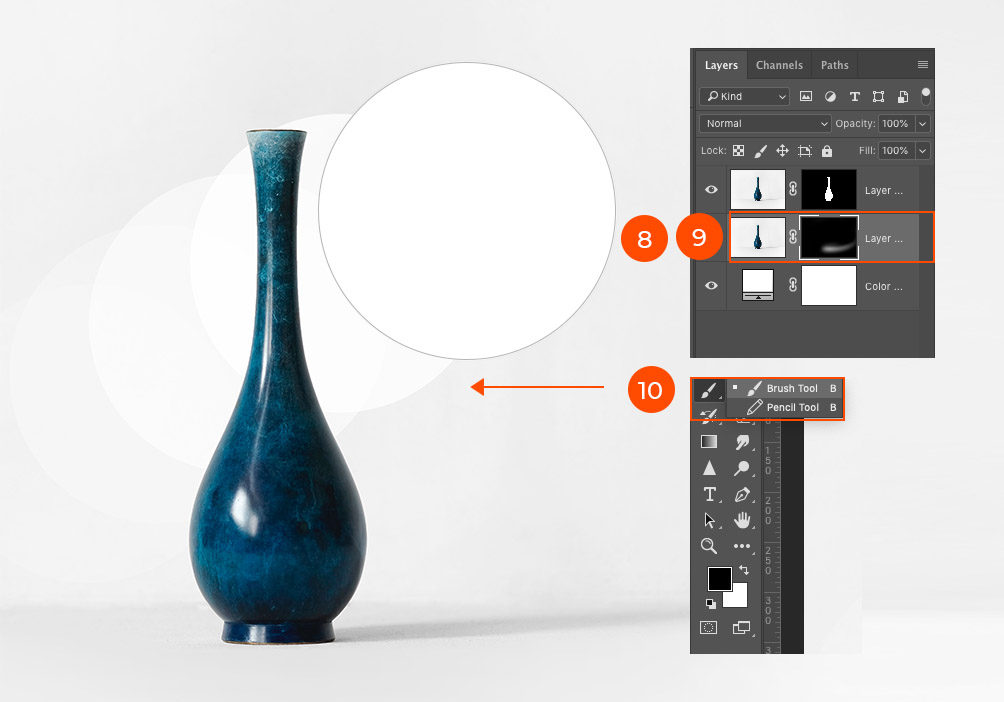
10. Brush away around the vase except the shadow created by the vase. Do this until it looks quite right and natural.
11. Save your image.
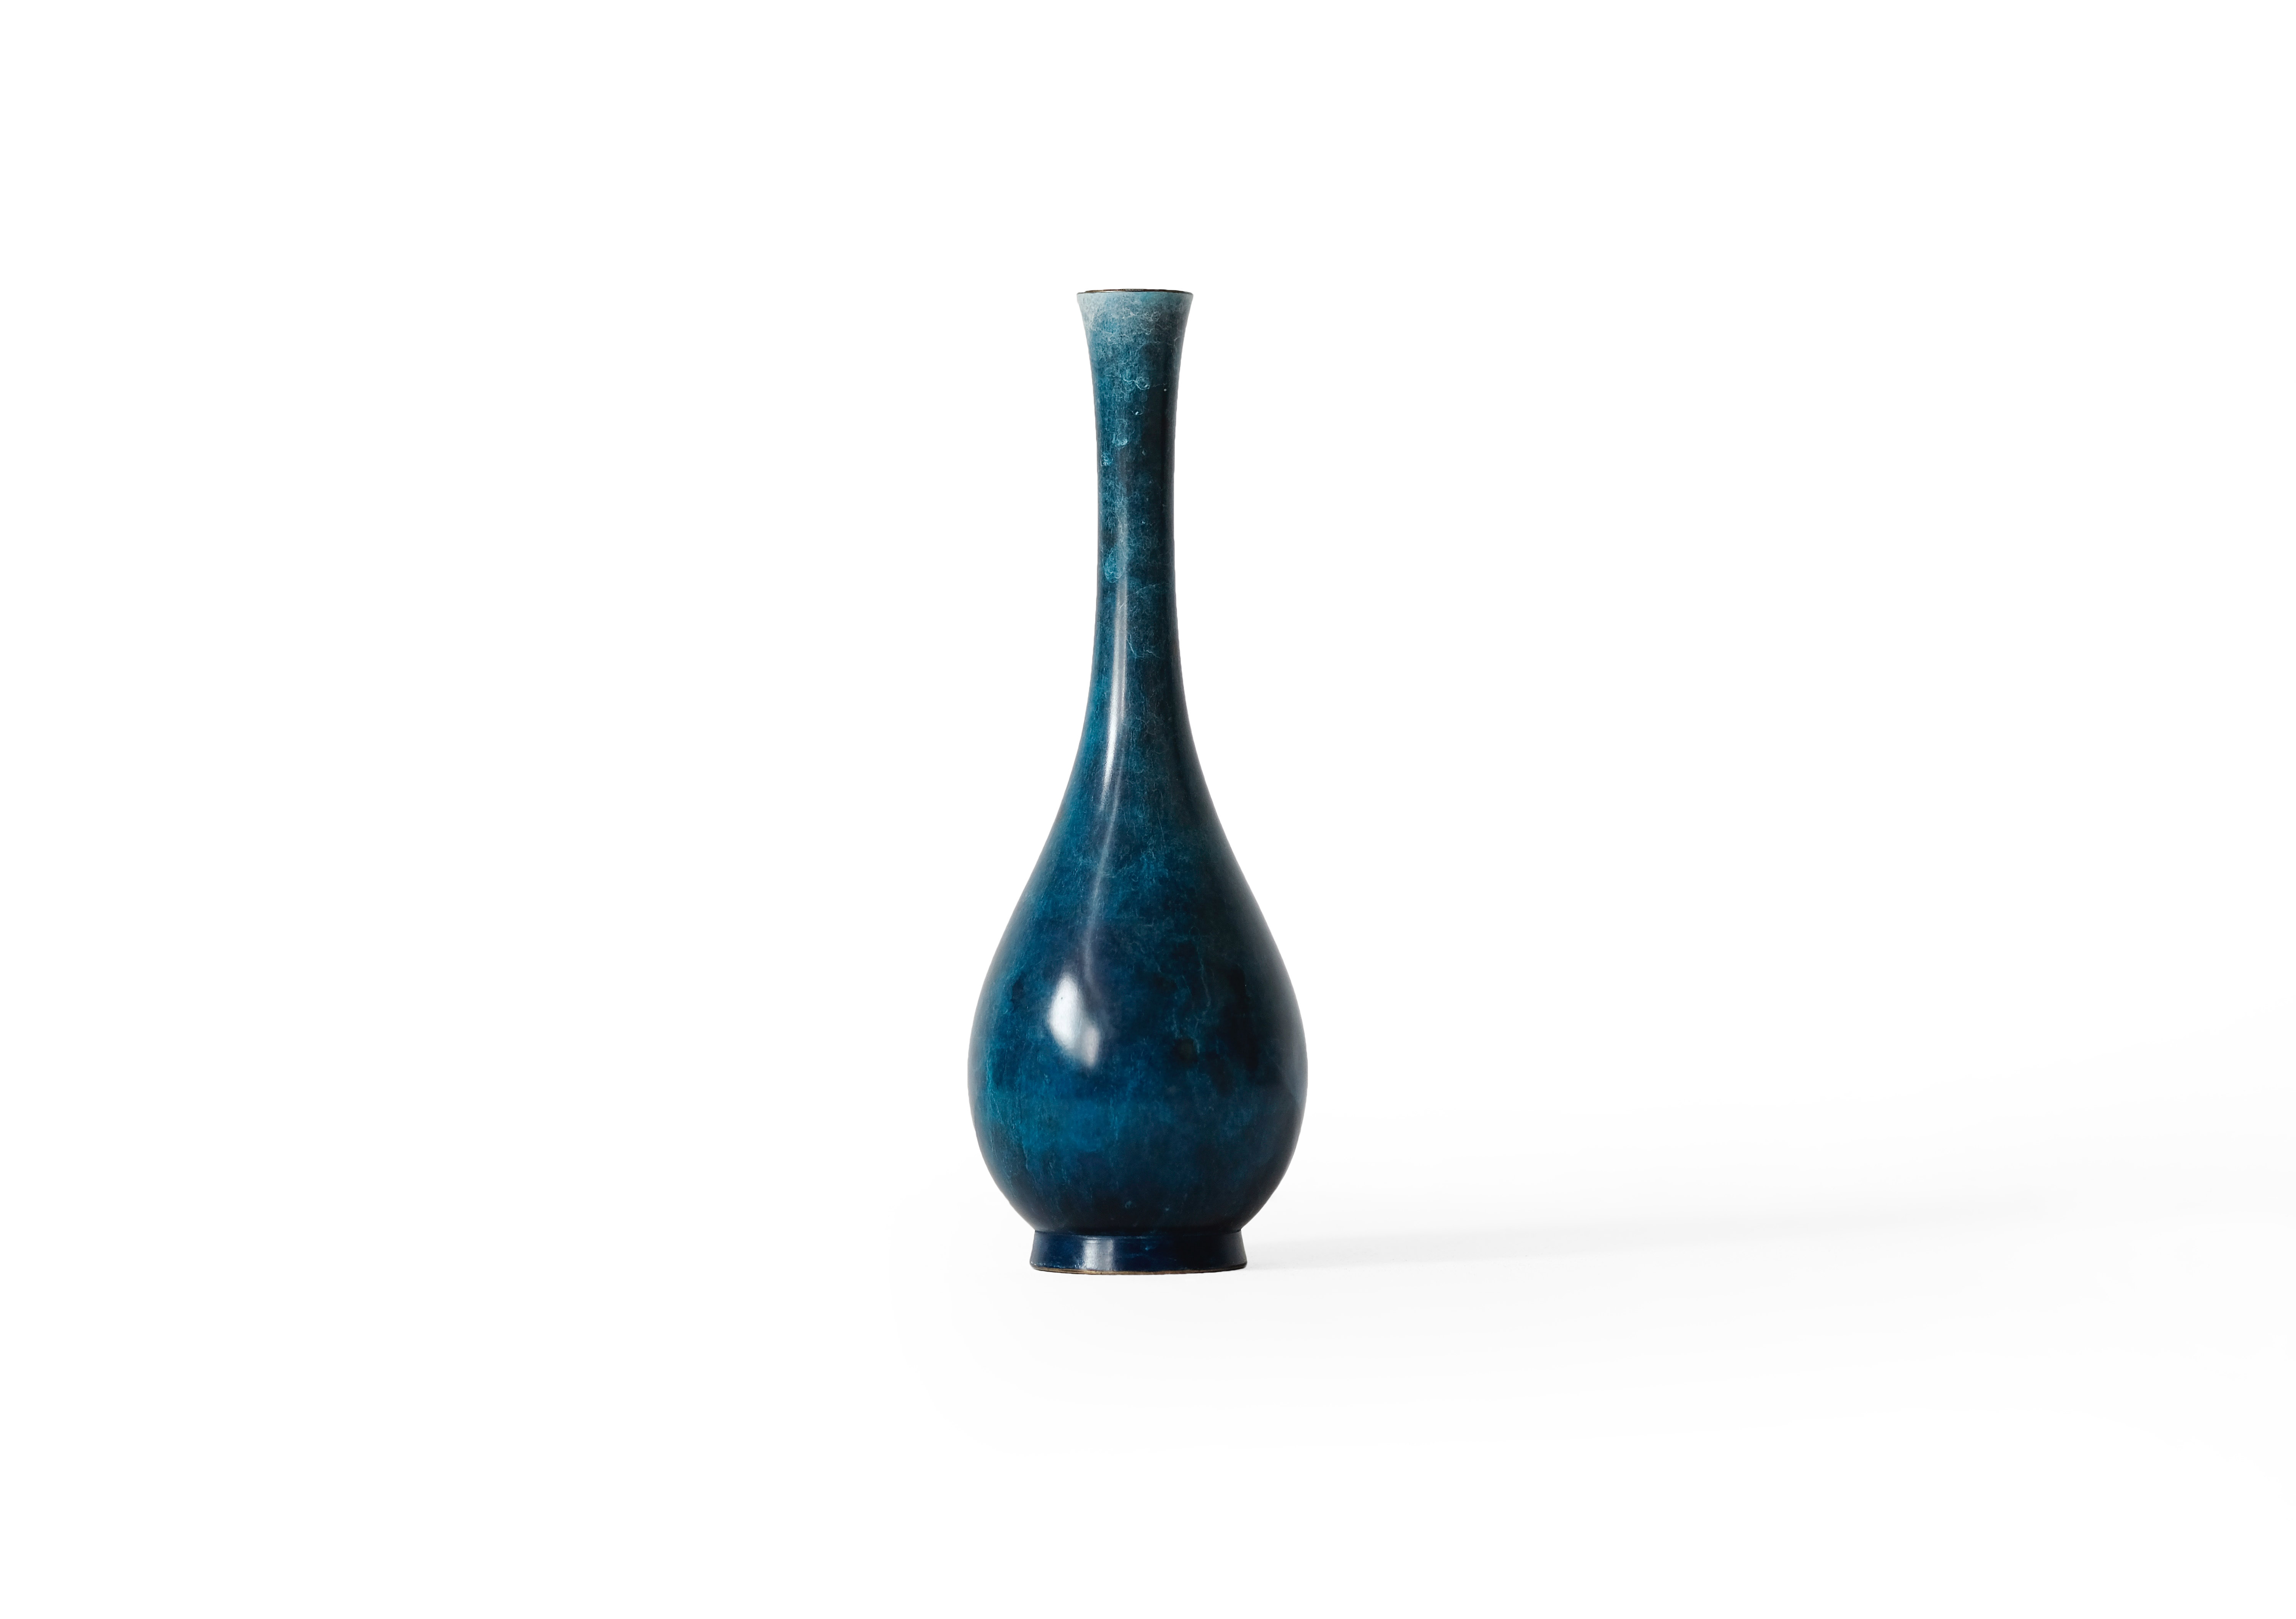
When done right, the natural shadow will make the product look more genuine as if there is no artificial touch done to enhance the picture.
Adding Drop Shadows
Because it is an artificial shadow, a drop shadow in Photoshop must be perfectly executed to create an ethereal effect rather than a fake-looking photo. Here is how you can do it for your product photos:
Camera
1. Open the image.
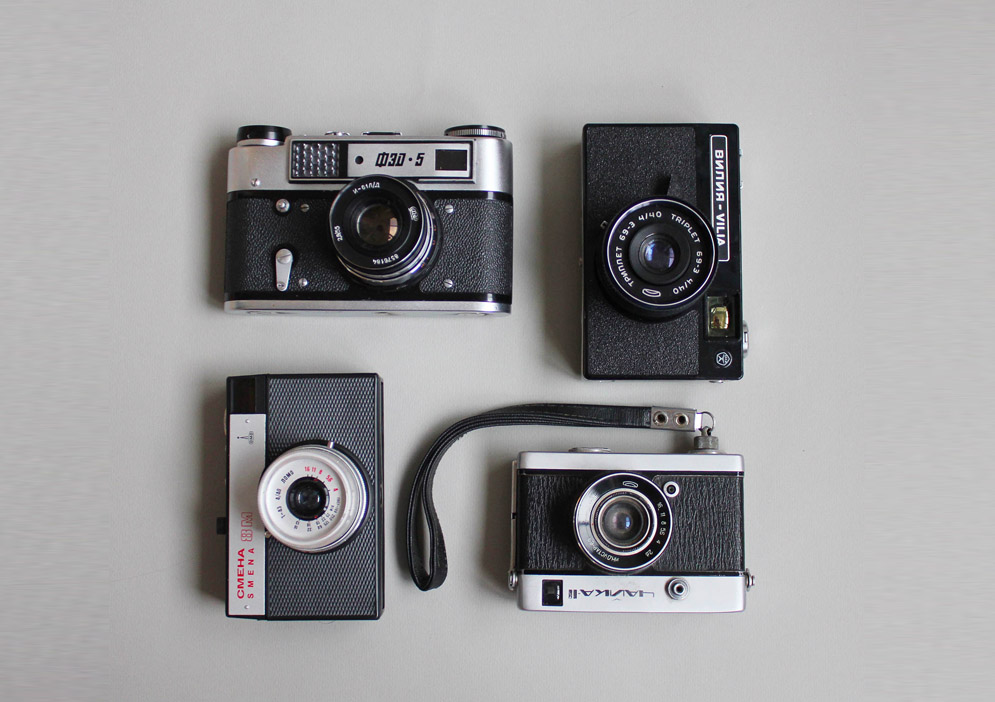
2. Add a new layer then fill up with a solid white background.
3. Move your newly added solid white layer under the layer stack.
4. Make a clean selection as you can just around the vase using the Pen Tool or Quick Selection Tool.
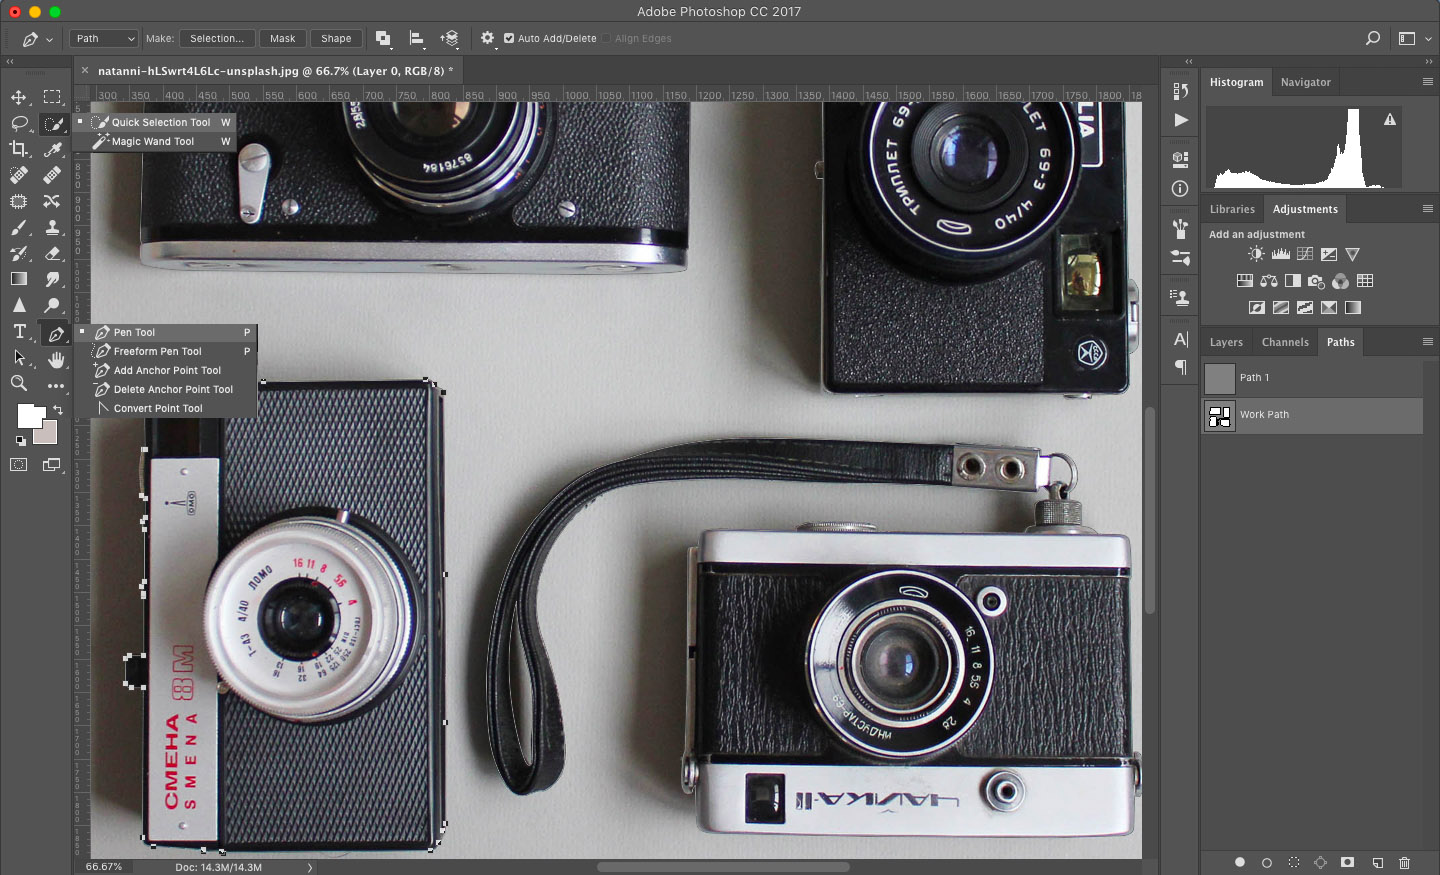
5. Refine the edges of the selection to be more smoother. Adjust this by clicking on Select and Mask. Modify until it show just the right smoothness.
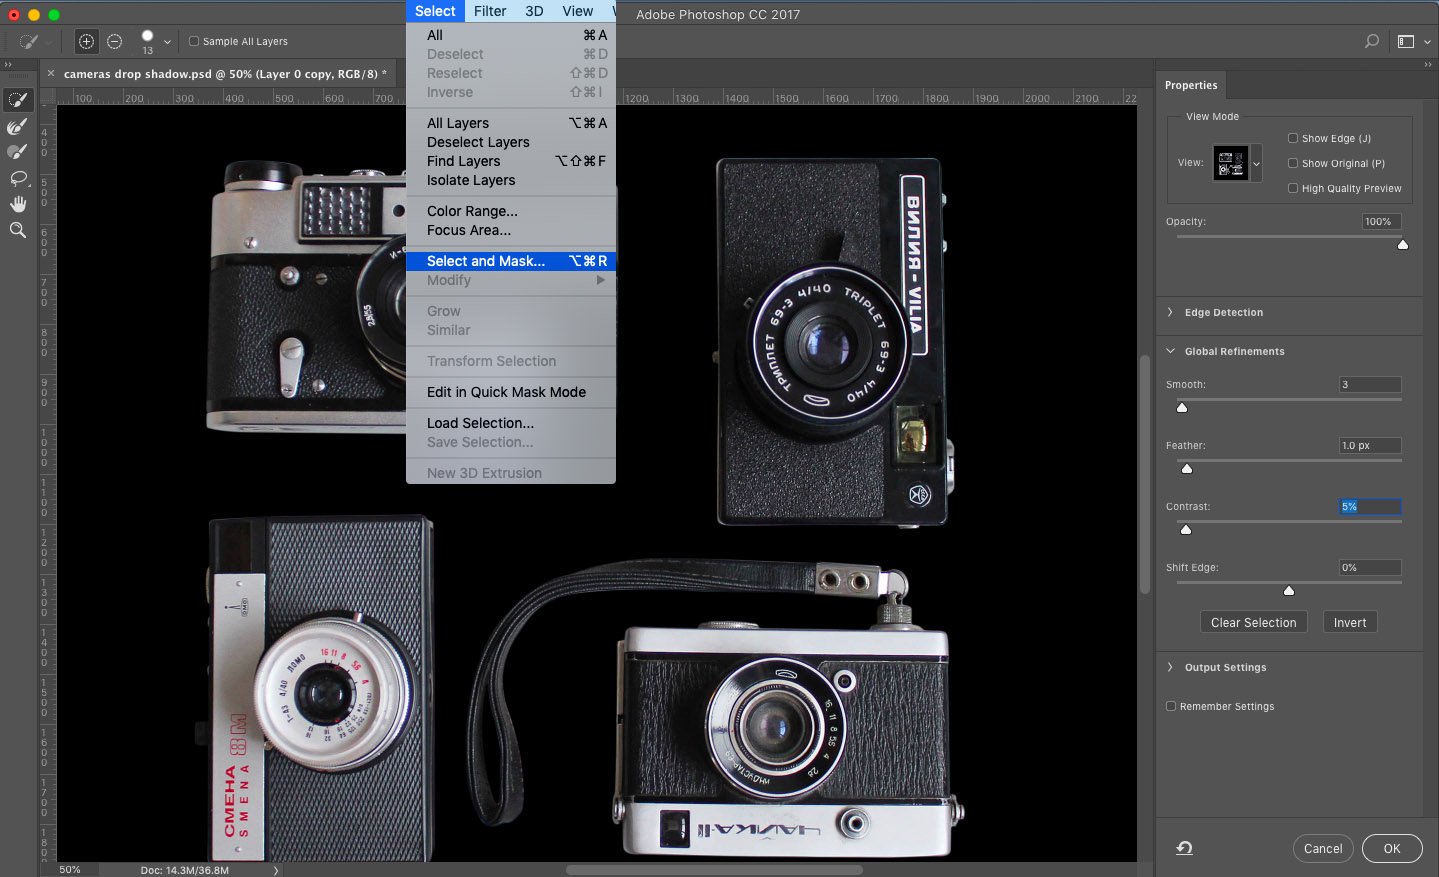
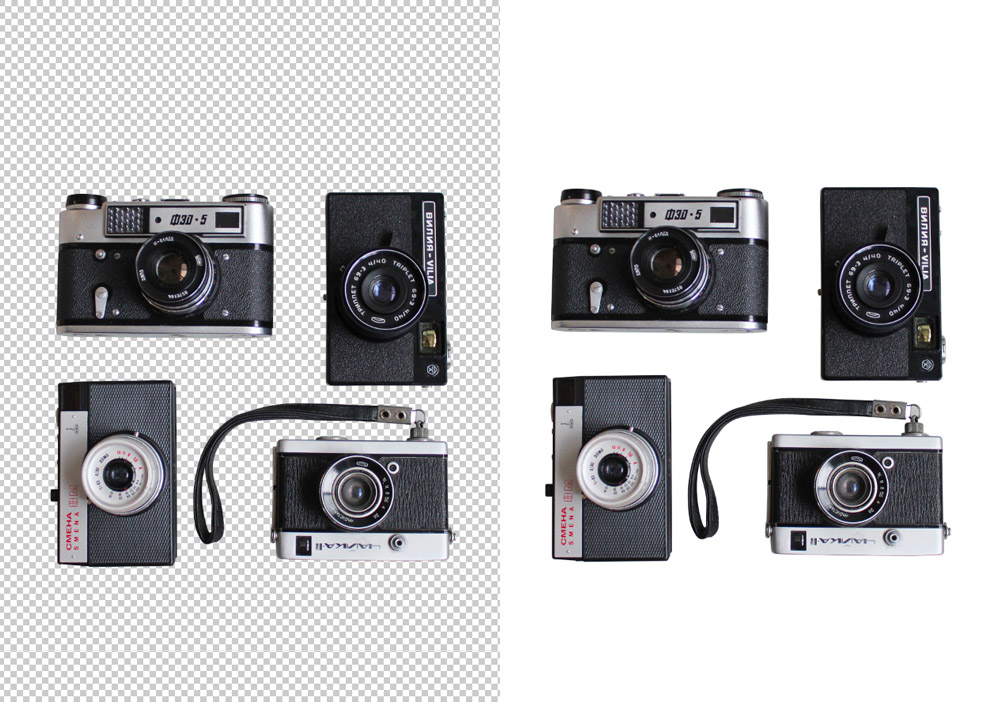
6. select the masked layer. Double click the masked layer. A “Layer Style” window will pop up.
Check on the “drop shadow” box. Then, a shadow will appear on the image you’re working on. Adjust the effects. Change the shadow opacity until the appropriate shadow shows.
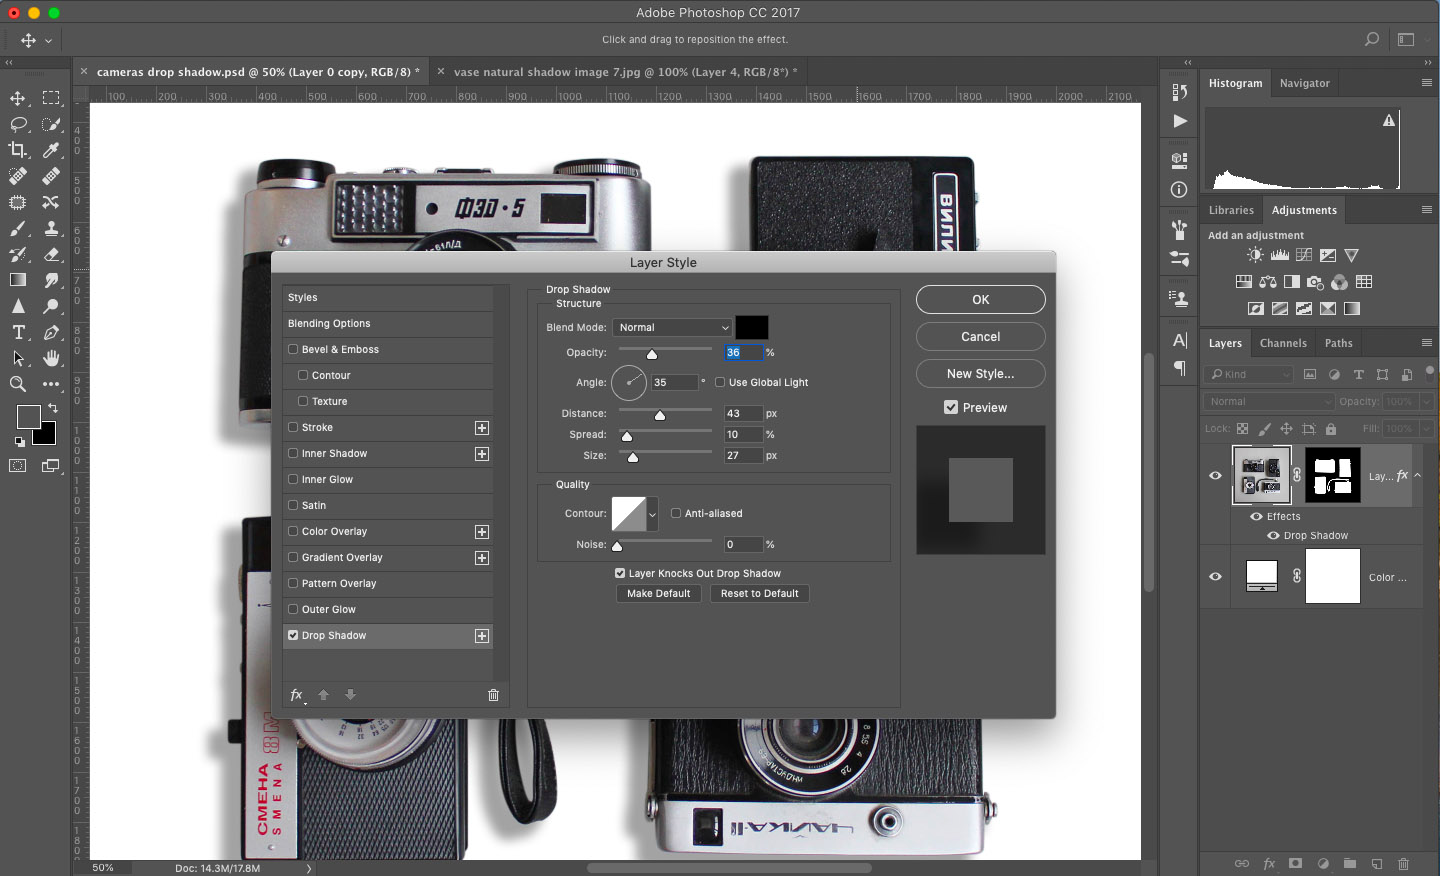
8. Change or adjust the angle, distance, size, spread and other drop shadow properties . Alter specific properties by moving the bar left to right. Do this so it matches the direction of light that you can see on the product. Pay close attention so that shadow falls just right, considering natural light source.
9. Save your image.
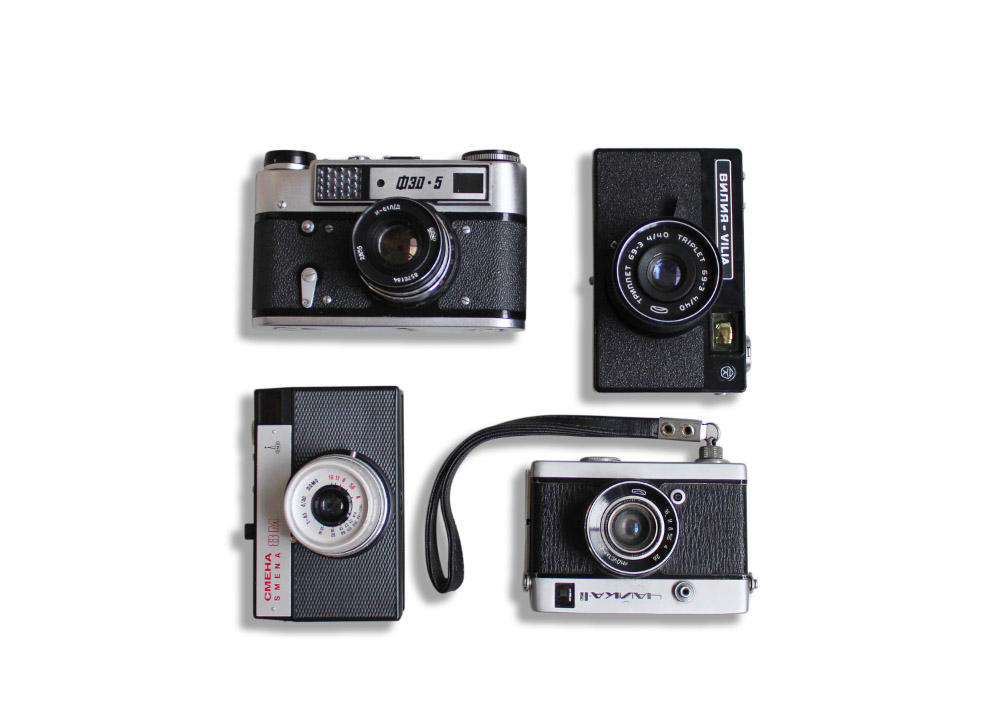
Comparing the first two shadow styles, adding a drop shadow on a photo is simpler. There are also other ways that you can achieve the same effect but this method works best for beginners.
Adding Reflection Shadows
Reflection shadows make product photos look dramatic since the shadow looks more really like a reflection of the product itself. The effect looks like the product is on top of a reflective surface, like glass or water. Here is how you can achieve this shadow style:
Bag
1. Open the bag image.
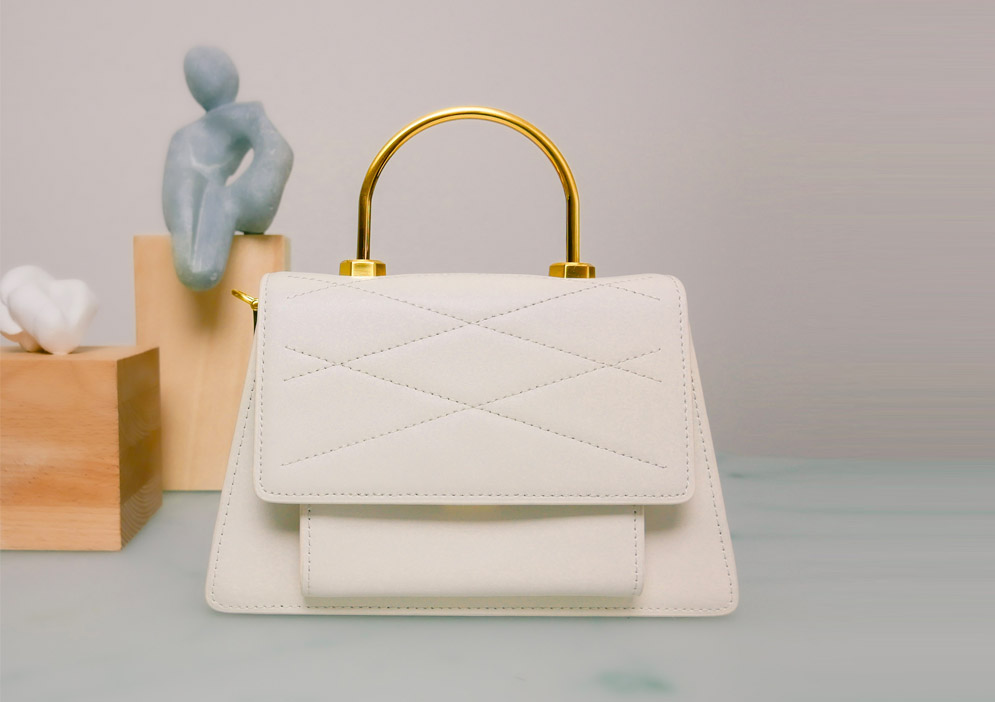
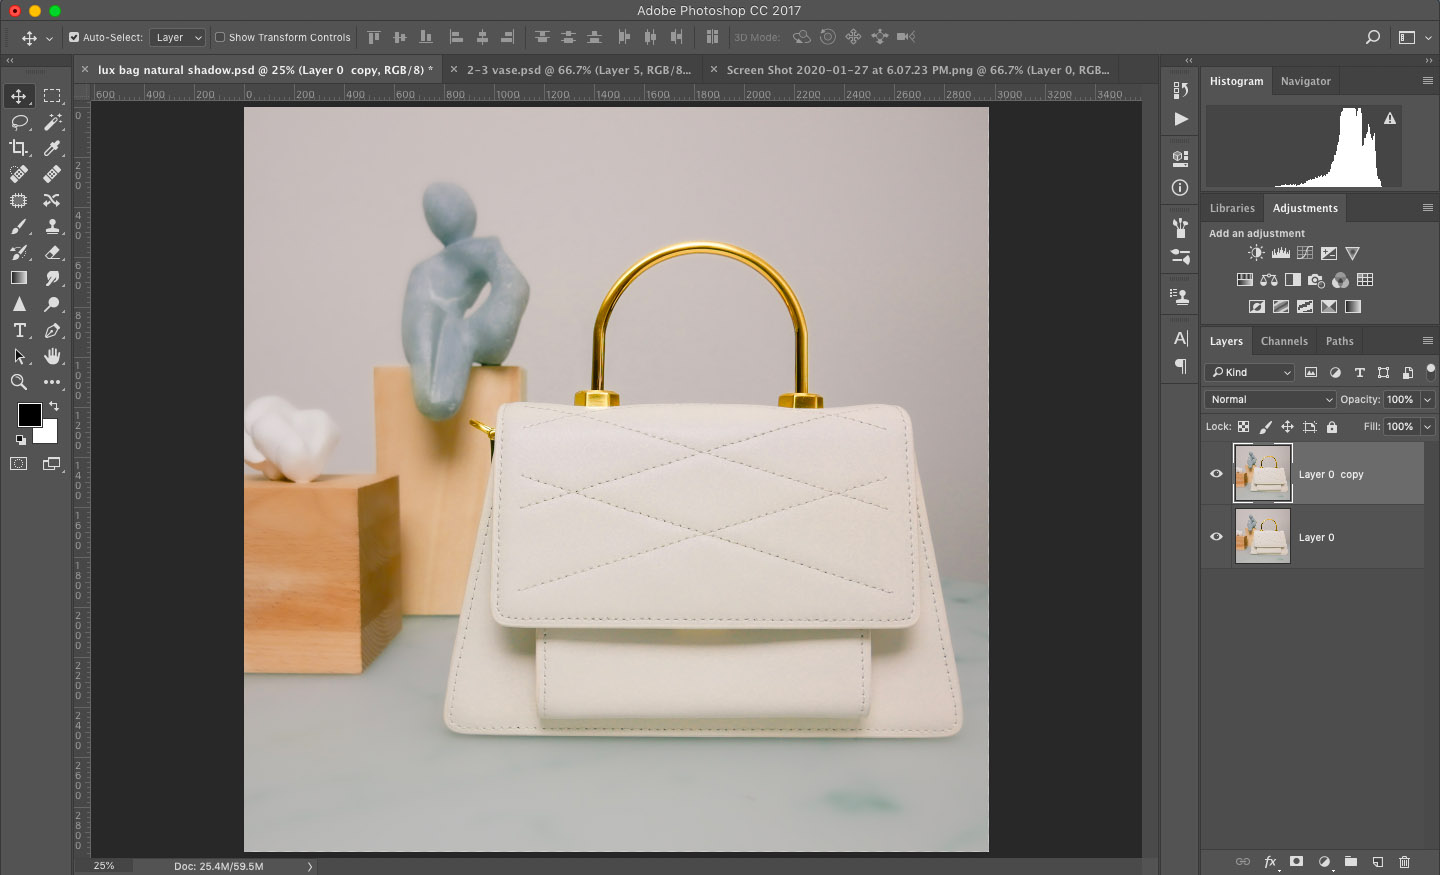
2. Create a duplicate of this layer. So you’ll have two bags and two layers.
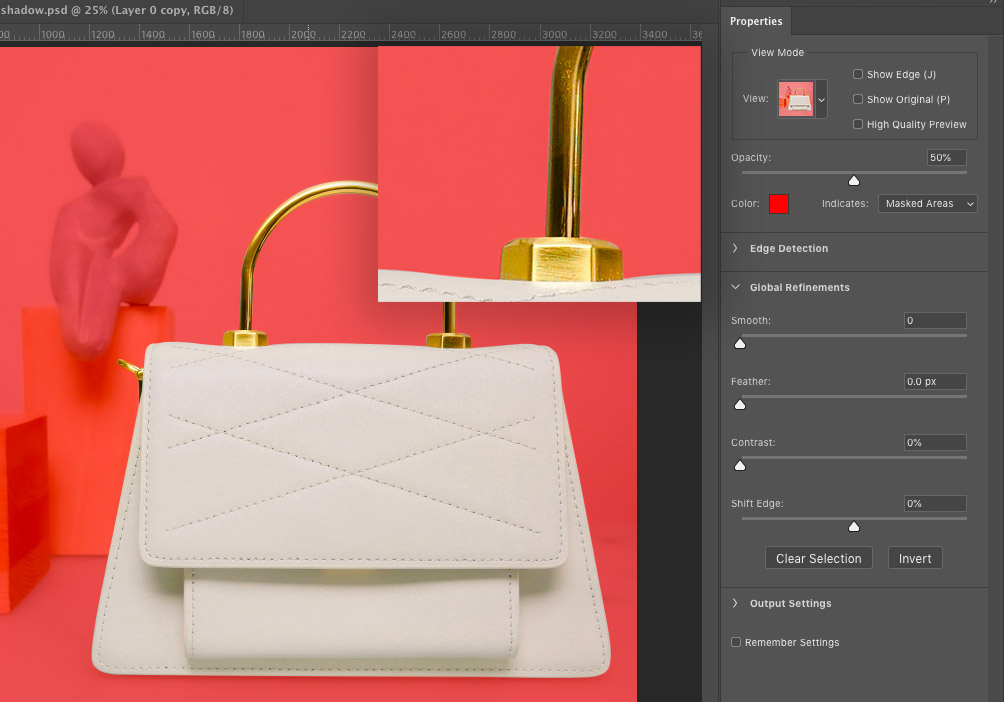
3. Make a tight selection around the bag. Use Pen tool for smoother and exact selection if quick selection is not enough.
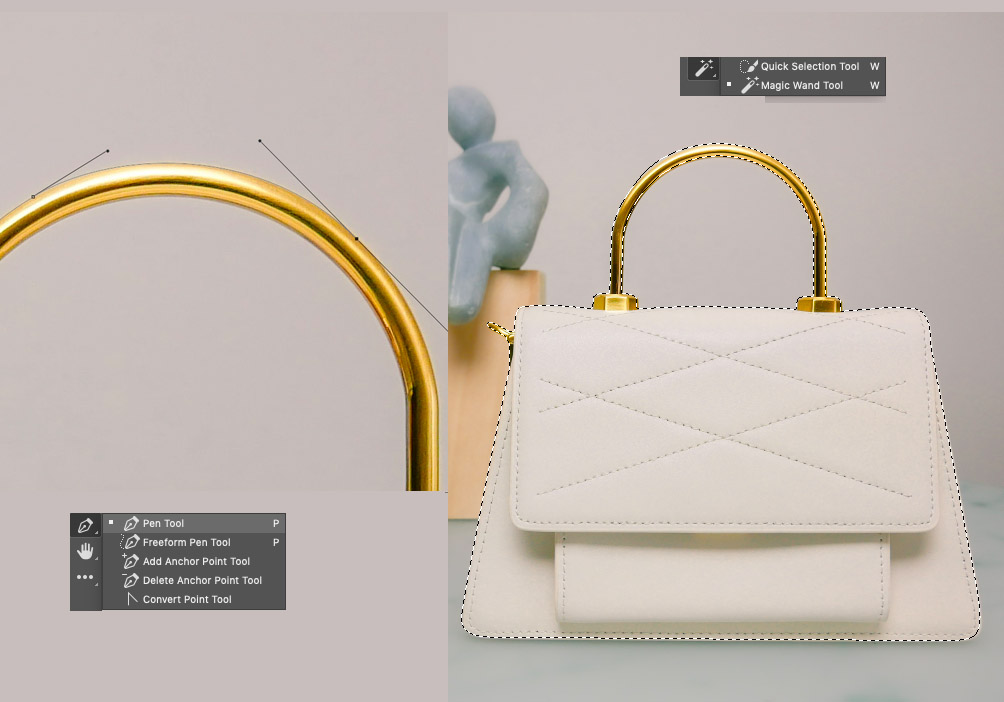
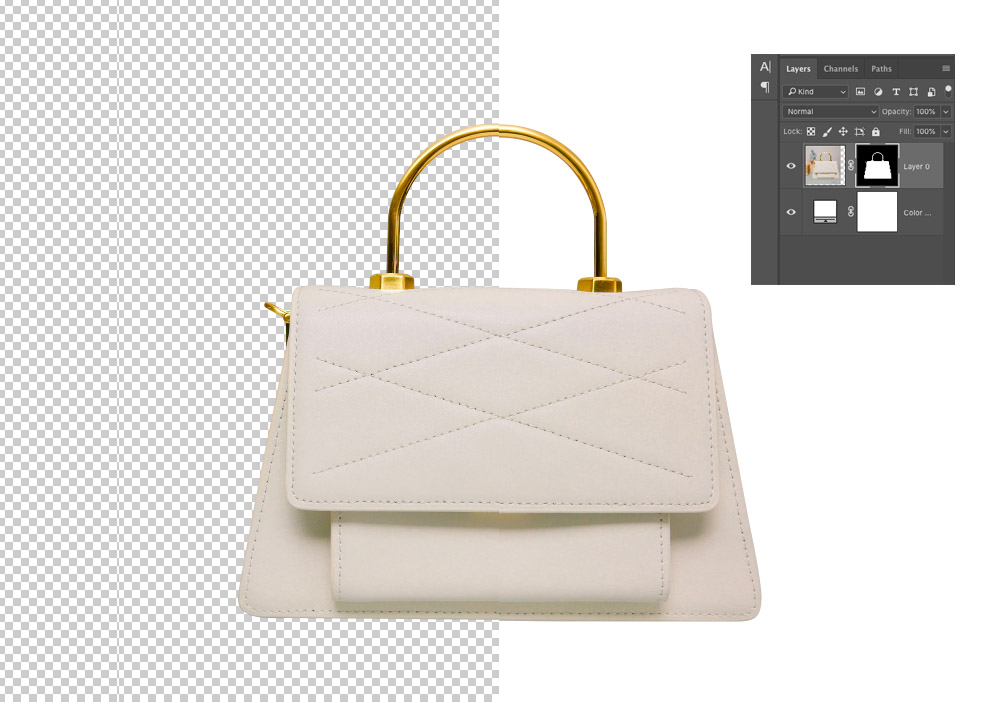
4. Add a mask.
5. Create a new layer below the two layers and fill the background with a solid color. White is good for product images. Transfer the new layer with a solid fill down the layer stack.
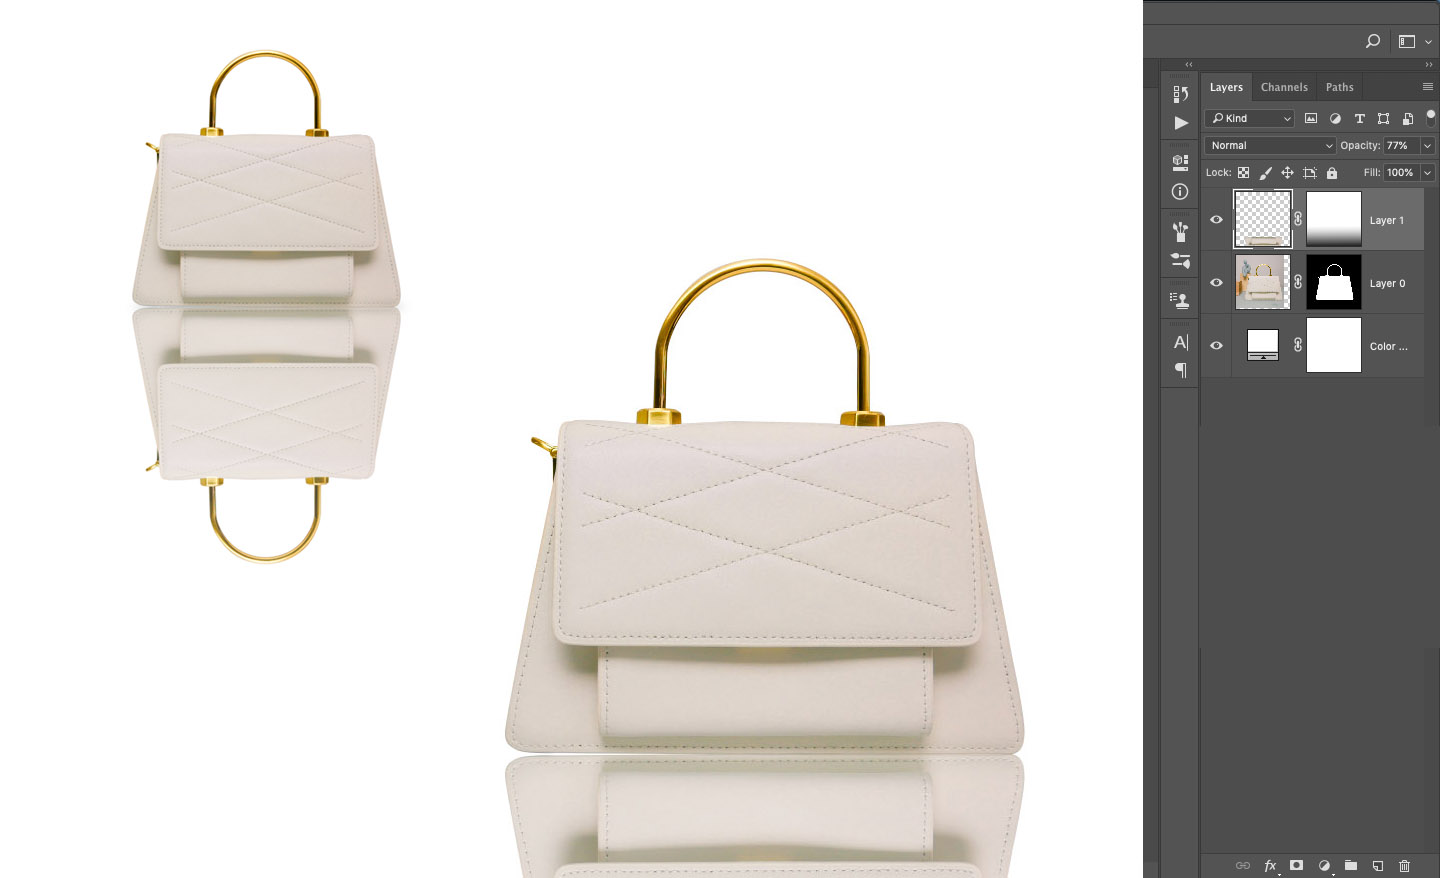
6. Select top layer bag. Click the right mouse button on go to Free Transform. Flip the image vertically.
Now, there’s two bags in the middle of the two layers vertically opposite each other.
7. Align the bottom edges of the bags so it looks upside down together. Make it look like a reflection of the pair is the right side up.
8. Add a slight drop shadow below the first bag layer. Select Lasso tool and draw an ellipse. Click on Select and Mask adjust a feather just right. Or create a new curves layer underneath the bag. Adjust the curves so that your selection becomes very dark. Feather or smoothen the edges.
9. Add a mask to this layer. Select the Mask Layer of the current layer then select the Gradient Tool and apply it on the reflection. Adjust as you please until looks natural. Ensure that the more opaque part of the bag is nearer to the bag of the right side up bag. The least opaque portion should be farthest from the bag. This will be valuable to generate a natural like reflection that falling off away from the subject.
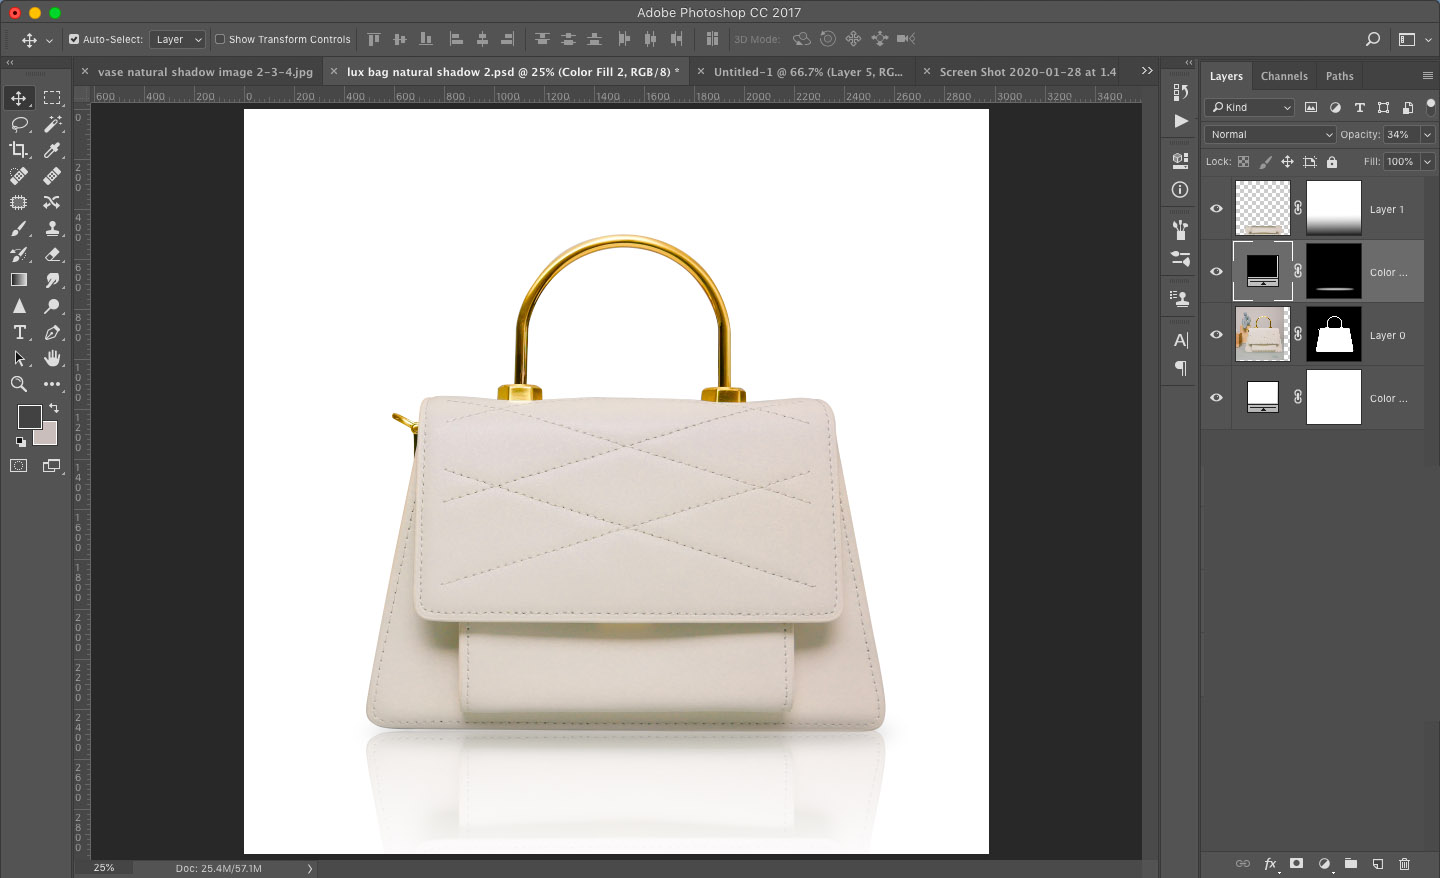
10. Brush out on the sides and top of the bag around the reflected bag’s base. Continue to refine the bag’s reflection by brushing out more to make it look most natural.
11. Save the file and you are done!
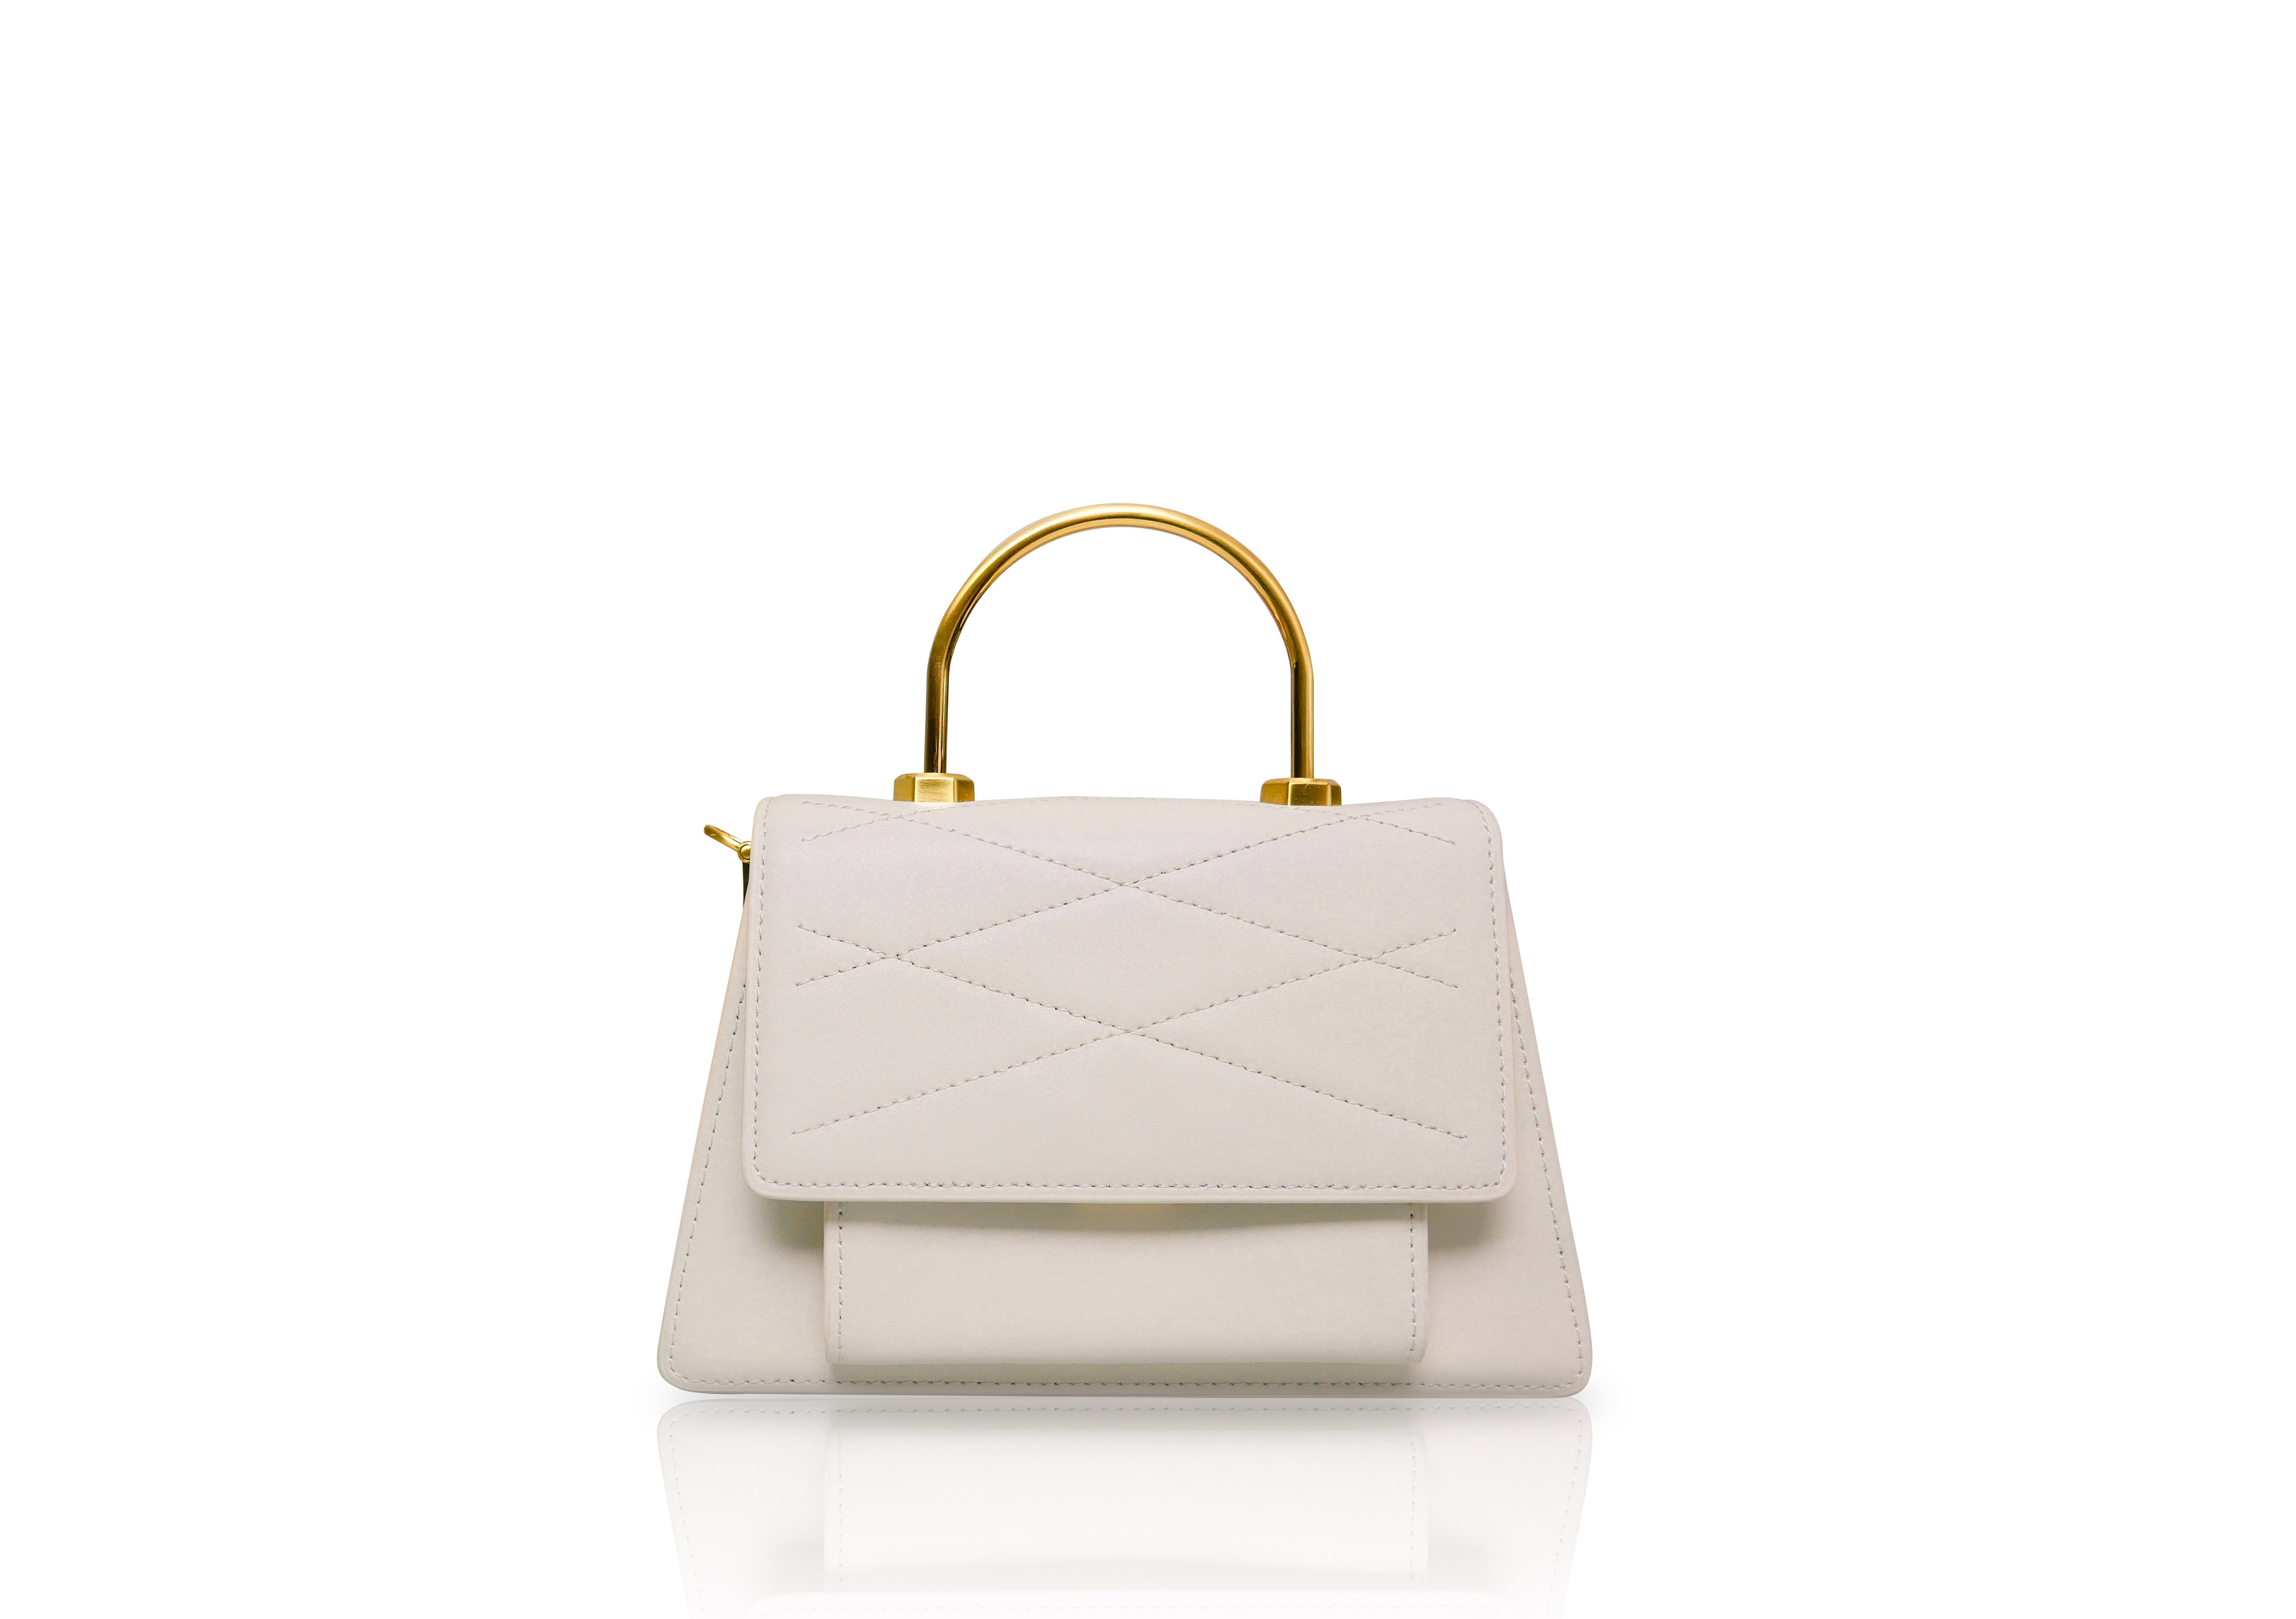
From these simple tutorials, you can see that adding shadows on photos is easy. This type of effect is not overly theatrical but they create the needed drama to make your product photos more noticeable.
Using a Retouching Service to Add Shadows
While it seems like a highly doable task, adding drop shadow in Photoshop can be time-consuming. It is not cost-efficient knowing that there are many other essential tasks in the business that you can do instead of minding the post-processing of product photos.
You have the option to assign somebody on your team to take care of this task too. The risk of not having the best results, however, is high since you are not sure if your editor has the skills to do it.
The best solution for this is to hire a professional team that has both knowledge and expertise in applying shadows on product photos. Furthermore, outsourcing this task will not only ensure a professional touch but will also give you more time to work on the more important aspects of the business.
Ephotovn is a leading company when it comes to enhancing product photos. We have expert editors who can expertly add drop shadow in Photoshop, as well as creating natural and reflection shadows.
Ephotovn offers you fast, high-quality and professional image editing services!
- We have strong photo editing skills. Our team of editors are highly skilled and trained to deliver only the best!
- We have a wide-range of services.We offer you services that will surely cater to your needs.
- Test our skills now. Send us a photo to test our abilities first. It’s for free!

