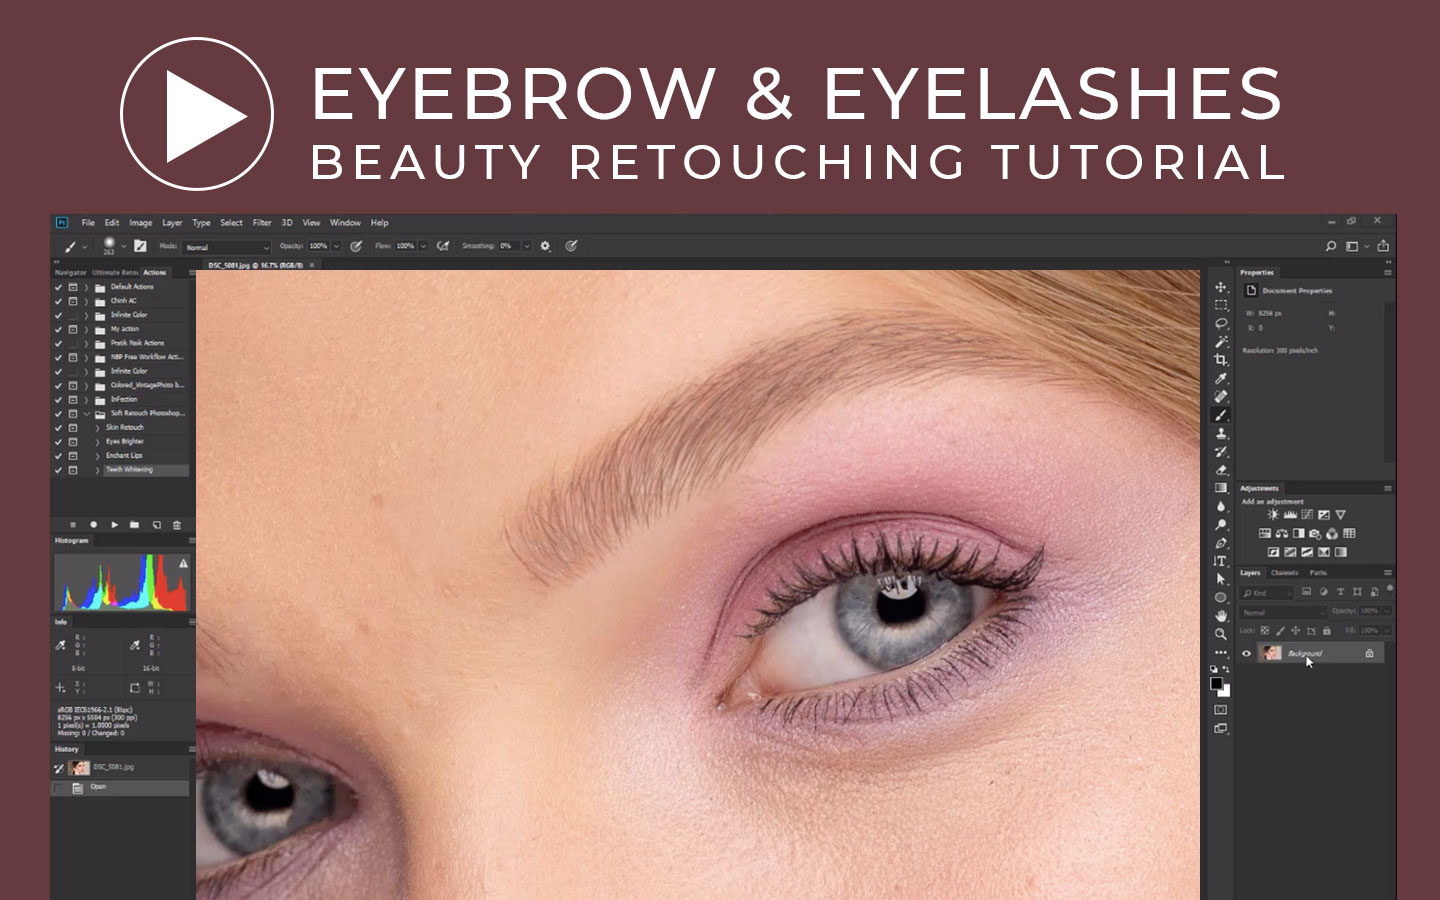
One of the main focal points on the face of a headshot or portrait image is the eye area. In general photo retouching, one of the particular features of the face that are often overlooked are minor elements such as the eyebrows and eyelashes. Apart from the eye itself it is often missed. But in beauty model or high-end retouching, these are the delicate details that should not be overlooked.
Emphasize those eyelashes and cleanup mascara smudges! Make the eye area stand out just right. Keep it natural with the aid of this photo retouching technique in Photoshop. And get it done in a few minutes!
In this photo retouching tutorial, you will be able to:
1. Use of brushes and Apply them
2. Fix, Draw and Enhance eyelashes and eyebrows easily.
3. Learn how to Add and Arrange the eyelashes uniformly.
4. Making them look natural as possible.
In Portrait or Model retouching, the Eyelashes requires focus and a steady hand. This process employs a combination of the Brush Tool, Clone Stamp, Spot and Healing Brush and Patch Tool.
Key Points to Remember when Retouching Eyebrows and Eyelashes
1. Constantly Adjust your brush
2. Keep brush lines Clean and Natural
3. Eyelashes and eyebrow color vary
4. Keep in mind Uniformity and Consistency
5. Focus. Be patient
Tip:
It’s always a good idea to remove blemishes around the eye area like acne, eyebags, wrinkles before proceeding with this process.
Step 1:
Open up the Image.
Step 2:
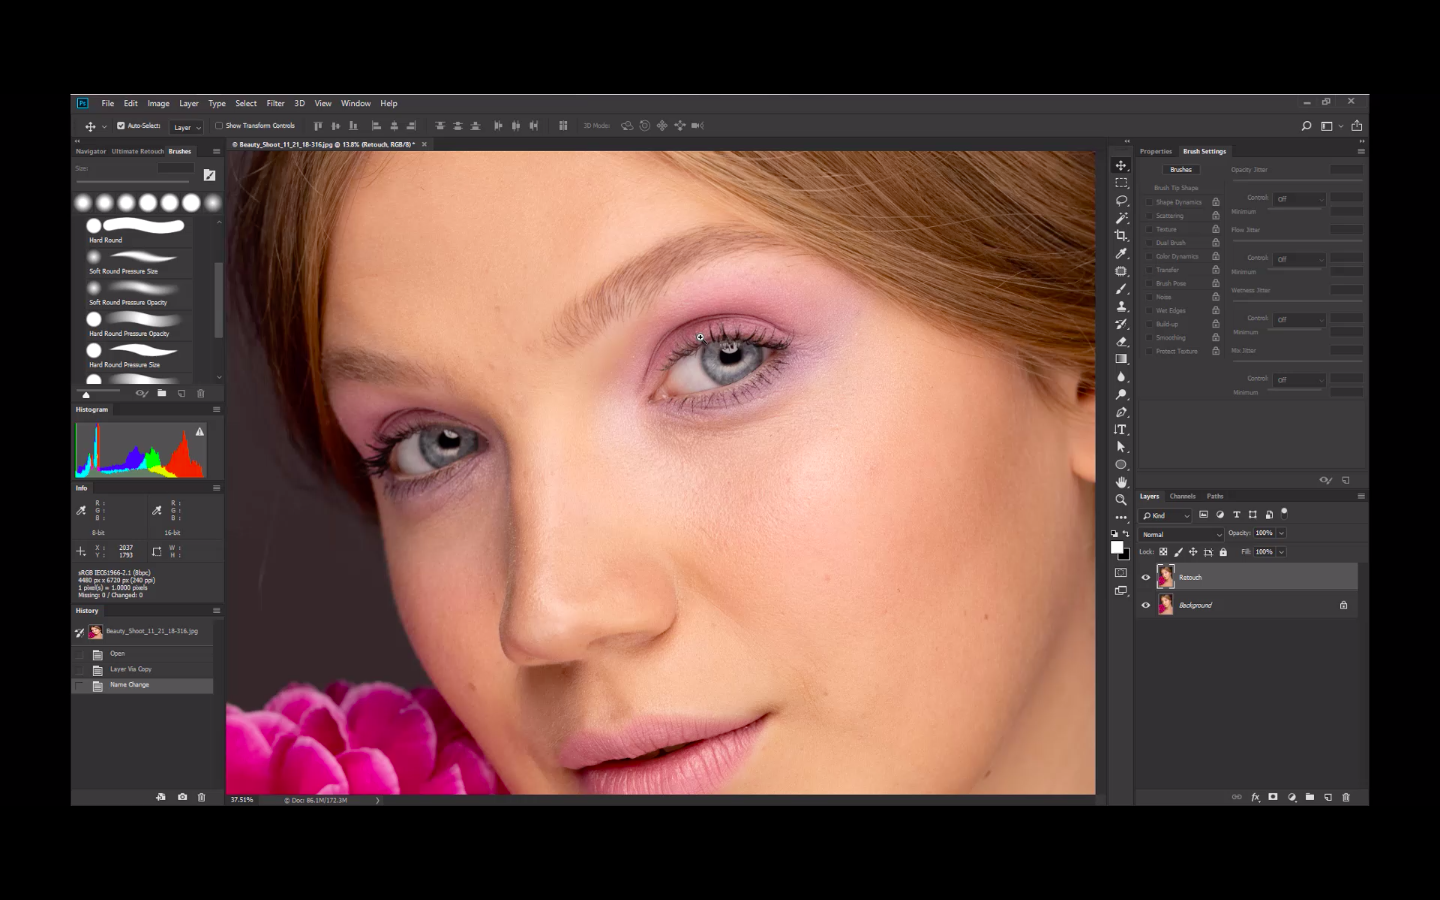
Make a copy or Duplicate the Image ( Ctrl+J ). Rename the layer to Retouch.
Step 3:
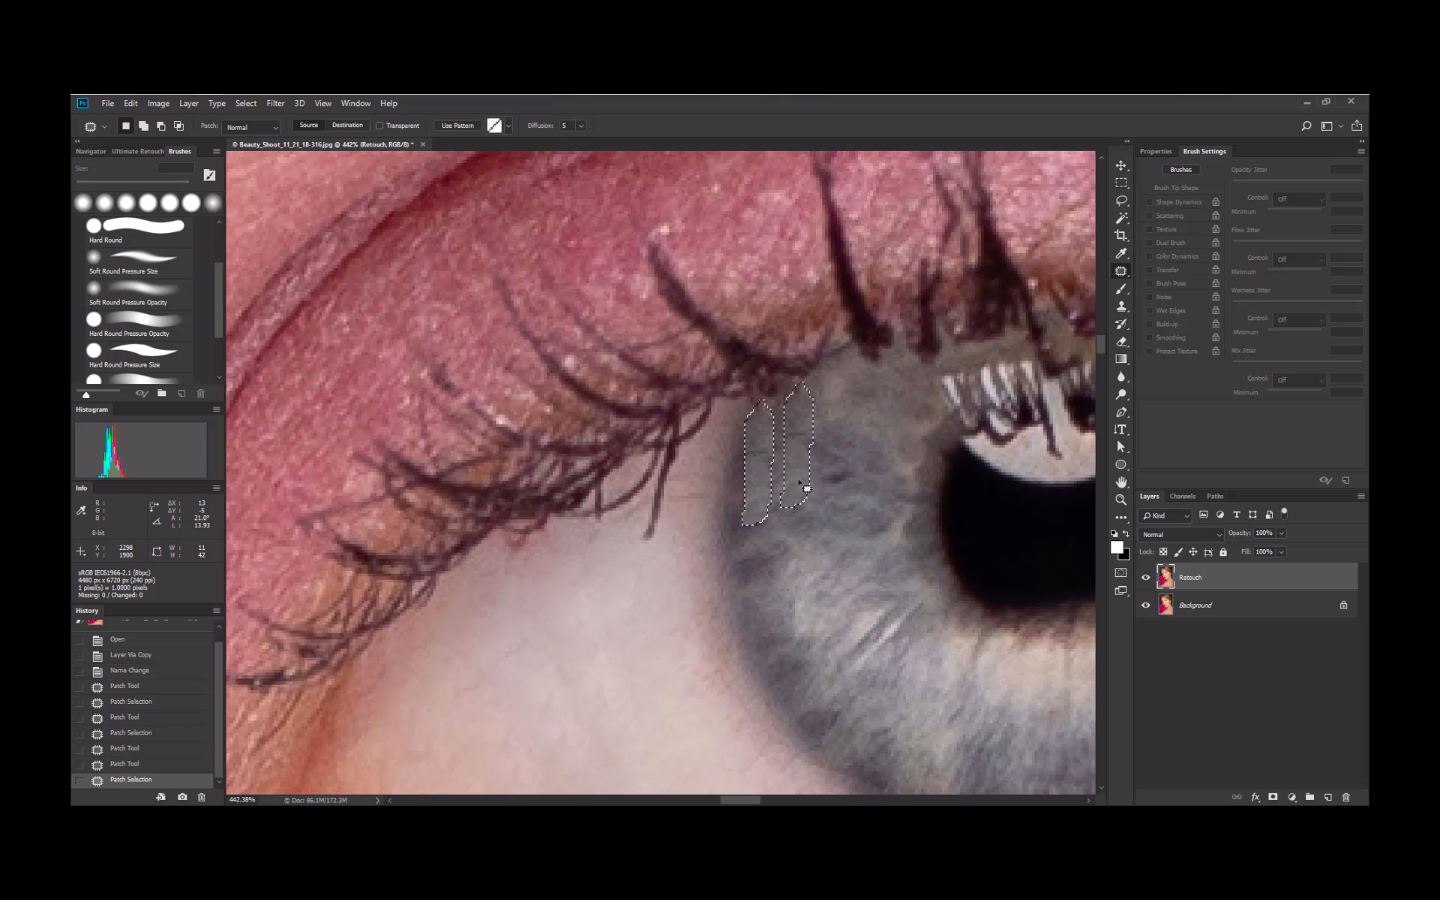
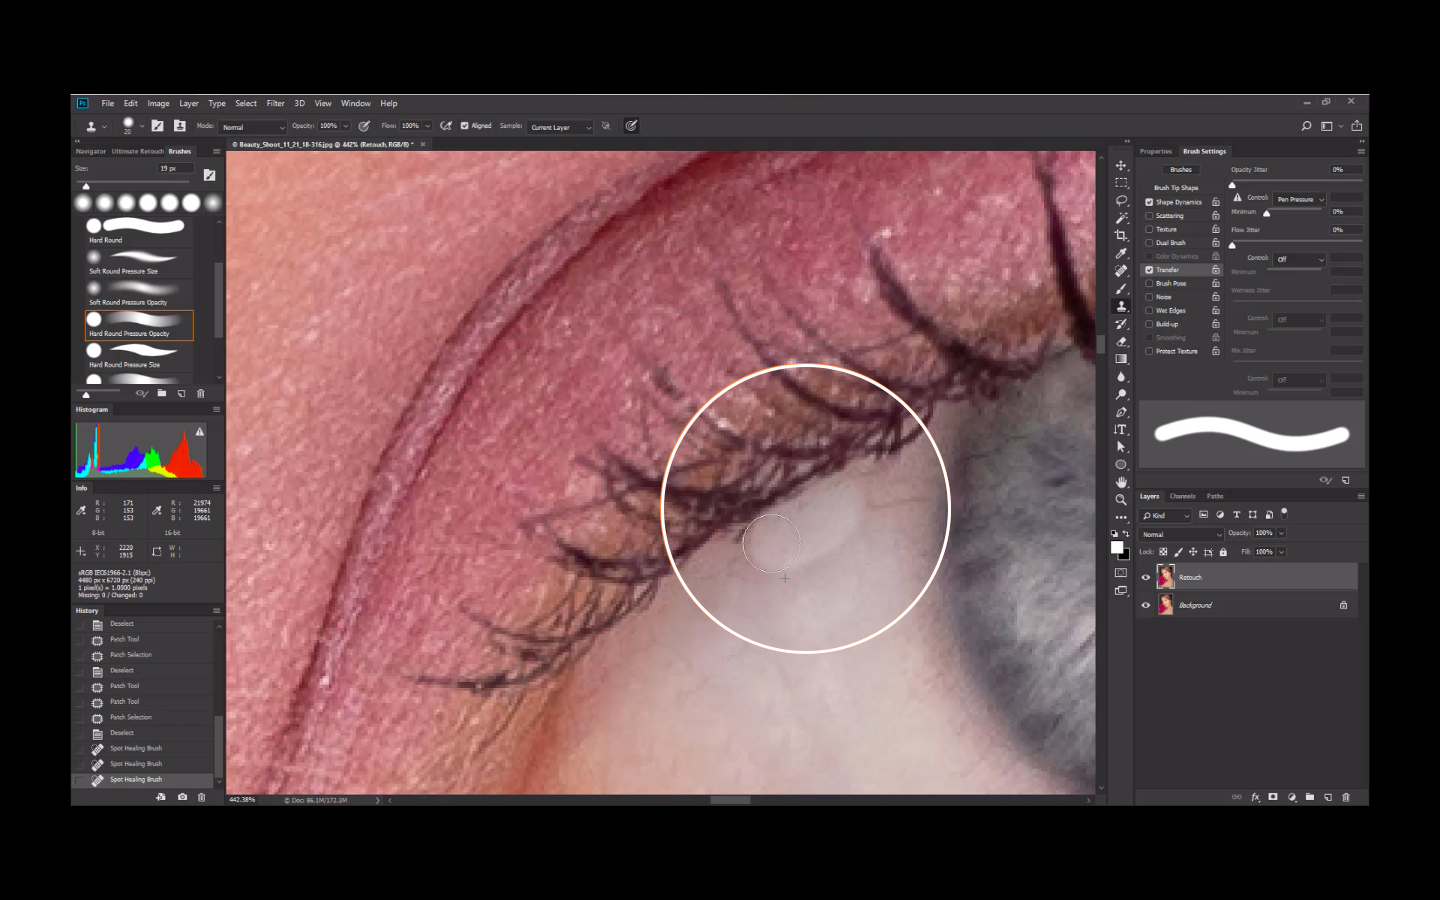
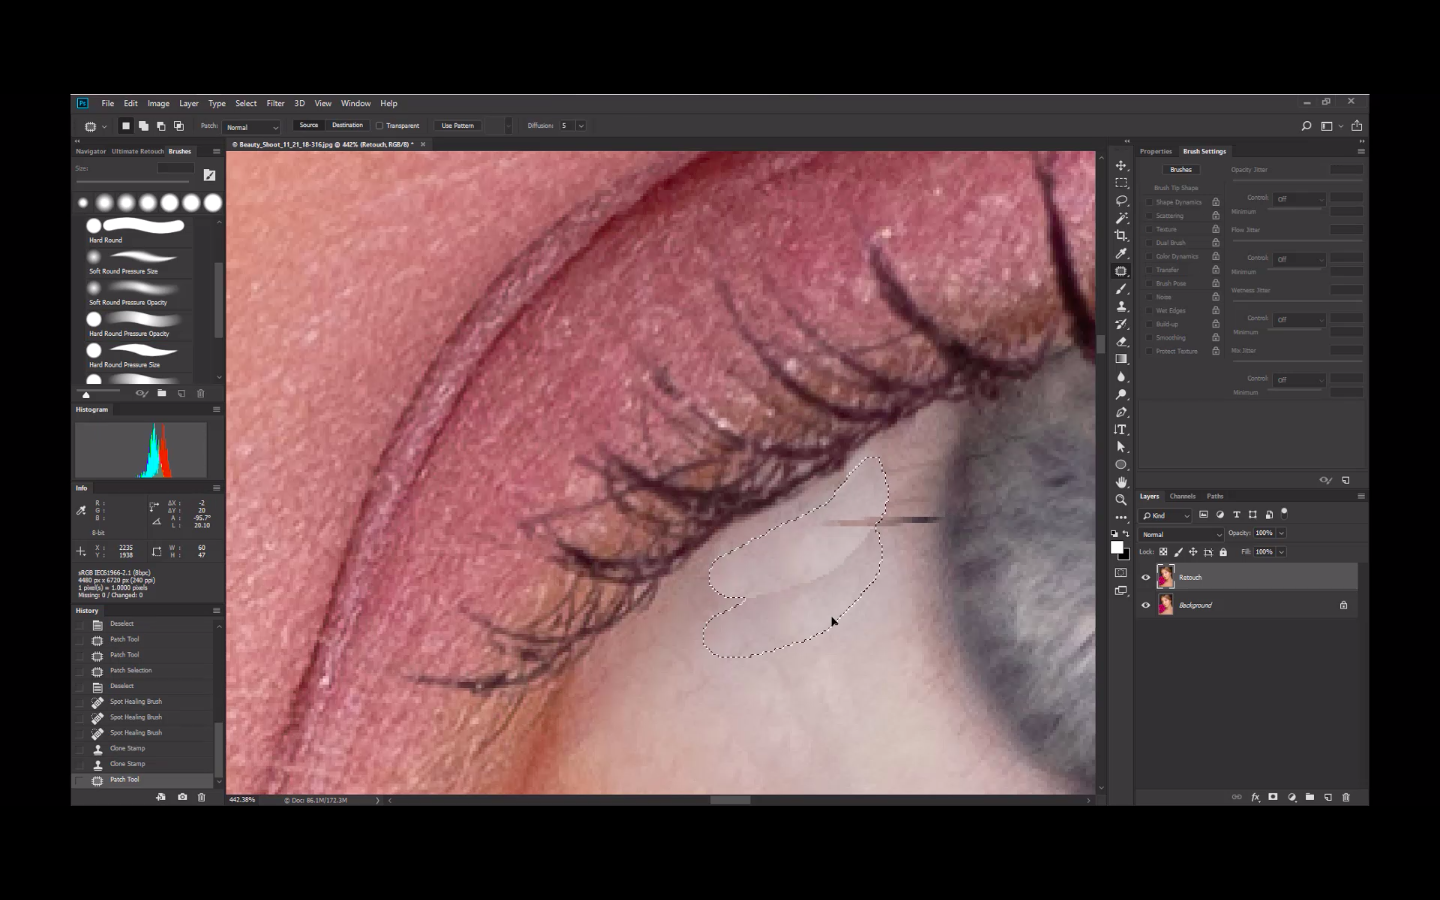
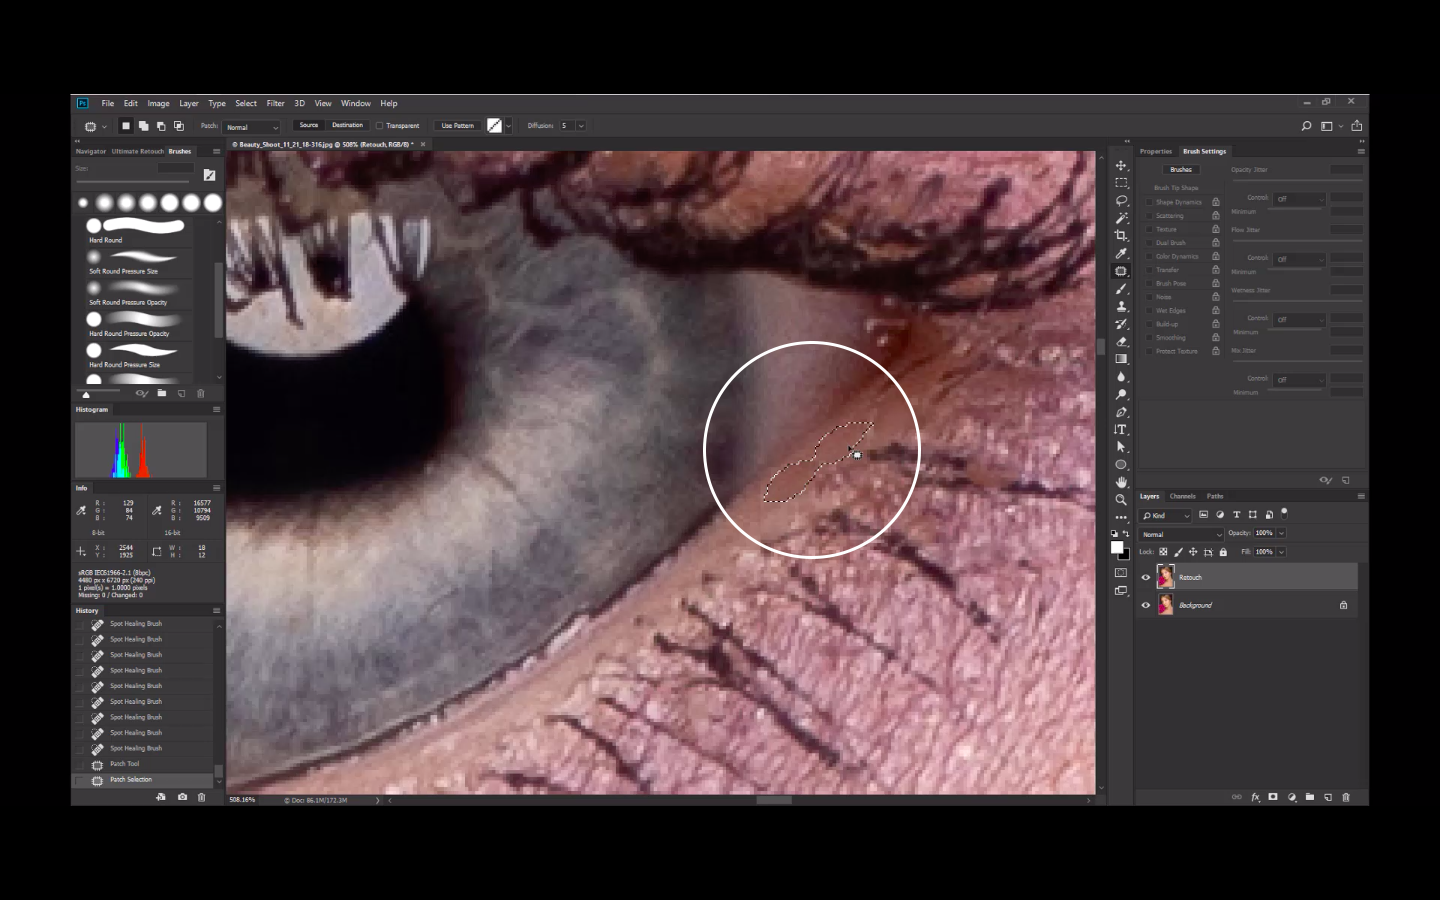
Zoom in to the eye area. On the eyes, remove excess hair covering the Iris. Cleanup on the edges of the white part around the eye as well. Use Patch Tool, Healing brush or Spot Healing Brush whichever is needed.
Step 4:
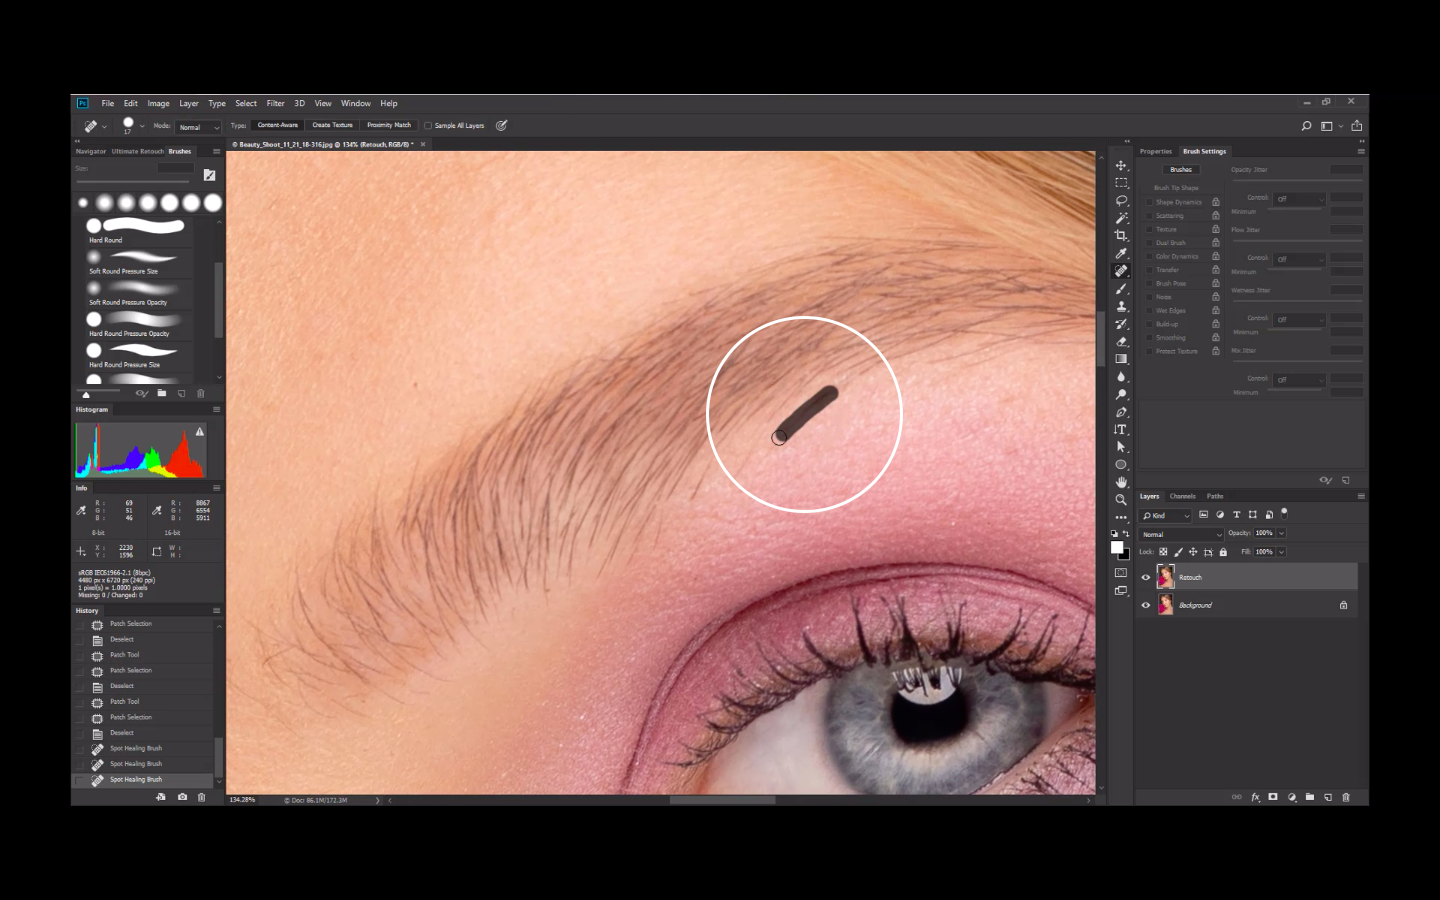
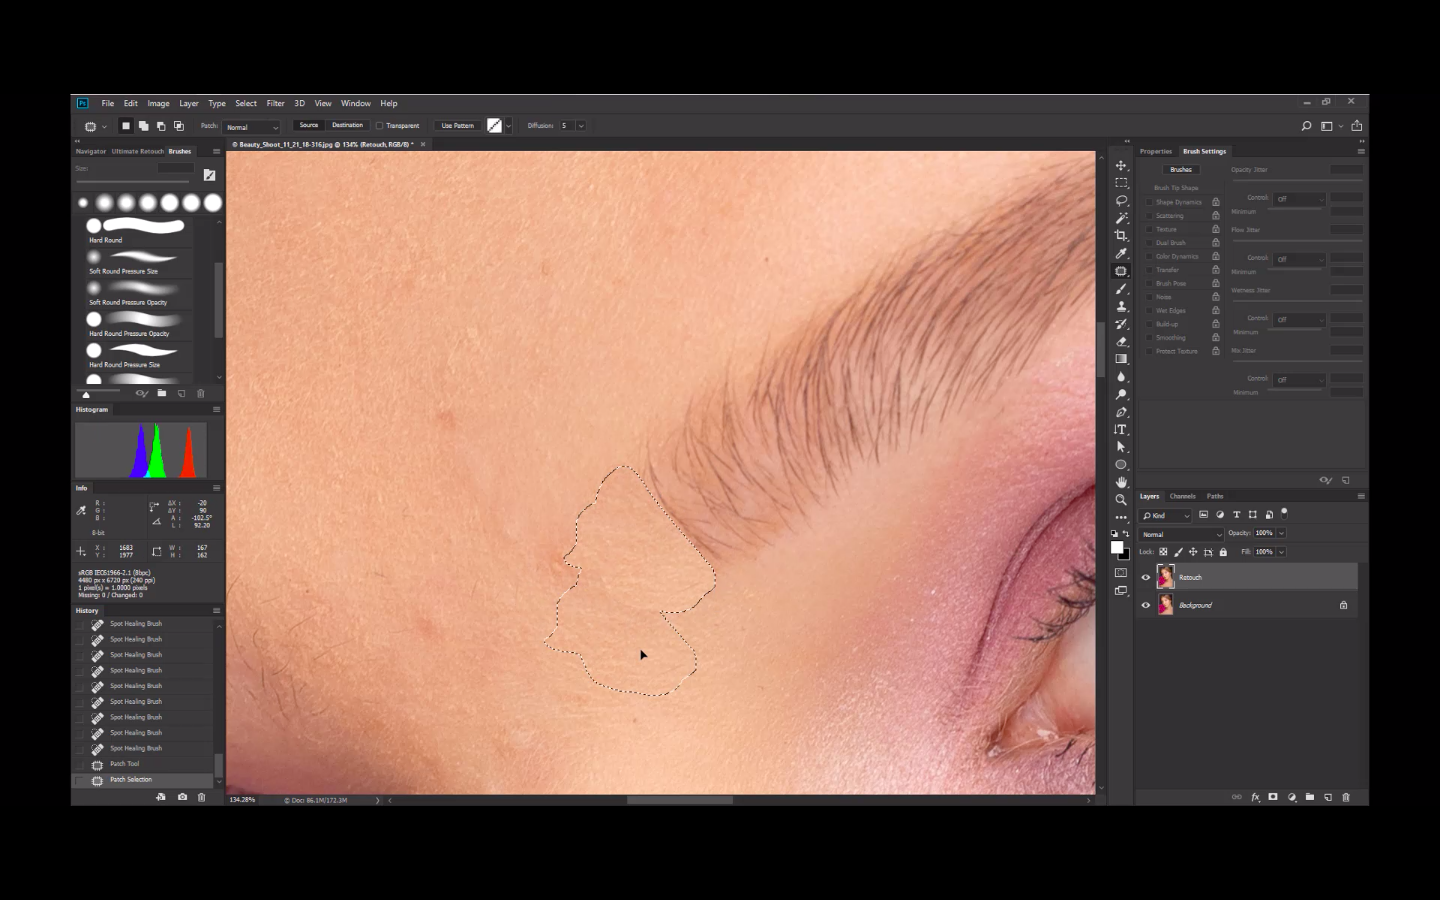
On the Eyebrows, Shape or virtually trim it by removing excess hair below and above the eyebrow line use a Healing Brush Tool. Utilize the Patch Tool when dealing with excess hair in the center edge part of the eyebrow just above the nose line.
Step 5:
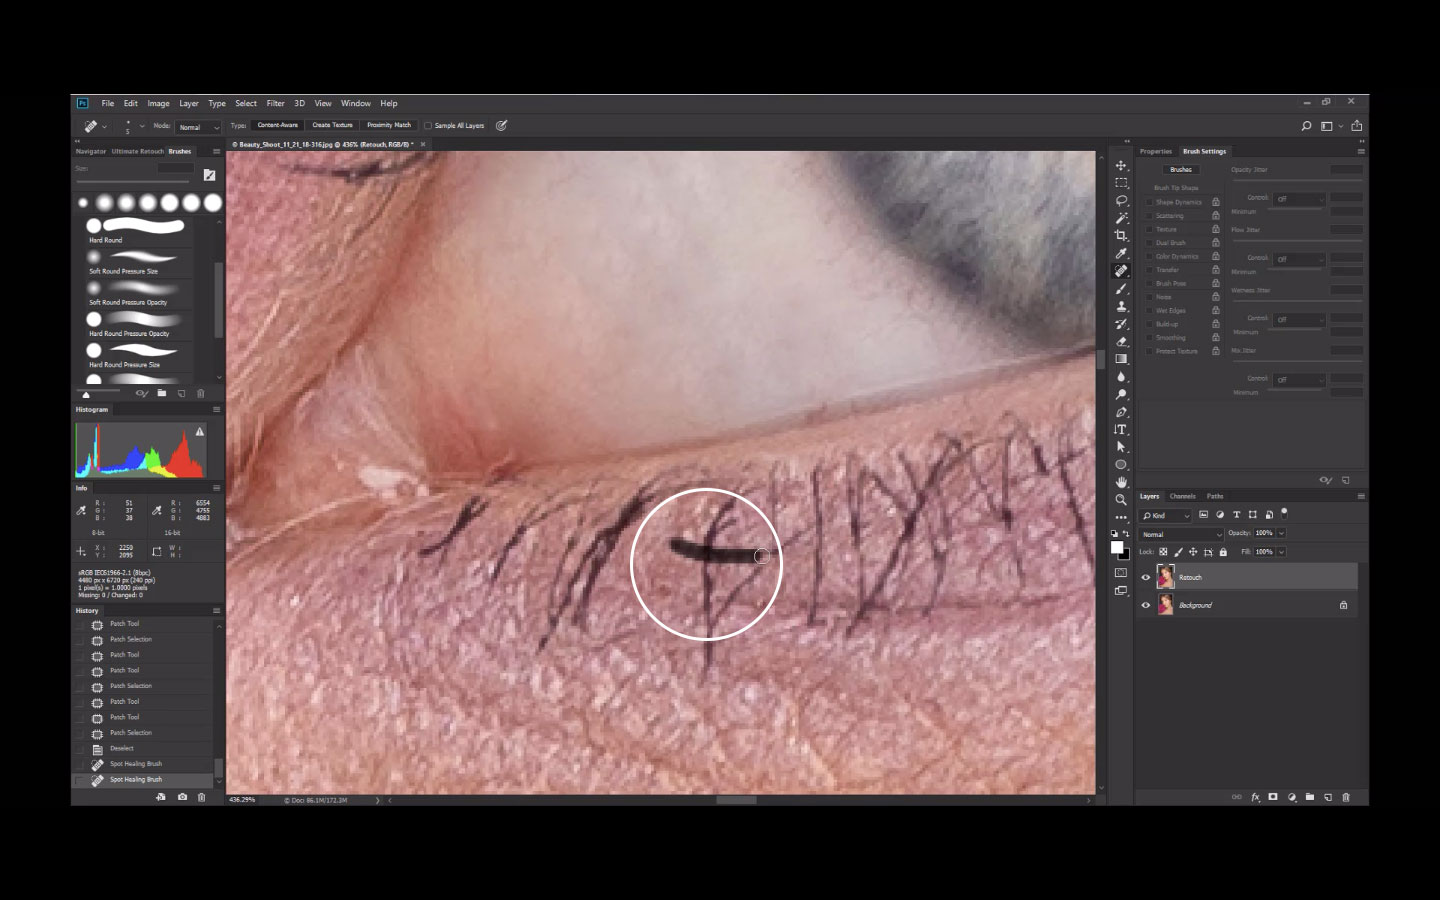
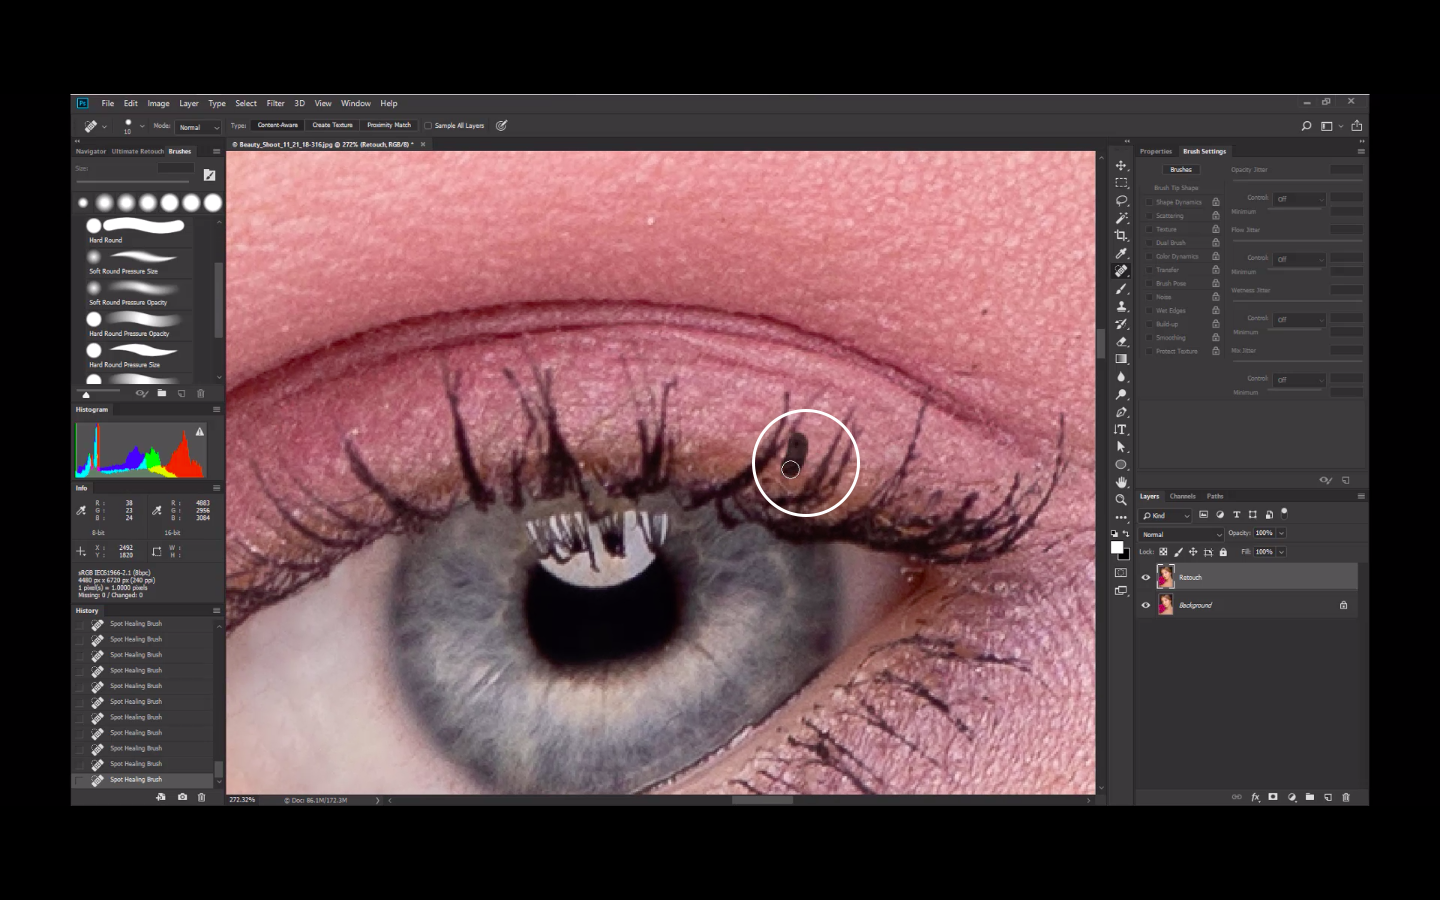
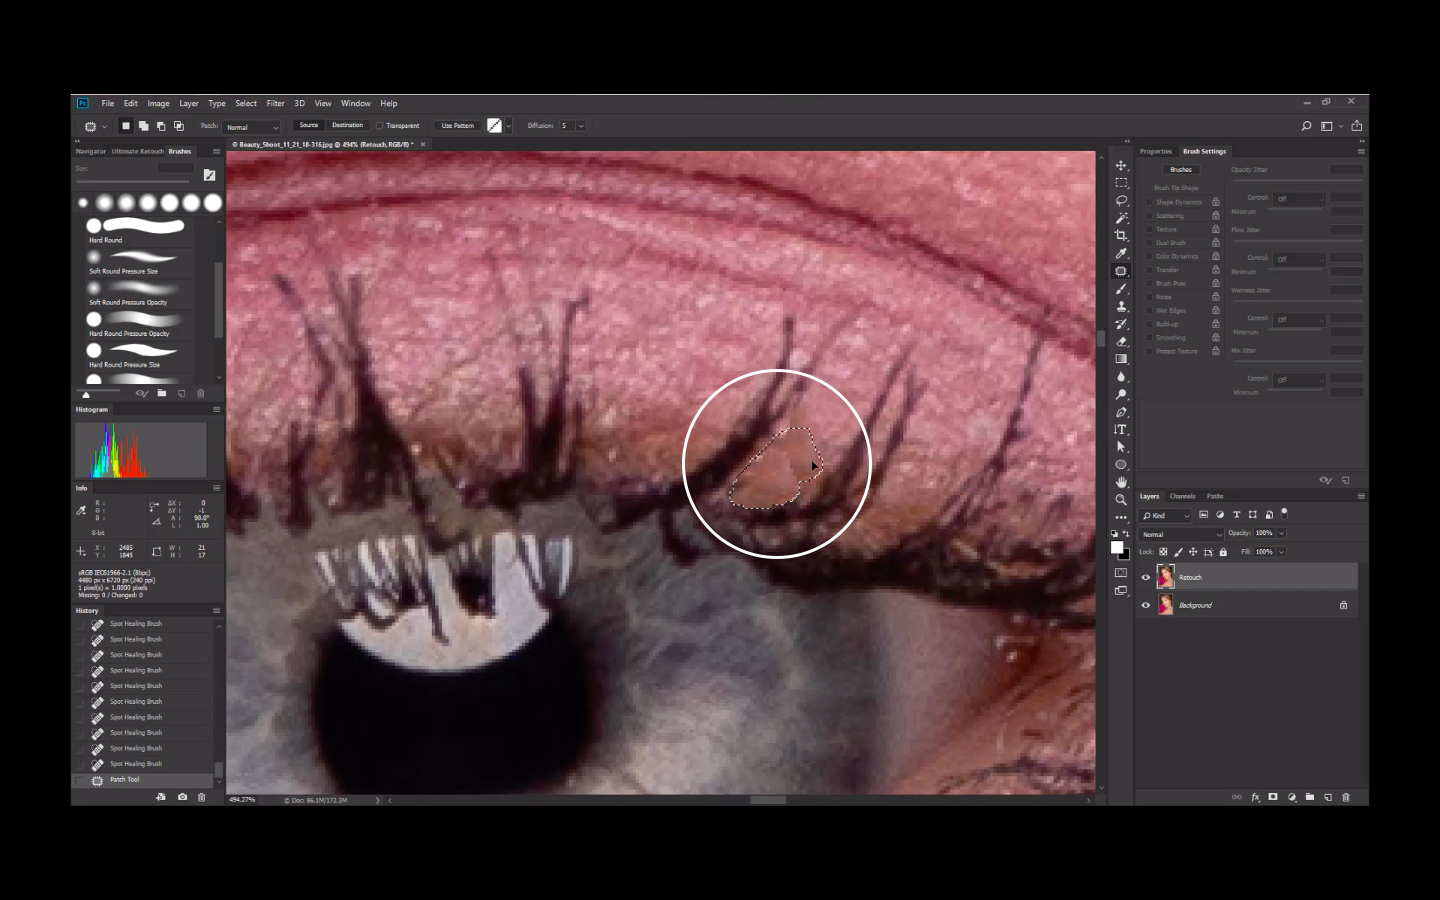
On the Eyelashes, Remove the lashes that are going against the flow (horizontal) or overlapping others. Clean up the in betweens of the lashes. Heal the blots of messy mascara. This way, the eyelashes will appear uniform and neat. Don’t forget to clean up the eyelids as well.
Step 6:
Create a New Layer. Rename to Eyelashes.
Step 7:
Select the Brush Tool.
Step 8:
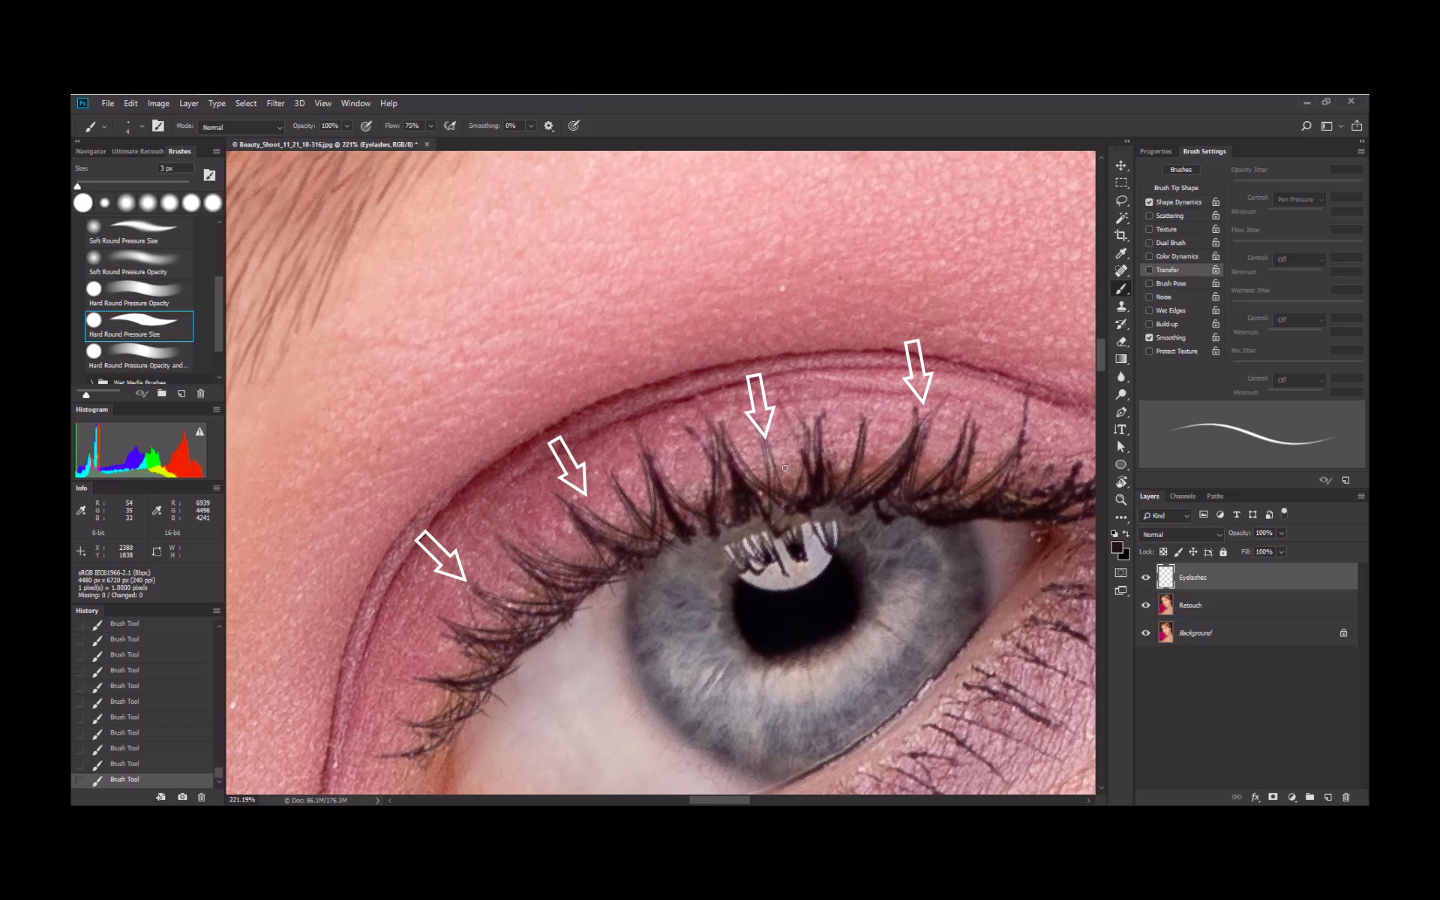
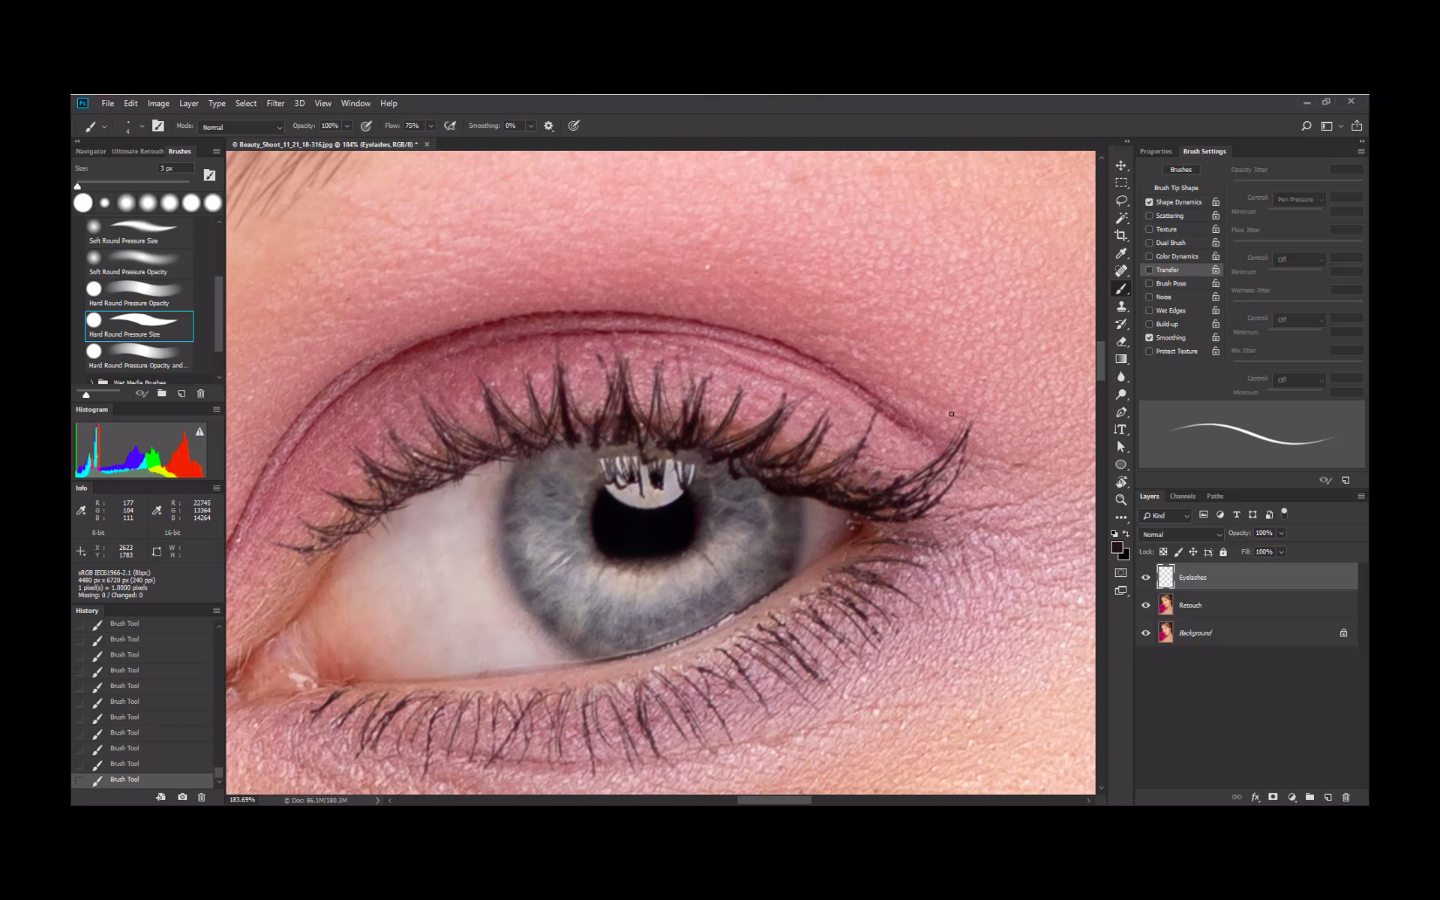
Choose the Hard Round Pressure Size. Set Brush size to 3 pixels. Select Eyedropper Tool. Pick a color from the nearby eyelash. Set Flow to 75% in the brush properties panel above.
Step 9:
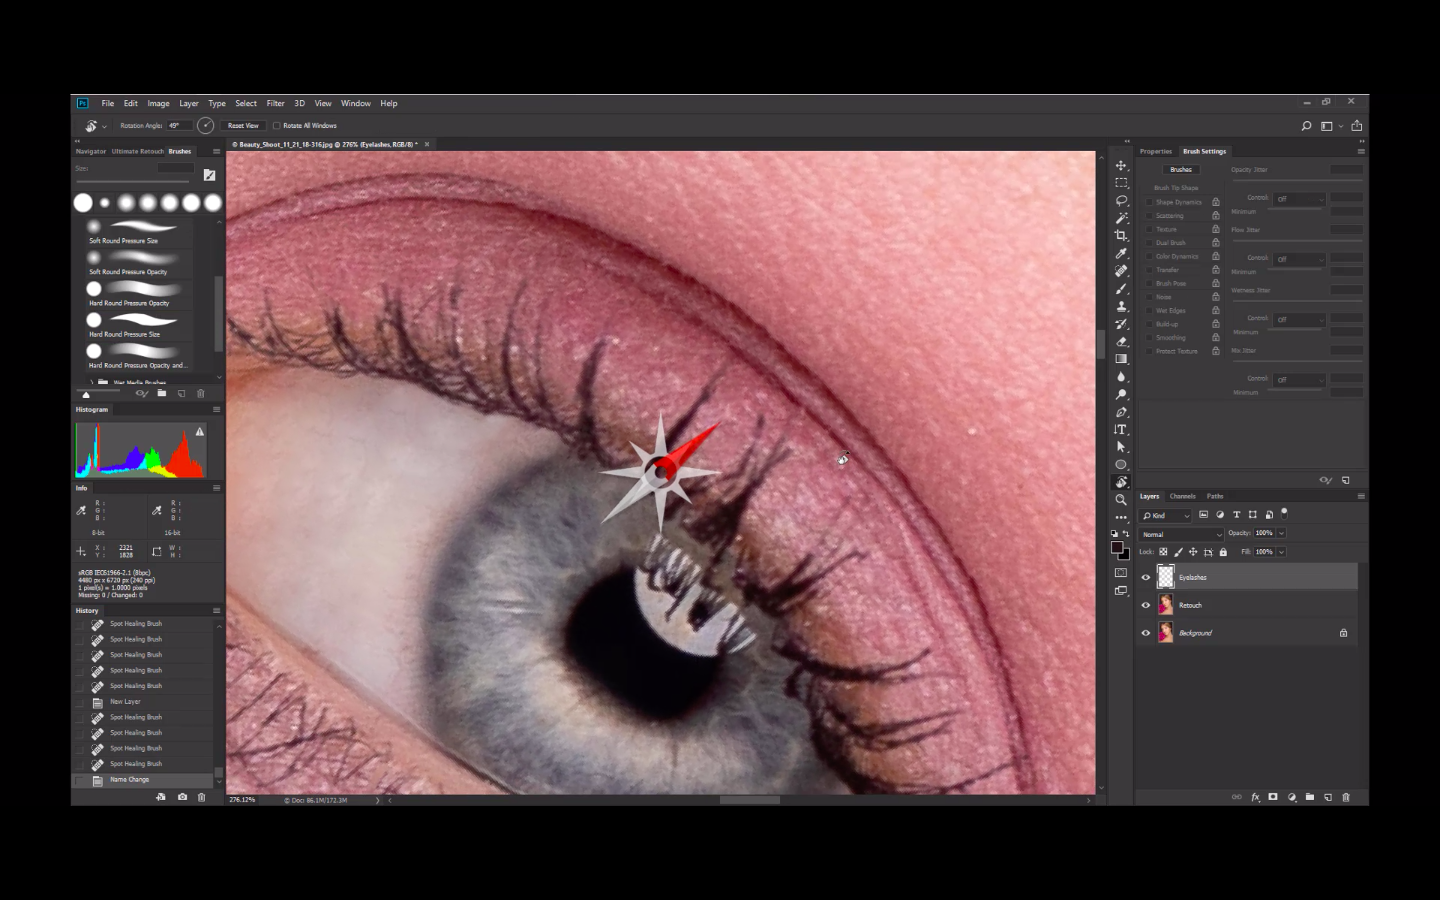
Now, Rotate the image to 50 ° degrees . Do this by hitting the letter “R” on your keyboard, then click and drag the mouse.
Step 10:
Then, be ready to apply the lashes. Work with the upper eyelids first.
Step 11:
Draw the eyelashes by brushing down from the tip of the eyelashes going to the line of eyelid where the starts to grow.
Step 12:
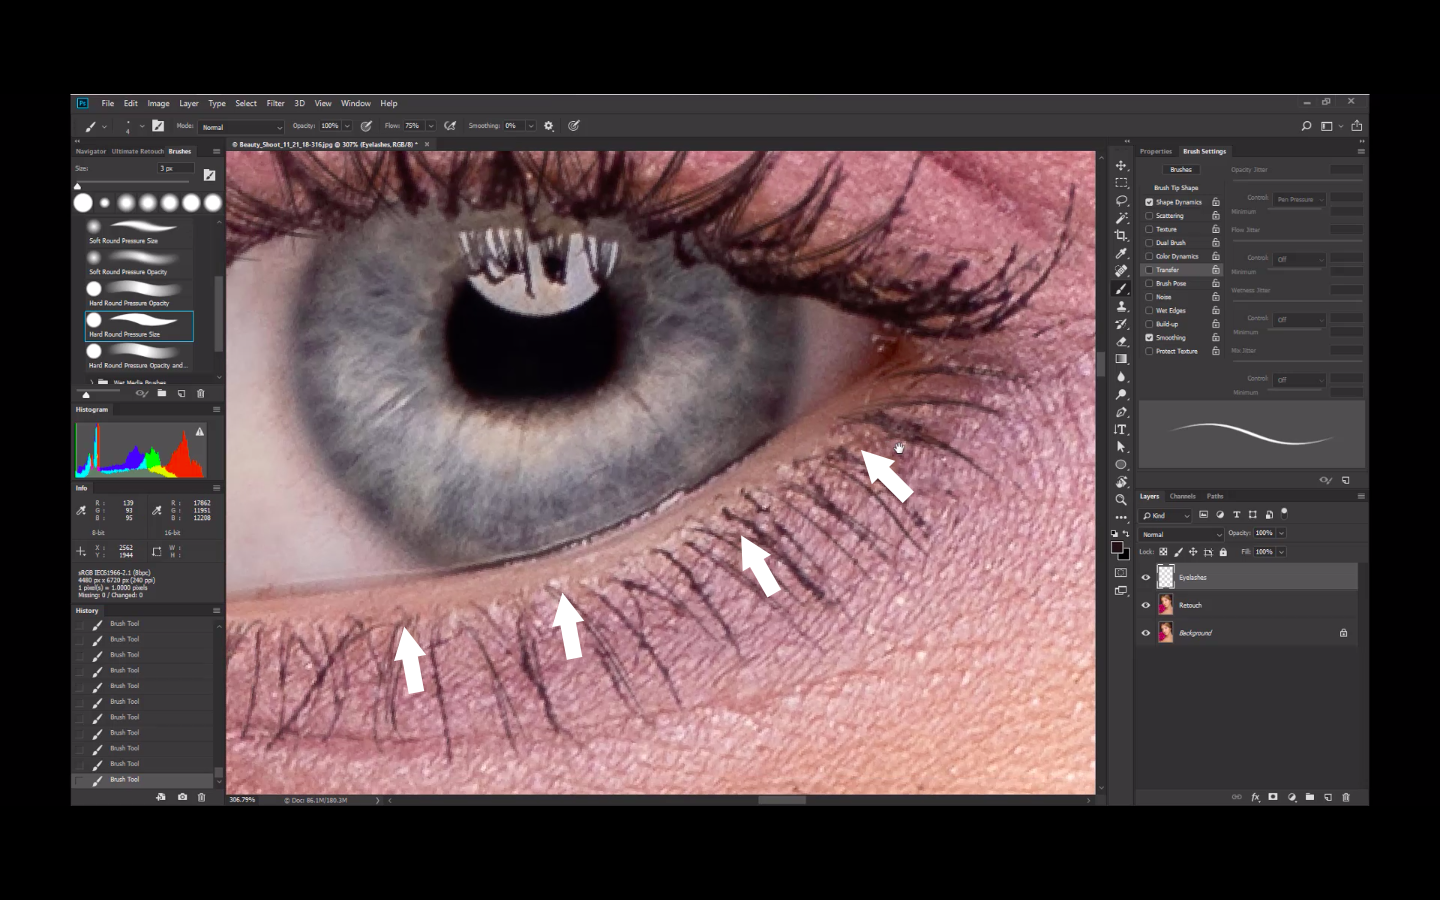
Brush away quickly in a slightly arc shape following the natural flow of the lashes to create a uniform appearance. Adjust the brush size by clicking on the [ ] to decrease/increase size and { } to decrease /increase brush hardness. Also, Zoom in and out to check. Also Rotate as you work your way around.
Step 13:
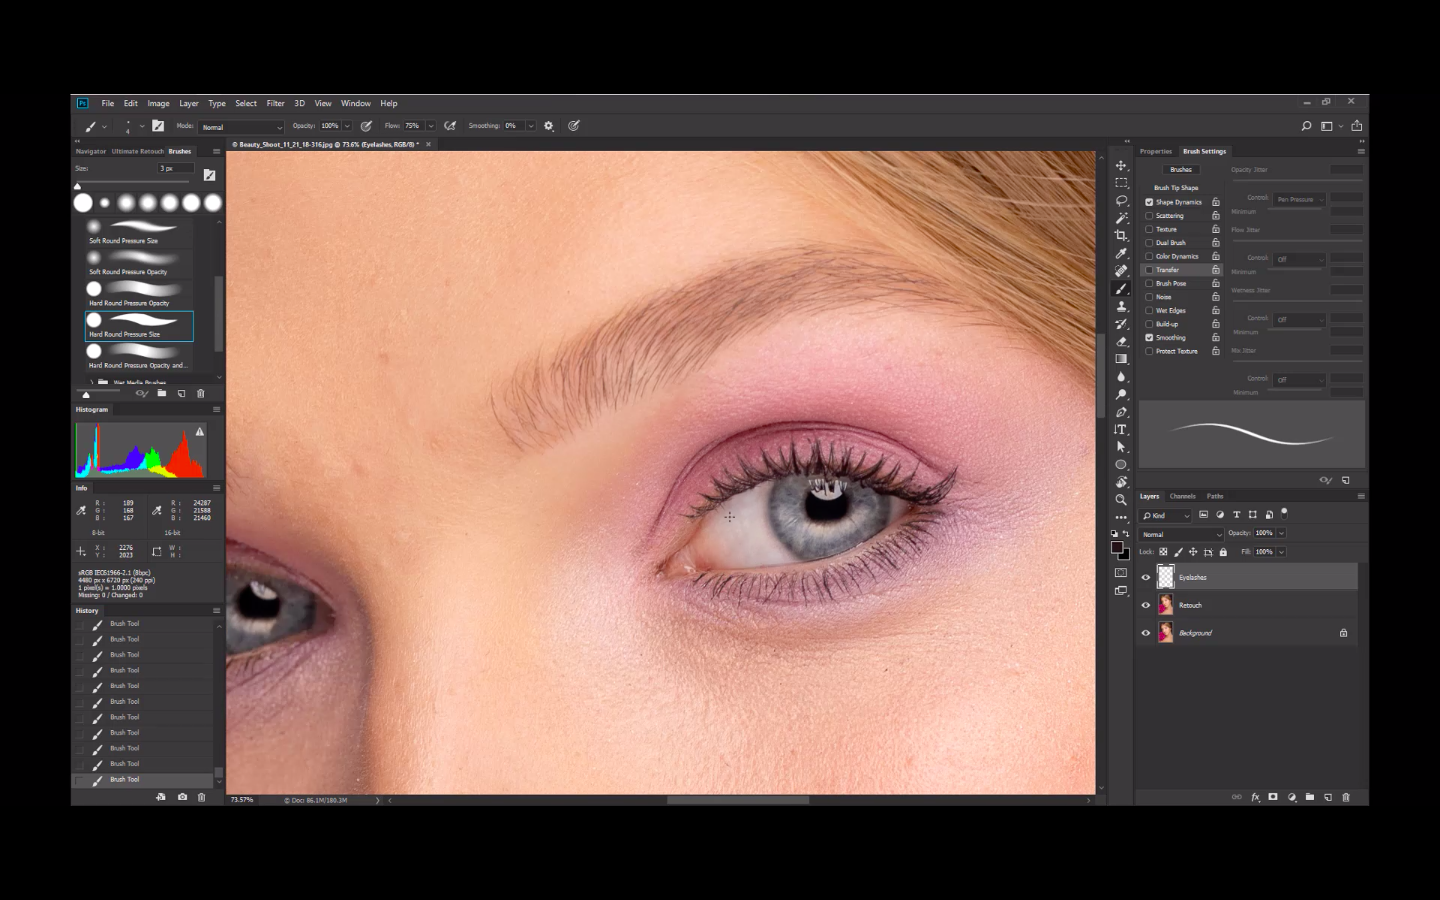
Check your progress by turning on/off the on the Eyelashes Layer. See the difference from the original image (background layer).
Step 14:
Do the same process with the eyebrows. Start with Step 6 to 13 .
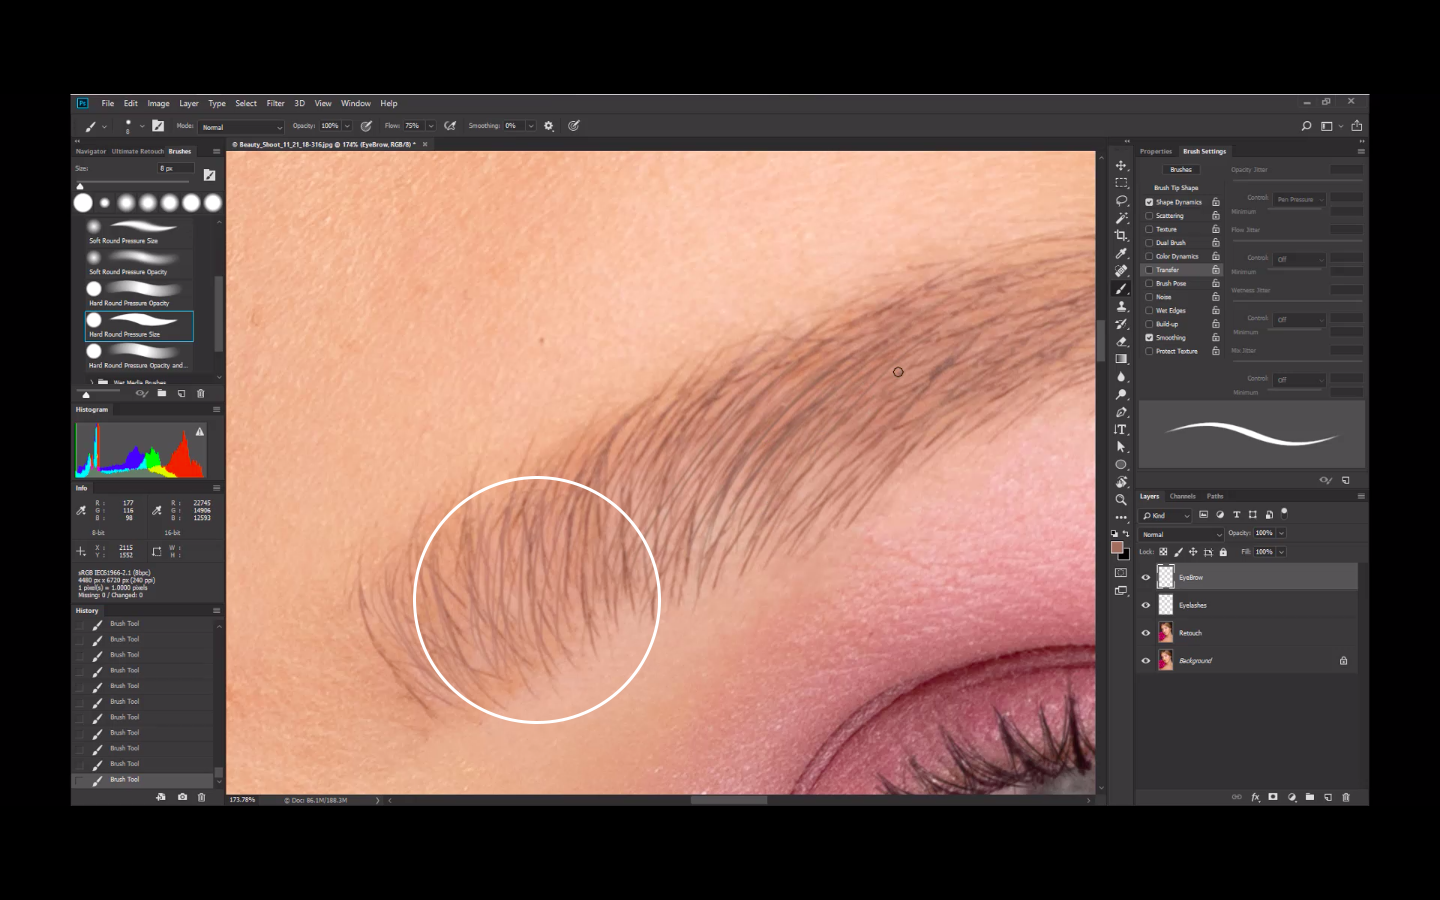
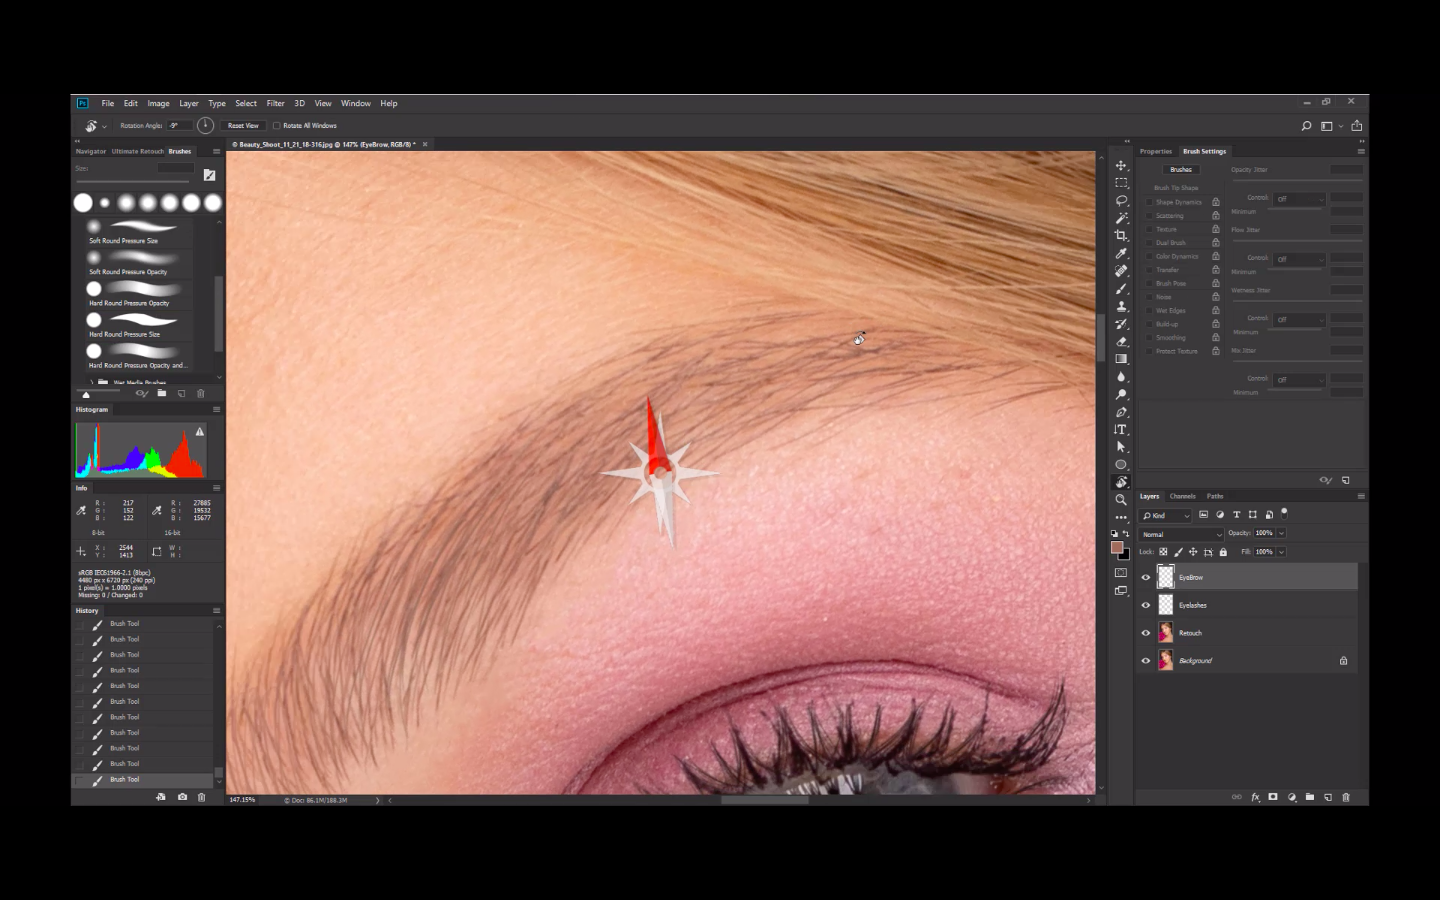
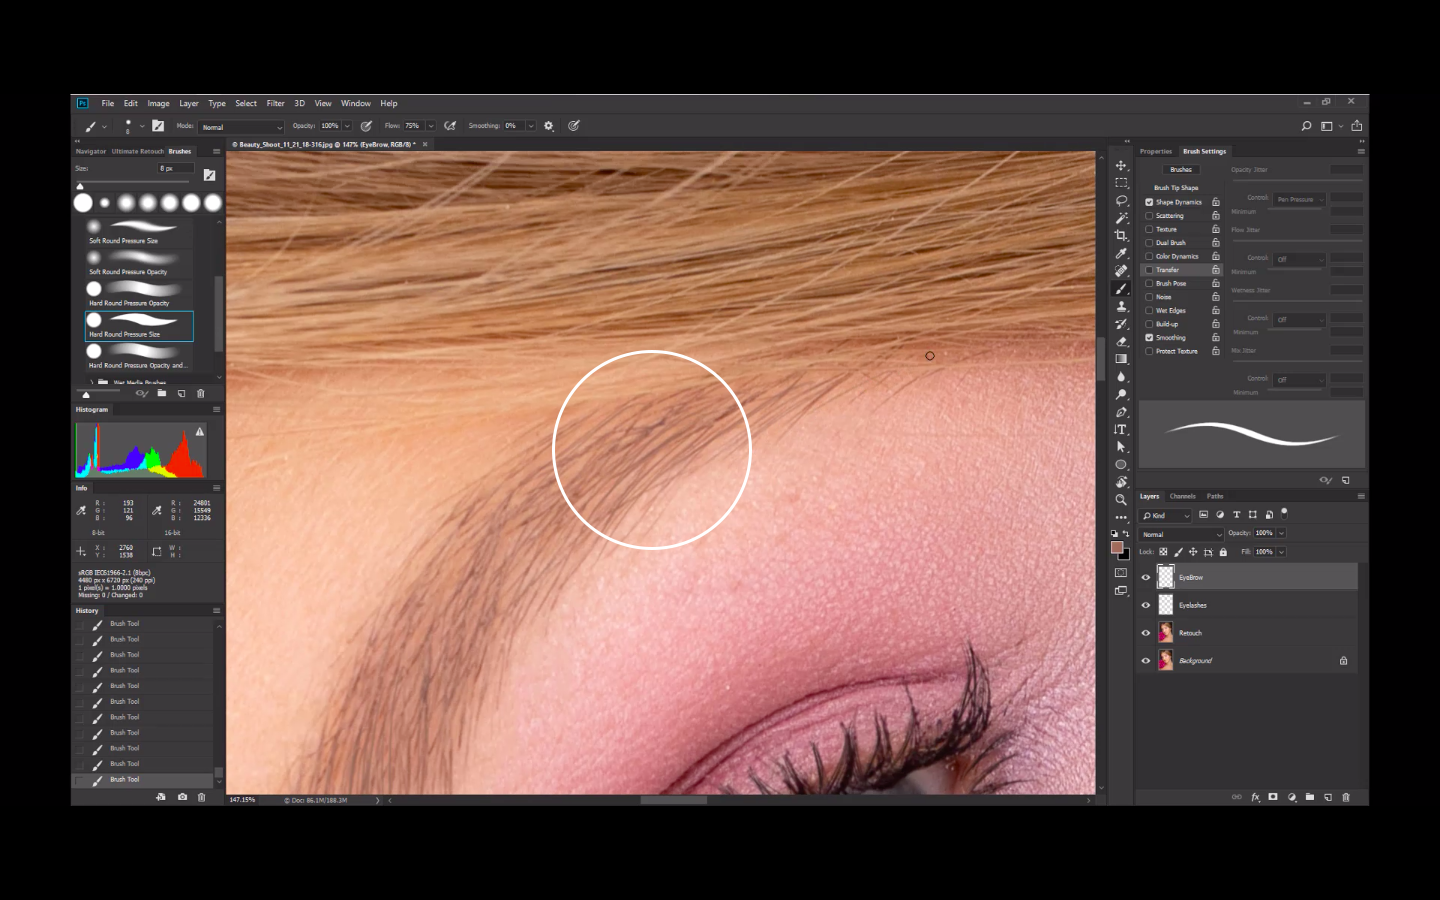
Now, we hope that you can fix, draw and enhance eyelashes and eyebrows easily with the help of this photo retouching process. See the Photoshop Video Tutorial for more visual detail editing of these steps.
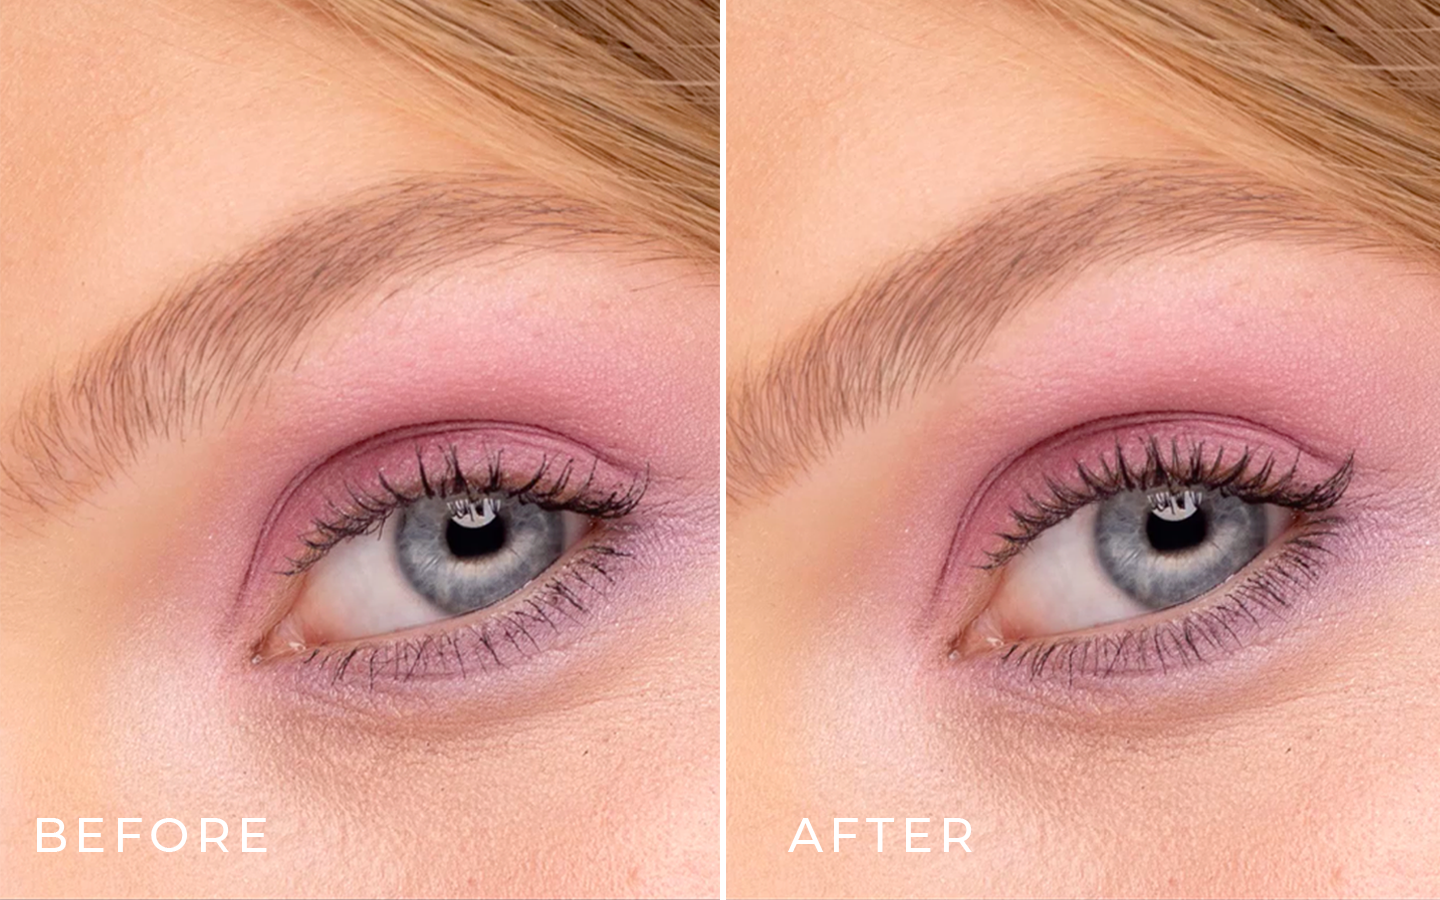
Throughout post-production of beauty retouching, these small details are mostly the things that’s given careful attention and time. Minding these could make a whole lot of difference in the appearance of the overall subject or muse in a photo. And it is vital in the aspect of quality high-end retouching.
Ephotovn pays special attention to these details because they matter. For precision and exceptional photo retouching service these are your go to guys. See for samples of their work. Request for a free quote! Or Upload an image and have it edited for FREE!

