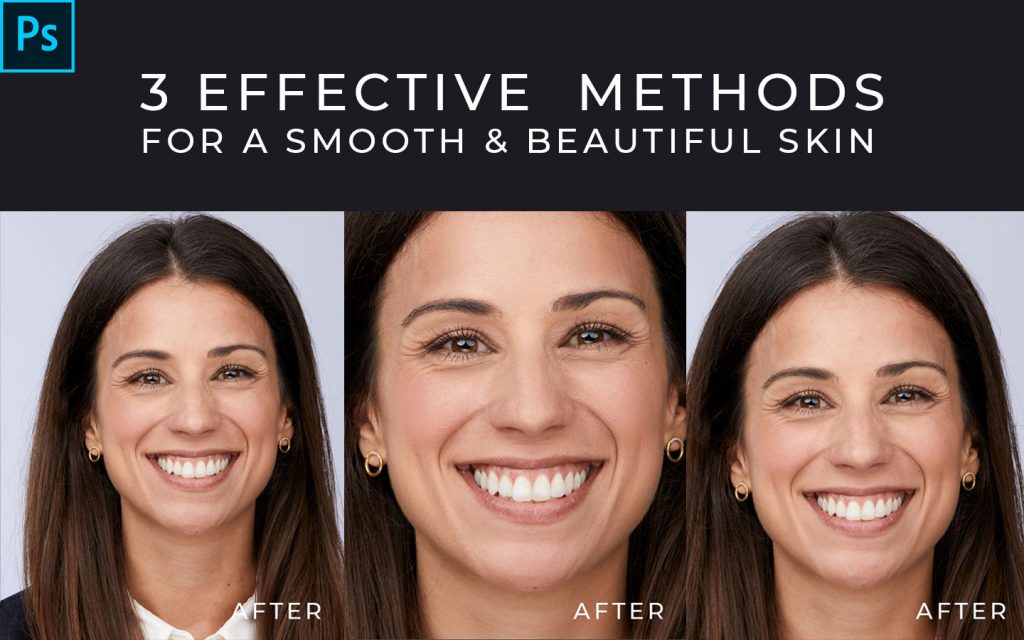
3 Effective Methods for a Smooth Beautiful Skin – A Photo Retouching Tutorial
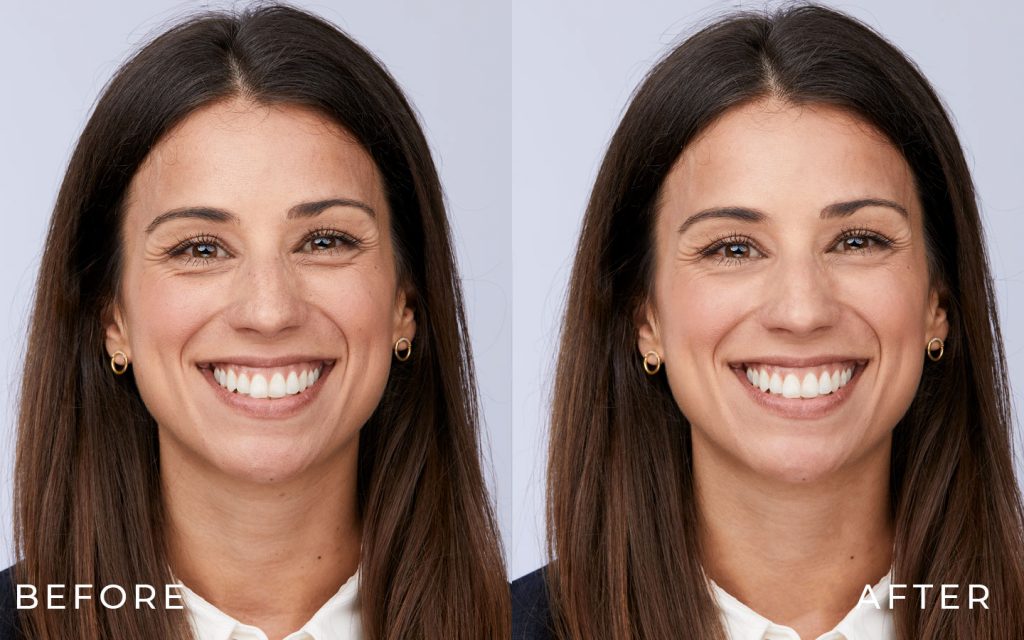
To obtain beautiful smooth-looking skin on a subject in photographs, completely descent photo retouching tutorial could get in handy. Retouching skin in Photoshop seem difficult at first, but is surprisingly easy. In addition, there are great techniques that could really help. What you need is a little time for this small lesson.
Keeping the edit to a minimal creates a more realistic and natural look and feel, in a way. Thus, always consider preserving the natural skin texture in overall retouching process. Good makeup and proper lighting during photo shoots are the main constituents of a great shot. It’s definitely an essential photography tips to keep in mind. But photo editing and image retouching as a matter of fact, fine tunes and completes it.
What you’ll learn from this Photoshop tutorial are three effective skin retouching techniques. That will ultimately be sufficient enough for your photo editing needs. You’ll also discover which approach is beneficial to some situations you will encounter during your photo retouching. And by the end of this tutorial, you’ll learn two tricks in retouching skin that you may apply for the final polish.
What and When to use these 3 Methods?
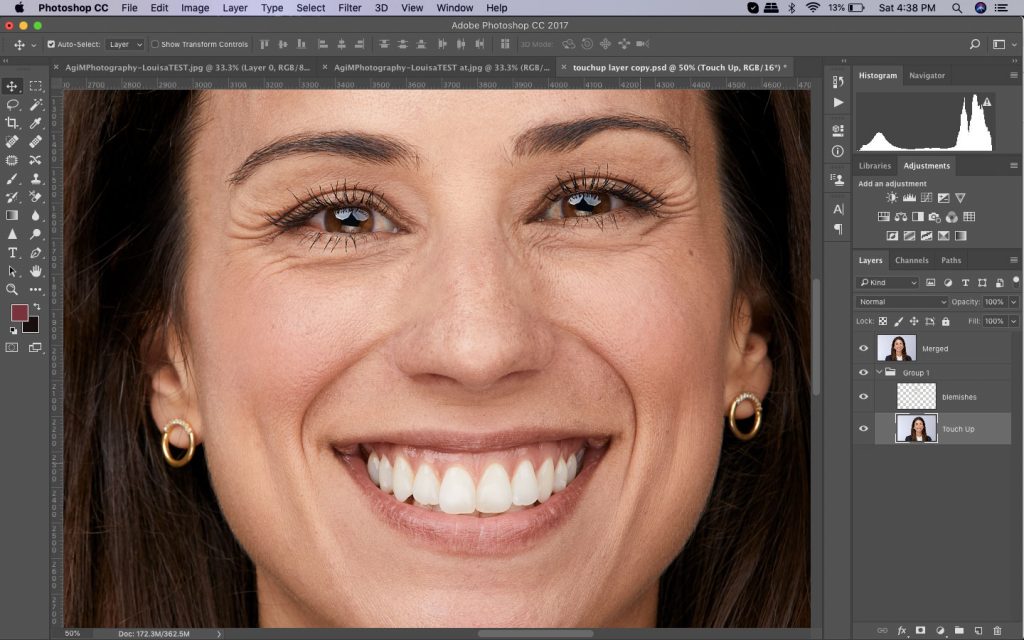
Method 1: Using Touch Up Layer
By using the Touch Up later, it will be more convenient later before the application of other methods. Always keep in mind that the Touch Up layer will serve as the initial method or foundation of every retouching work.
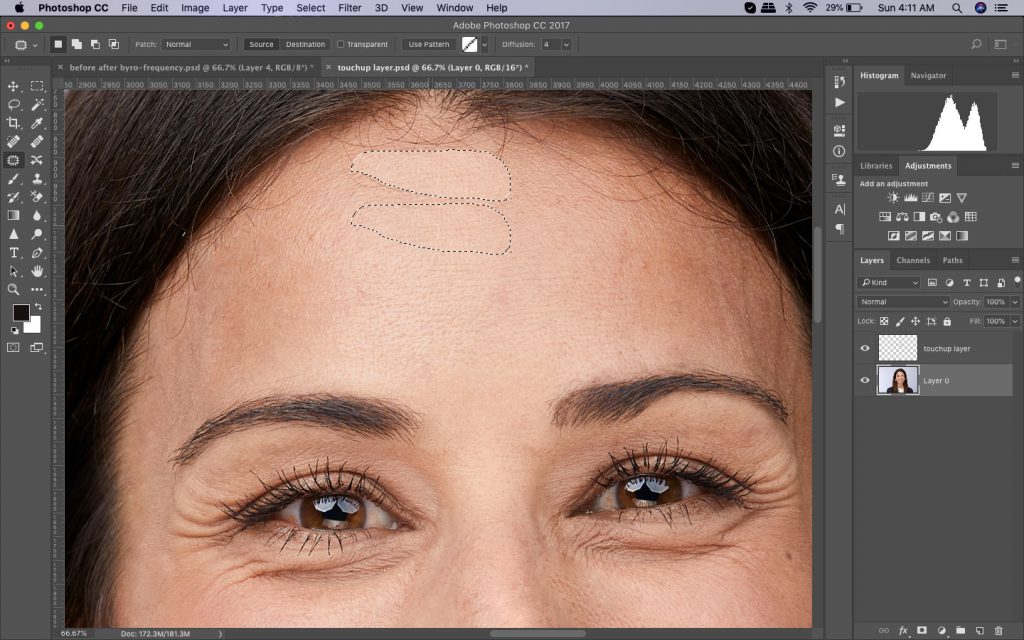
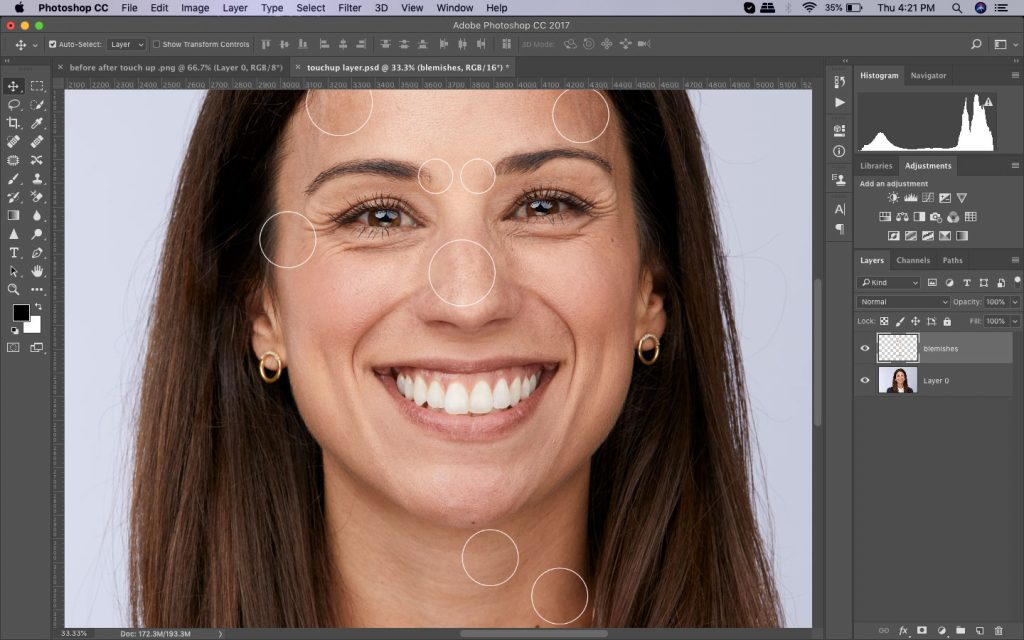
In a well-photographed image of a subject with a beautiful smooth skin , a simple retouching process could do. But in dealing with and removing unnecessary blemishes, acne, pimples, tiny dark spots, stray hair or excess strands and other irregularities on the areas off the face and skin, the best way is to use touchup layer. It is the most basic thing that’s properly need in initial skin retouching.
Touch up layer is also used to refine makeup when needed. For example, a missed spot on the lips during lipstick application or a bled mascara on the eyelashes or to clean up the applied eyeliner. This way, overall makeup appears smooth and refined. Perhaps adds value to the photo or the image.
Although, touch-up layer seem perfect, in some ways it cannot totally assist in other retouching dilemmas. Like blotches or patches on the skin, stretch marks, eyebags, wrinkles and hotspots and overall skin texture and coloration.Touch-up layer is only limited to editing simple noticeable skin problems.
Step 1
Open the image in Photoshop that you want to work with. Add a New Layer over the background layer where your main image is. Name it Touch Up layer.

Step 2
Prepare the tools needed. Make use of a Clone Stamp, Healing Brush, Spot Healing Brush and the Patch Tool. If the areas of the skin is reasonably uniform, you can use the latter. Switch between these four tools depending on what fits in the point of editing. Whenever the Clone Stamp is used, set Sample to Current & Below. Make sure to set tool option to Sample All Layers during the use of a Healing brush.
Using the Clone Stamp tool, work your way smoothly and improve the look of the skin. Make sure the Sample is set to Current & Below. Click on areas that need correction. Check on your progress from time to time by turning the visibility icon on or off.
Patch tool is often more effective in dealing with serious wrinkles.You need to select a part of a wrinkle and bring it to a nearby even skin to patch. Be gentle with these touch-ups and be careful not to totally remove the wrinkles just reduce them. Same to do with pores, minimize but don’t eliminate everything.

Step 3
While on the New Layer, focus and zoom in on the area when retouching skin. Start with setting the brush size of the Healing Brush a bit larger to cover the blemish. Set brush size to 50 with a 75% hardness. You can start small and adjust while working through. Take note that, brush size and hardness differs or depends on the proper and applicable specifications that’s needed in the skin retouching. Remember, a softer brush has a tendency to create an artificial feel to the skin touch-up. Make sure you adjust it just right.
Be keen on getting the Sample. Choose a clear and clean skin area that’s as near as possible to the flaw you’re retouching. By sampling correctly, you’ll get the best results. Watch out how the skin tone changes. Likewise, observe how the skin texture flows. Move or click on the brush and try to keep the texture flow as natural as possible.
Position the brush over, covering the blemish. Remember not to sweep over them, just click. You’ll see what happens when you do it wrong. Make a couple of clicks, thereby retouching skin smoothly . Gently click away on obvious spots, patches and imperfections across the face. Resample or adjust as you go along different parts of the face or skin.
Note: Always try to recall the difference between a Clone Stamp and the Healing Brush. Remember, the Healing Brush suits better in adjusting the textures of objects. It is therefore usually fitting to use Clone Stamp when creating, duplicating or removing elements or objects in an area.
Step 4
Select Clone Stamp tool. Set opacity to 100% or depend on the blemish. Work with the wrinkles by lightening them up. Adjust the opacity as you move along to show enough so to restore texture.
Step 5
Be creative. Maximize the flexibility of the touch-up layer in all your work. Click Ctrl Z to Undo or use the Eraser tool to cancel the corrections you previously made and start from your preferred point of editing. If you notice the touch up to be a little heavy on the side, apply the Eraser with low opacity. Choose a soft brush wipe up certain touch ups away. You can also decrease the opacity value of the touch up layer for a smoother lighter effect.
In some images or photos , this is as much as retouching is needed to achieve a beautiful skin. Some would rather require a lot more work and other techniques. It is however recommended, to always start with touch-up layer whether you need a few touch ups or more.
Method 2: Frequency Separation Method
In the case that a Touch Up Layer method is not enough to achieve flawless skin, Frequency Separation is another option and would likely do it. In this photoshop retouching tutorial, some steps when working layers could be a bit technical. But you’ll find yourself being able to carry out the touch-ups better as you go. With this method, you will be capable of retouching skin in a careful approach without damaging or losing texture.
This technique is also suitable to smooth off makeup that was poorly applied or has caked up. It can do miracles with blotchiness of the skin, eyebags and under-eye circles. Why do we need to do necessary touch ups prior to doing frequency method? It is because some blemishes might show up in the low or high frequency layers, when we apply this method. And you will need to remove them on each layer which will require more work. So it’s best to do it beforehand.
Frequency Separation, sadly is inadequate in eliminating stray hairs and removing blemishes that are clearly defined like wrinkles. But you’ll see where it is necessary and applicable. Frequency separation should be able to resolve some hotspots. Mild up to moderate hot spots can be toned down and if there is a visible texture. Or else, the result will appear heavily composed.
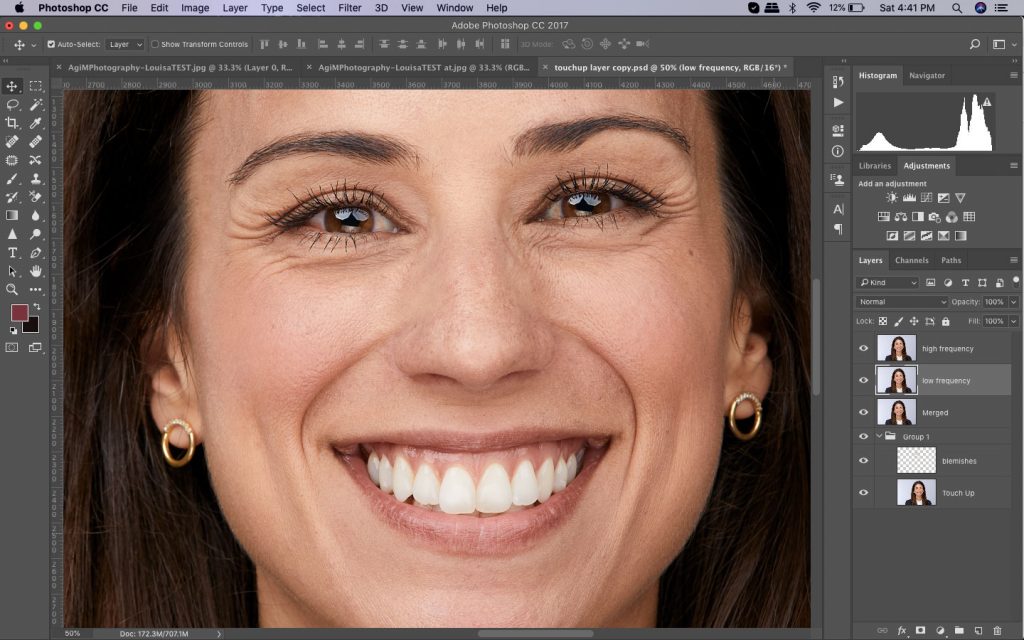
Remember: The high frequency layer will have the texture details of the image, the low frequency on the other hand includes color information. With this method they will be worked on separately.
Step 1
Duplicate the Touch Up Layer. Make sure the Touch-Up layers and the Background layer are visible or is turned on. While selecting both layers, hold down the Option (Alt) key. Then, from the Layers panel menu, click on Layer > Merge Visible. Or Command + Option + Shift + E.
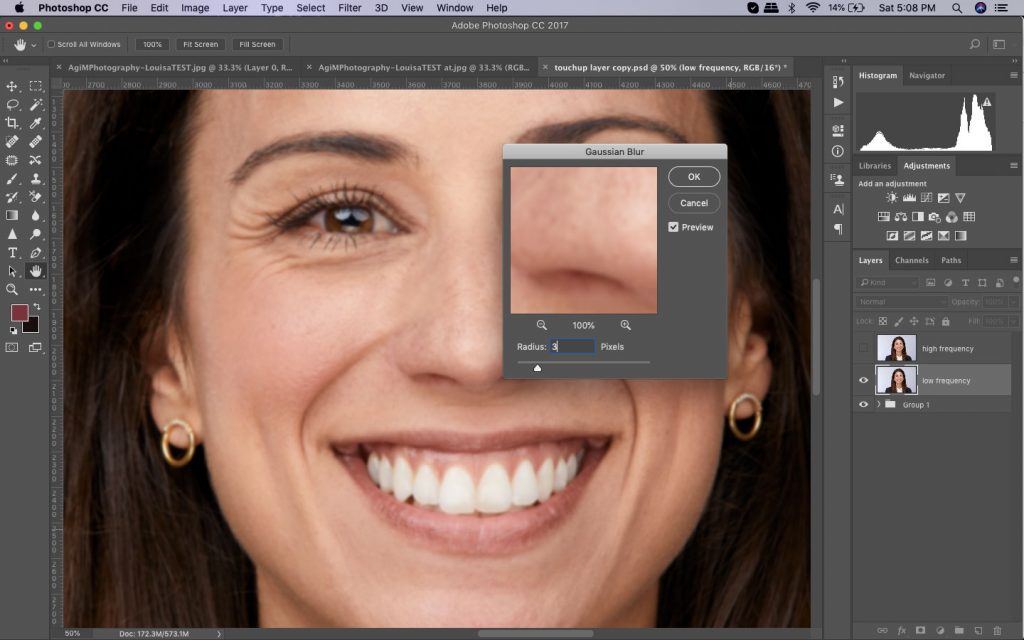
Step 2
Create two duplicates of the merged layer. Press (Ctrl + J) twice. Name the copy above to “High Frequency” , the middle to “Low Frequency.” Disable or the High Frequency layer. Choose the Low Frequency layer that includes all the colour details. Blur this layer by employing Filter > Blur > Gaussian Blur. Blur by setting 3.0 pixels or less until details of the pore is at 100%.
Step 3
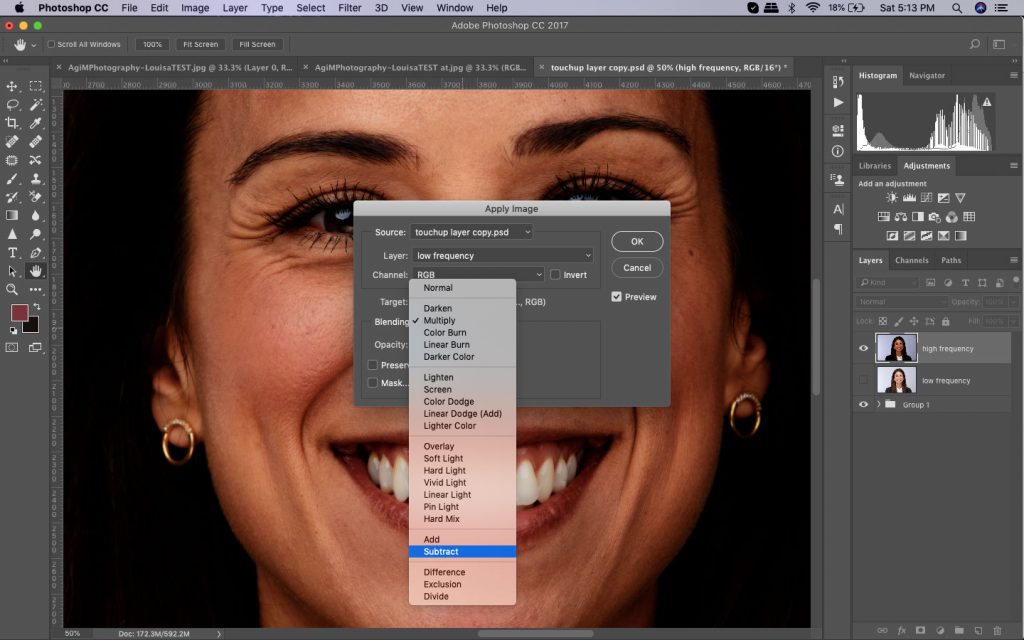
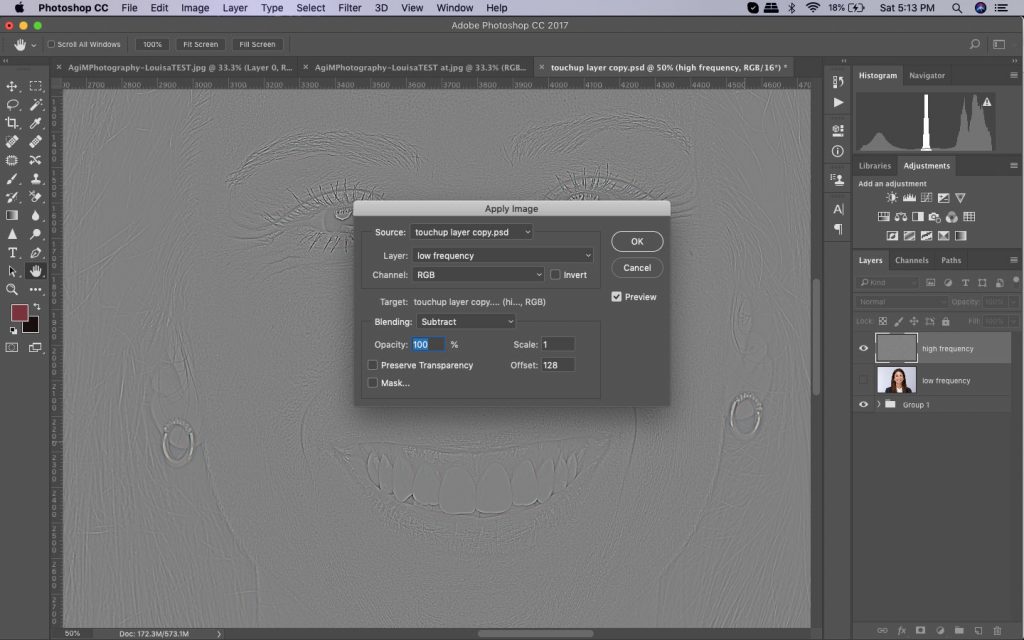
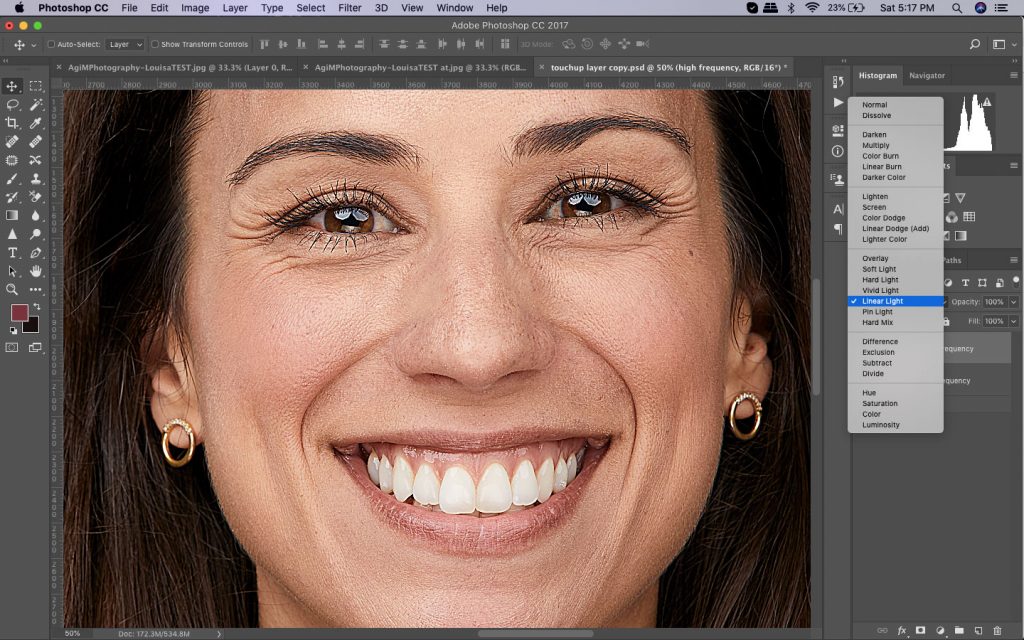
Now, try selecting High Frequency layer. Turn on visibility back. Go to Image.Then, Apply Image. Set values displayed below. What you’re doing is subtracting the low frequency layer from the high frequency layer. Then, modify the blending mode of the layer to Linear Light.
Step 4
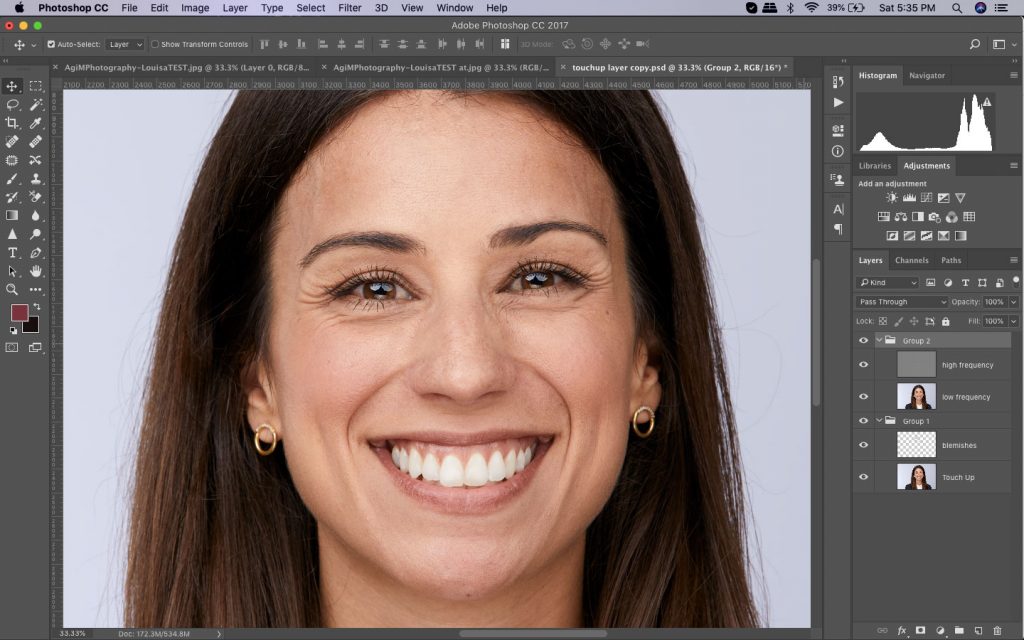
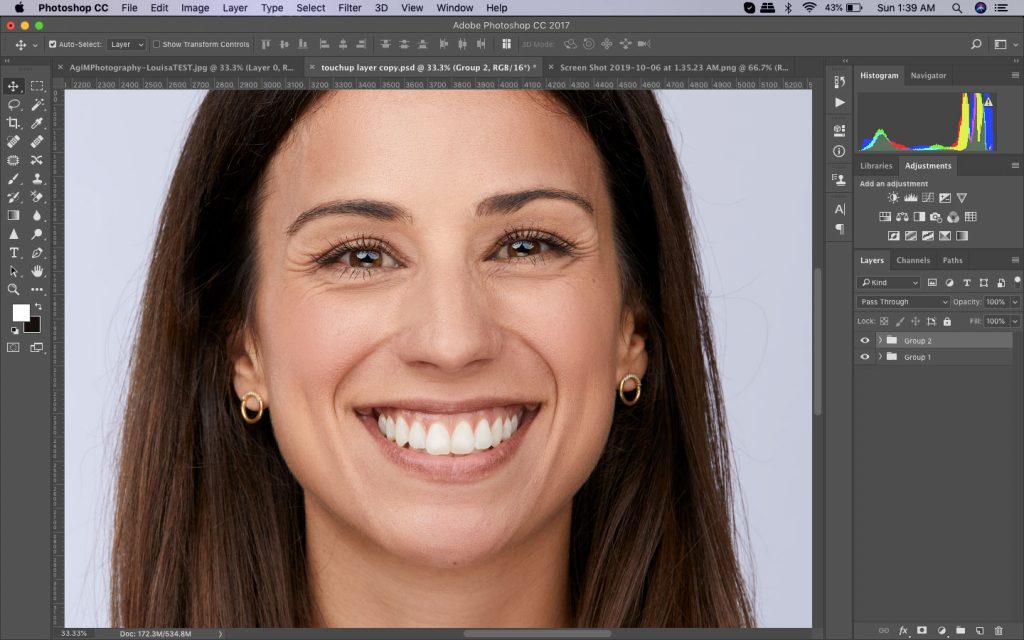
Then, group both layers. Now, you have the Group 1 and Group 2 creates exactly the same image.
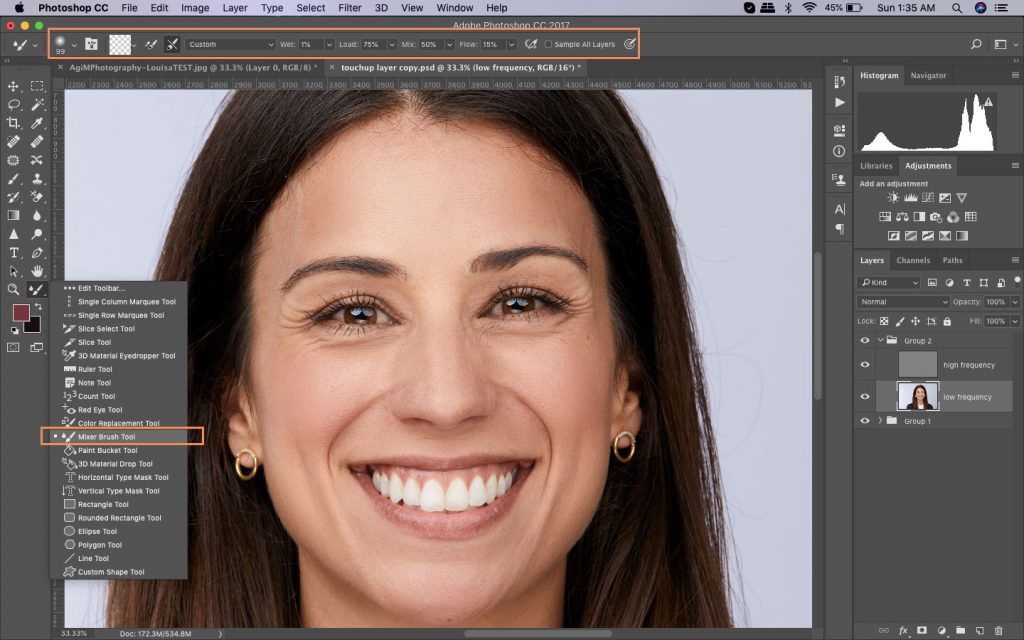
Step 5
Select the Brush Tool. Choose Mixer Brush. In the brush properties panel above set these modes: Set Current Brush Load to Transparent. Next, Enable the Clean the Brush after each stroke icon. Disable the Load Brush after each stroke. Set Wetness to 1-2%. Set Load to 75%. Mix to 50% and Flow 15%.
Step 6
Select the Low Frequency Layer, enable the visibility icon and disable the High Frequency Layer.
Brush on the skin of the face and the neck area as well to apply the mix and effect. This will smoothen the areas as you brush. Follow the flow natural shades of the skin. This way the colors blends smoothly. If you are wondering why are you brushing on the blurred layer (low frequency layer) it is to easily see the effect of the brush. Enable the visibility button of the high frequency layer to see the effect.
Pay attention particularly to the changing natural shades over the face and the contours. It is easy to carelessly spread or clone dark to lighter skin. You don’t want to go too far because you will lose or ruin the shape natural shape, shades and highlights of the face or skin. Furthermore, do not blend the natural shading too much making skin tone will look dull and there’ll be no distinct shape.

Step 6
Now, that you have tried frequency separation, you can achieve sharpening in another way:
Duplicate or make a copy of the High Frequency layer. Then, apply masking to the layers. Do this by holding Option or Alt + Add a Mask in the Layers panel. Select the mask. Use a soft brush. Use white foreground, then swipe your brush in the areas of the mask where you think the sharpening to be applied to.
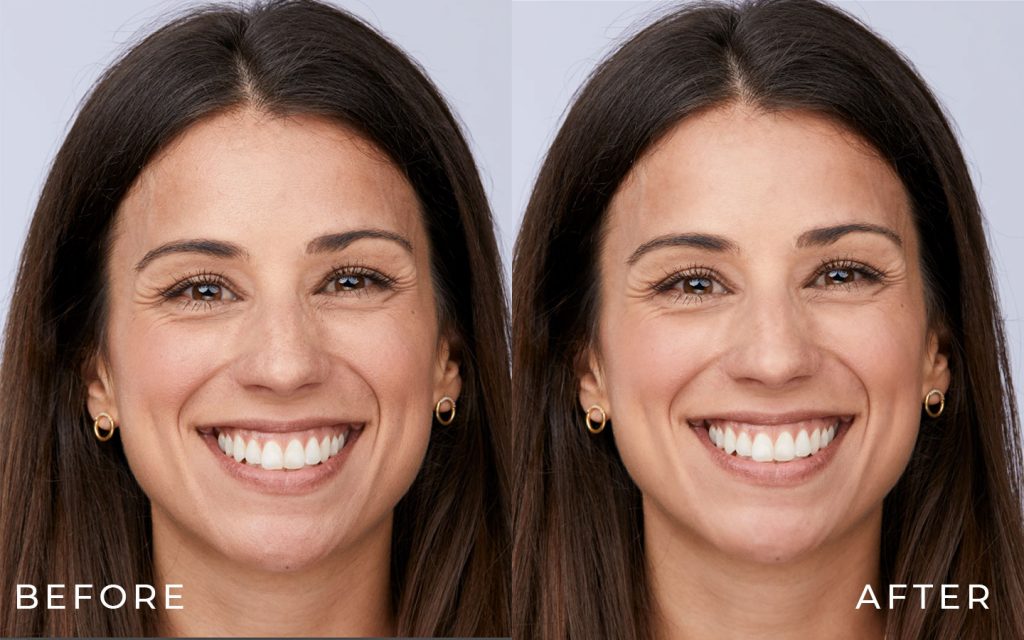
Method 3: The byRo method
Besides the other two methods mentioned above, the byRo Method is another powerful approach in retouching skin of portrait and headshot images. It is a tribute to the Brazilian retoucher who had invented this alternative technique. It is mainly efficient for quick overall retouching and smoothing. It is actually technical to set up though retains skin texture and smooth off really well.
This process is most applicable to smooth out bad makeup application, even off skin tone, and correct large pores on the skin and patches of minor breakouts. This may be the very step you’ll need if the model already has great makeup and skin to begin with. Learn how to use this simple method through this photo retouching tutorial to get beautiful skin that’s realistic and preserves a skin texture that has natural feel.
Step 1
First step in the byRo Method is to open the image ( Background Layer ). This is the image you previously made Touch Ups with just as you did initially for Frequency Separation. After that, duplicate the layer.
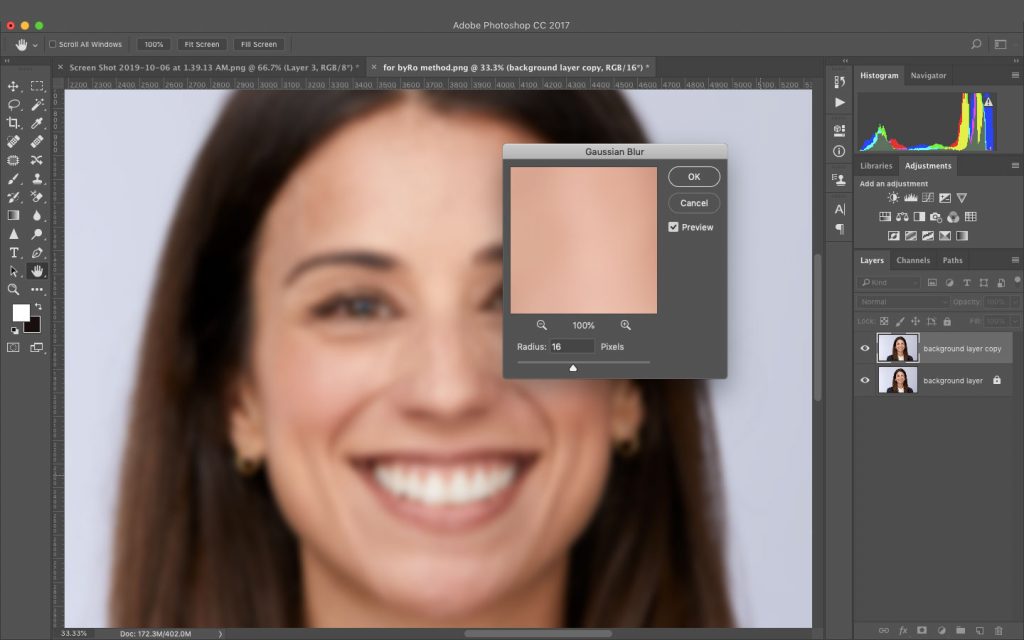
Step 2
Select the Duplicate Layer. on the Filter menu, click on Blur then Gaussian Blur. In the dialogue box, Change the radius of the Gaussian Blur. Adjust it until the skin smoothen out nicely. And observe the until the variation skin tone disappears. Take note of the radius you input applies just the right blur. Remember, you will not be applying this blur. This is just a step to determine the settings you’ll need later on the process. After that, click Cancel on the dialogue box.
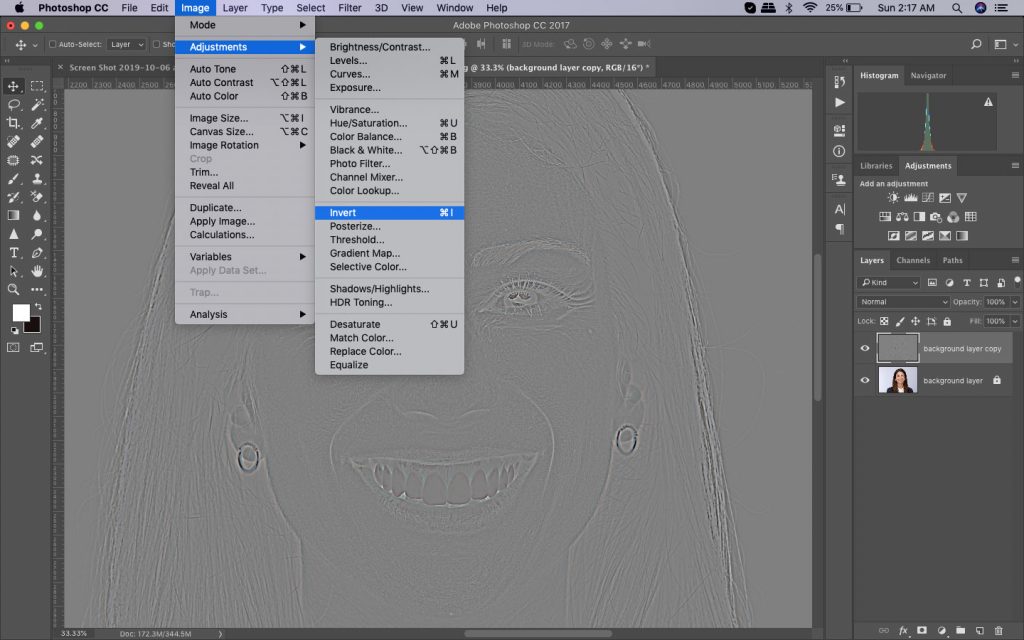
Step 3
Go back to Filter menu. Click on Other. Then, choose High Pass. Enter the radius value you selected during the testing of the Gaussian Blur that was in the second step. Now, apply the High Pass filter.

Step 4
While on that same layer, go back to the Filter menu once more. Apply the Gaussian Blur unto the High Pass layer. At this moment, the radius should be one-third of the value of the radius value that you used for High Pass filter. For instance, if you have set a radius value of 9 pixels for the High Pass filter, then radius for Gaussian Blur should be 3 pixels.
Step 5
Now, invert effect of the High Pass layer. On the Image menu, tap Adjustments and click on Invert. Adjust the blending mode of this layer to Linear Light. Lower or set the layer opacity of 40- 50%.
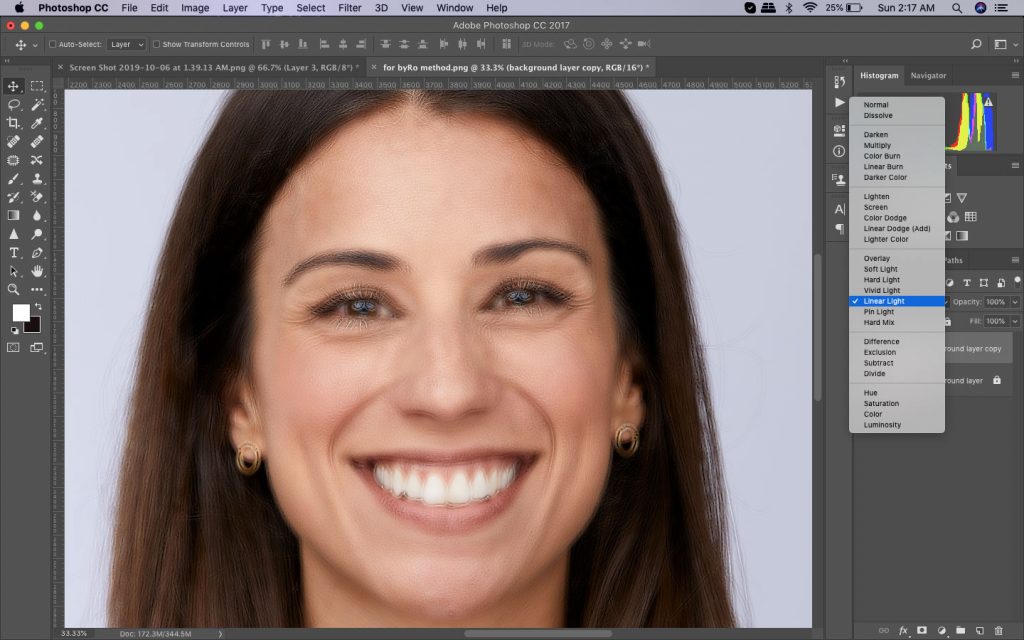
Step 6
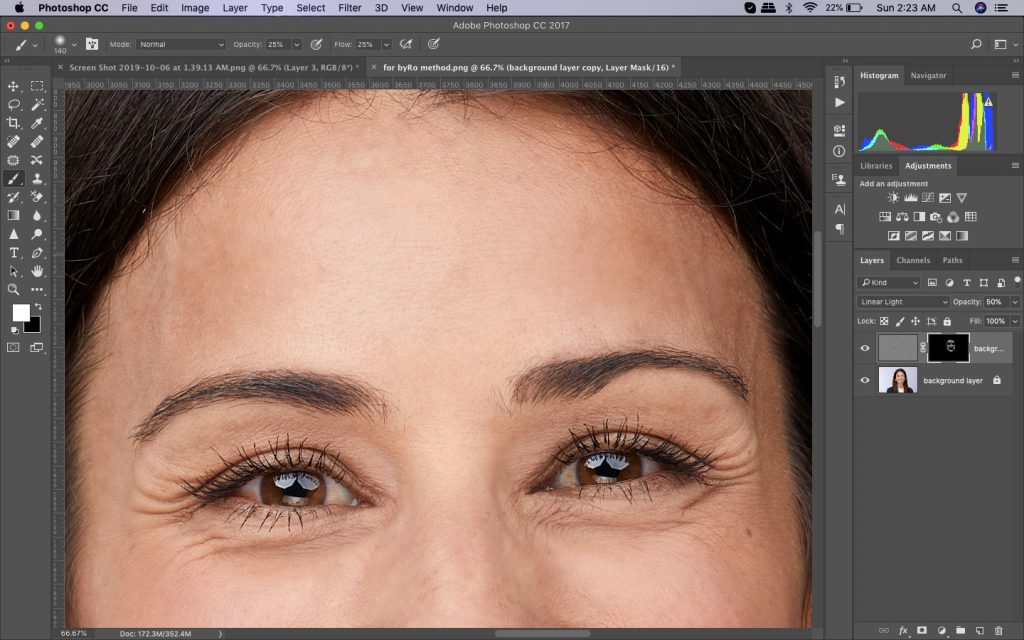
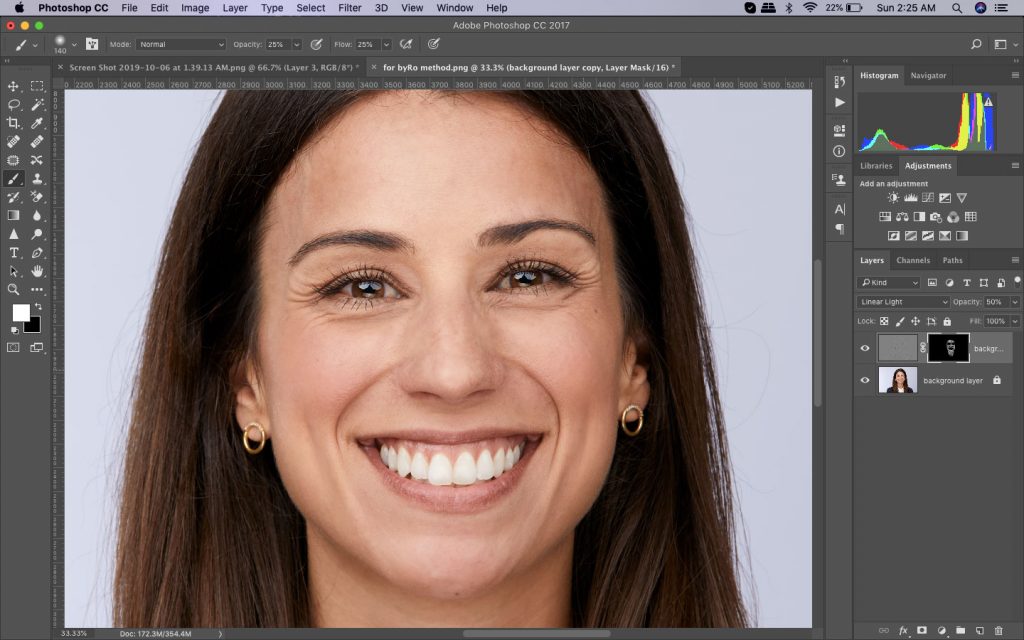
Apply mask to the entire layer. In the layer’s panel, click Option or Alt + Add a Mask. Select a proper brush size, small sized soft brush could work. Set the brush color to white and opacity to 50%. Start painting on the skin that needs polishing. Refrain from painting on areas with complex details like the nose, eyes, lips or the hair. Do the same all the way round the face to the edge. Make sure the brush settings are at Normal Mode to 100%, Flow to 20% and Opacity to 25%.
Step 7
Paint over the regions on the mask where you prefer smoothing or softening. Lower opacity of the brush as you move in different parts off the face. Decreasing opacity number of the whole layer also works. If you smoothed out an area of skin unintentionally or exceeding over what’s intended, you can switch foreground color to black and brush away correction back.
Final Polish
Aside from retouching skin techniques you’ve learned in this photo retouching tutorial, might as well take advantage of these final touches. Achieve a smooth and beautiful skin. That is why considering these final two steps in finishing up your work is a neat trick.
1. Hue Adjustment
It seems that in digital photography, red skin tones are more emphasized. Some photographs look overly saturated in colours before. And we’ve grown familiar with digital photographs, but the red property and over saturation ruins a fine portrait sometimes. To resolve this, adjust the colors in the Hue Adjustment layer.
Select Reds.
Nudge or move the Hue towards the right. Do this until the red tones settles down at
(usually between +1 or +3).
Select Yellows.
Move until Saturation is lowered down and the skin tone will appear more natural
(normally about -5 to -10).
Select Master.
(means all colours) and make the Saturation lower a bit. Ease the colors
(usually around -1 and -7).
Adjusting skin color visually, requires practice. For example, when you’re editing with a skin color or tone that’s uncommon for you in particular. The good thing about working with Hue Adjustment layer is that you can revisit and make changes. This way, if something comes up in your mind you can always go back. So do not hesitate to play with the settings that will enable you to achieve the skin that will appear natural, realistic and healthy.
2. Add Grain
Thanks to high -end cameras, we are able to snap sharp and quality images. And we owe alot to higher-resolution monitors and awesome editing software that aids in digital photography. Although, sometimes it is too clear you’ll see obvious flaws that even makeup miss. Thus, needs effective editing, that’s hopefully the things you’ll learn by the end of this photo retouching tutorial. It is vital to preserve texture in retouching skin. To make this happen restore some depth and texture to the skin. Add a Layer Grain for a smooth and perfect finish.
On the Layer menu, tap on to New then Layer. Input in the settings shown below. Under Filter menu, click on Filter Gallery then Grain. First make sure you change the the bit depth of the image to 8 Bits/Channel. Go to Image > Mode> 8 Bits/Channel. The Filter Gallery should now be available for use.
Meanwhile, set both Contrast and Intensity to 30. Select Enlarged grain mode. Next, decrease saturation of the Grain layer. Do this from the Image menu. Select Adjustments then Desaturate. Adjust the opacity of the layer depending on what look just right (mostly about 40 or 50%).
Conclusion:
There it is! the end of our photo retouching tutorial. Maximize these editing techniques and practice. Keep these three techniques so that it may be able to help you in alterations requiring them. Achieve beautiful, flawless but natural looking skin.
Remember: A Touch-Up Layer is used to deal with noticeable spots and blemishes. Frequency Separation makes it easier to rectify several issues while still help preserve skin texture. The byRo’s Method will give you the chance to make overall skin brightening and smoothing. In some situations you’ll need to use one, two or all three techniques. But it’s a good habit to always start with a Touch-Up Layer. This will make the remaining of your touch-up work in an appropriate flow.
Finish up your overall work by customizing the Hue and Saturation. Pay specific attention to the Red and Yellow properties. By the addition of a layer of grain on the final step, depth, character and realism is emphasized. This creates a refined and complete feel and look of the subject in the picture every time. I hope this photo retouching tutorial has been helpful!
Photo retouching service is on demand in high-end fashion, beauty, e-commerce industry to mention a few. If you are looking type of service then Ephotovn does the best. For professional output and speedy turnaround check them out at Ephotovn.
Receive Special Offers and Deals From Ephotovn
We hate spam. Only receive our Newsletter for the latest tips, deals, tutorials, resources and guides.
Related Post
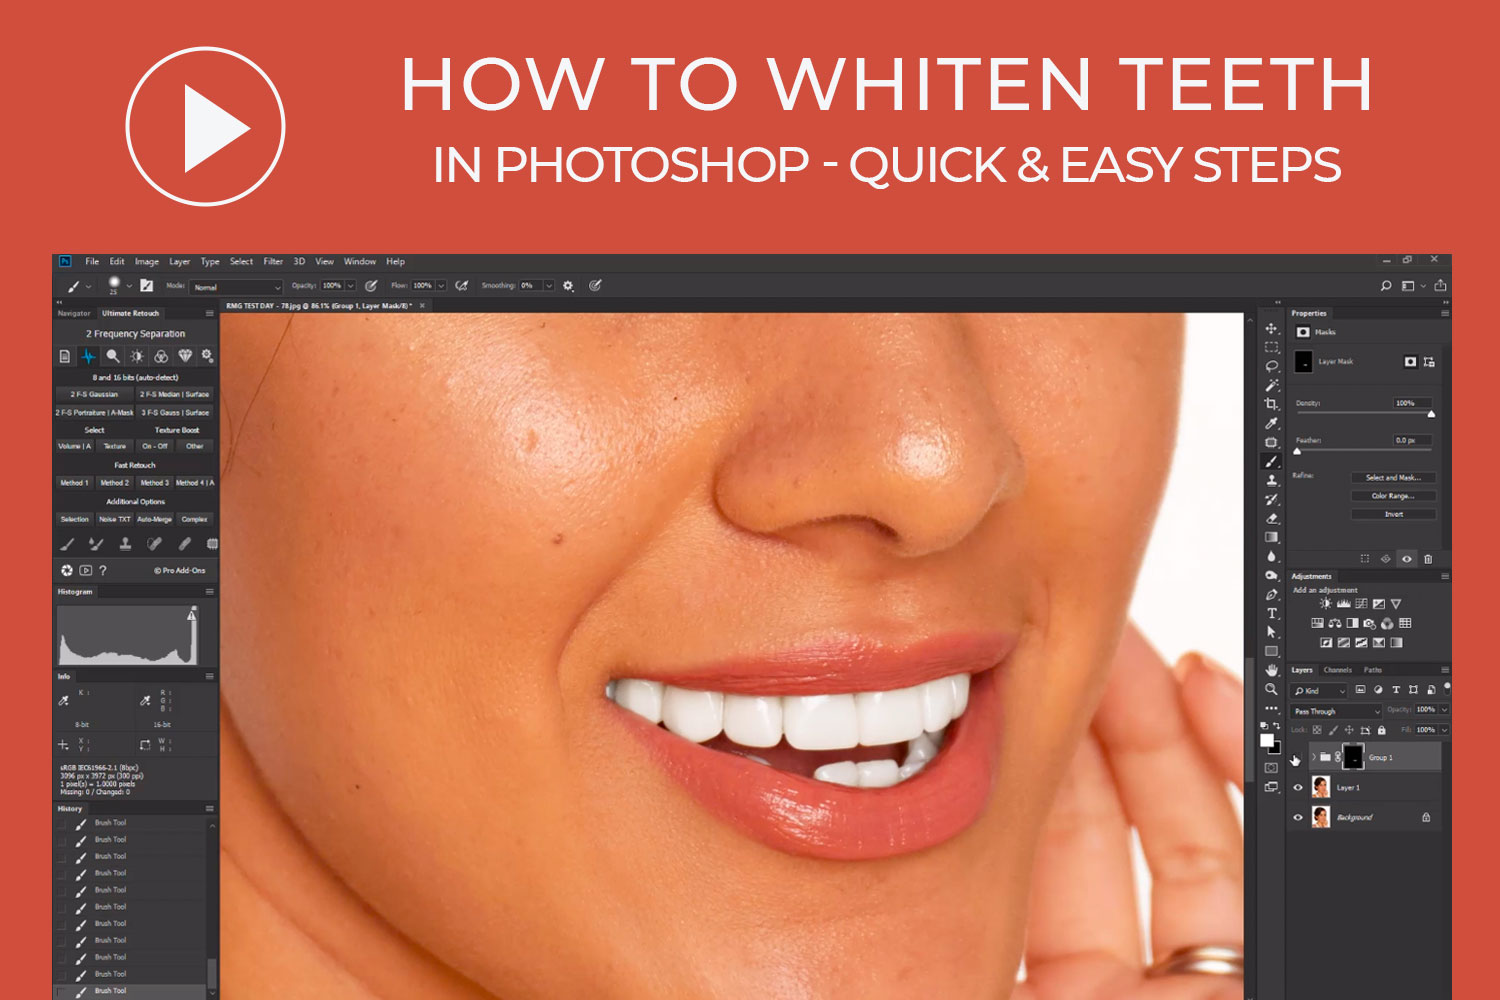
How To Whiten Teeth In Photoshop – Quick & Simple [VIDEO Tutorial]
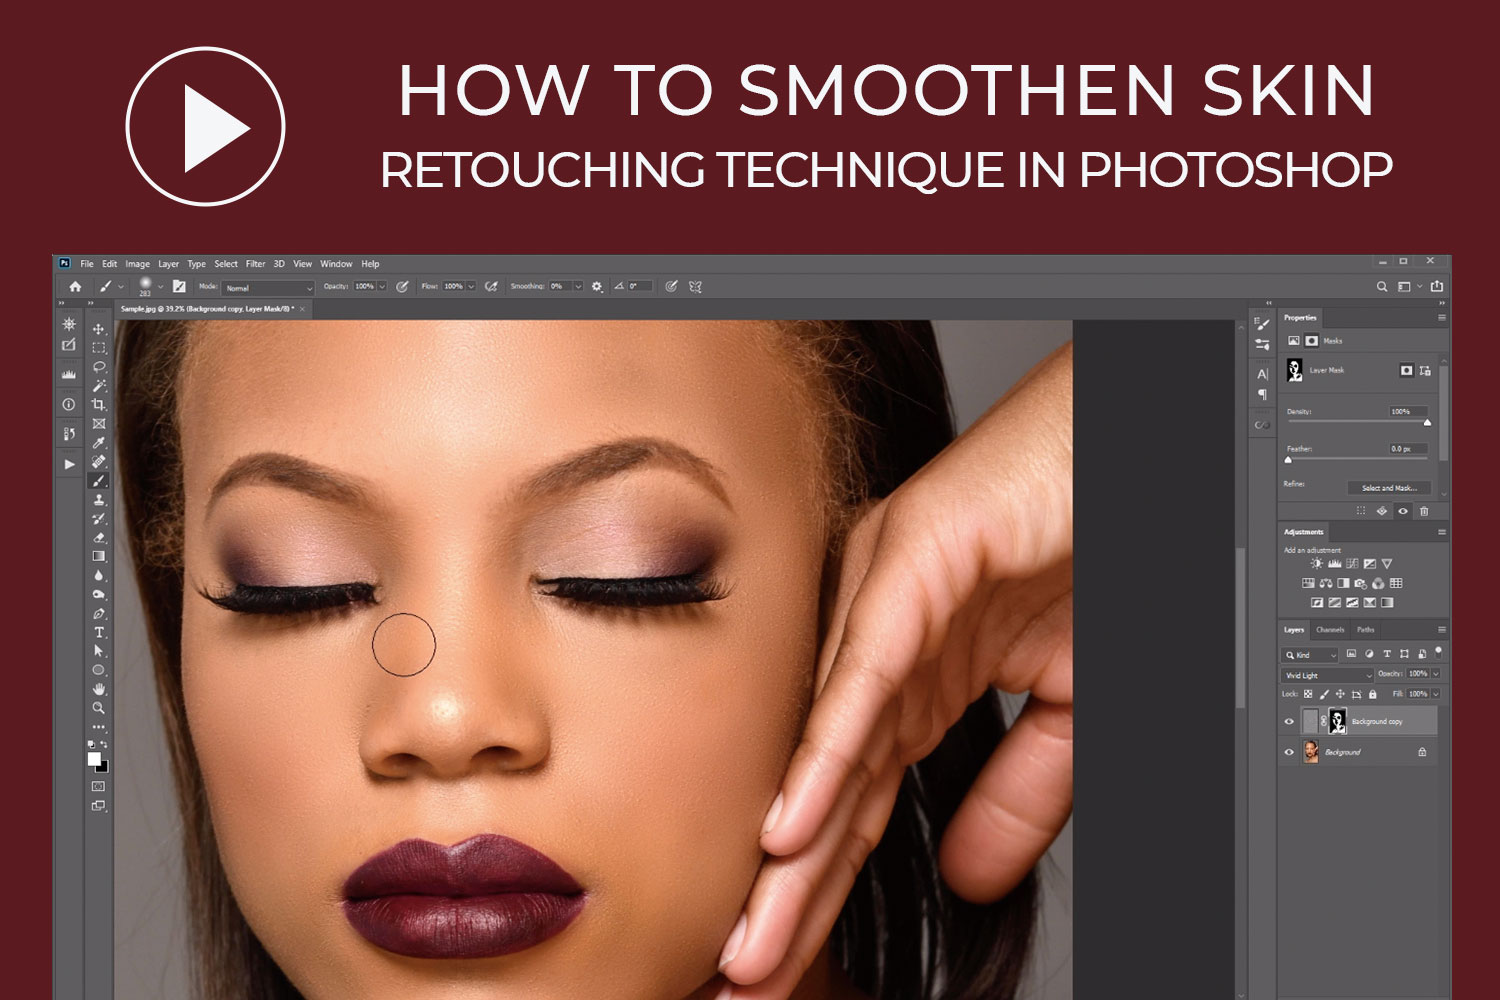
Fast and Easy – High-end Skin Retouching Photoshop Tutorial [Video]
RECENT POST

Graphic Design Tools For Various Design Teams for 2023
Posted on November 28, 2022
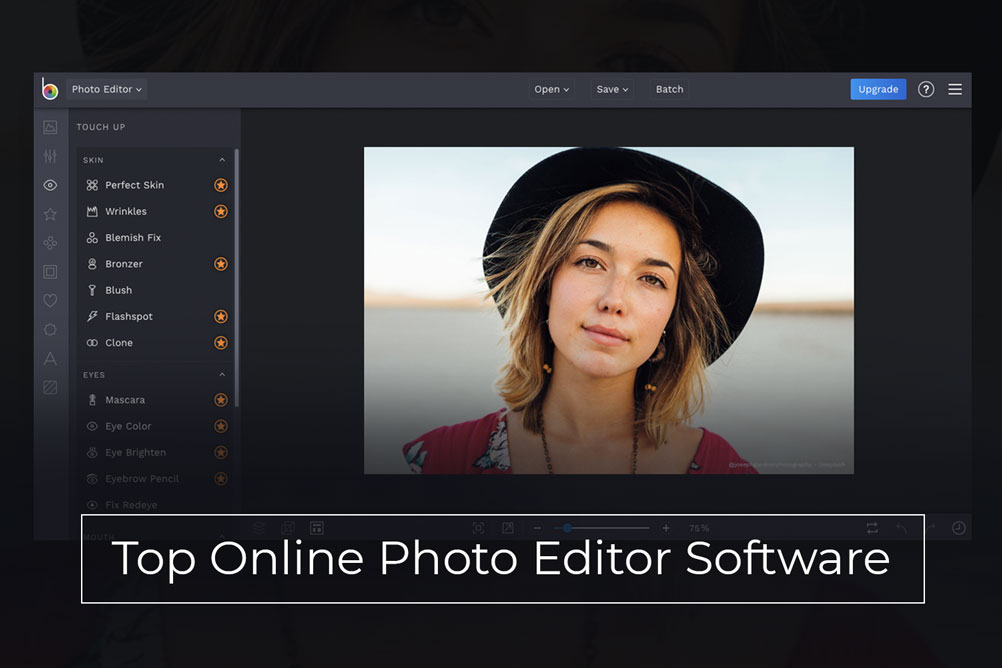
Top 10 Online Photo Editor Software of 2023 [Review and Comparison]
Posted on January 28, 2022

Photo Editing: One of the Tech Careers That Do Not Require a Tech Degree
Posted on November 20, 2020
Through the Lens: Inspiring Stories of Portrait Photographers
Posted on May 15, 2020
-
How To Whiten Teeth In Photoshop – Quick & Simple [VIDEO Tutorial]
Posted on May 13, 2020
Leave A Comment